Introduction
In this article, we’ll dive into how to use a 16×2 LCD display with Arduino, a versatile module that can add text-based interfaces to your projects. You’ll learn how to set up the LCD, understand its operation, and unlock its potential to display dynamic information, making your projects more interactive and informative.
What is a 16×2 LCD Display?
The 16×2 LCD display is a character-based display module capable of showing up to 16 characters per line across two lines. It uses the HD44780 controller, which simplifies its interface with microcontrollers like Arduino.
Key Features:
- Displays alphanumeric characters and basic symbols.
- Works in both 8-bit and 4-bit communication modes.
- Includes a backlight for better visibility in low-light conditions.
For a more detailed explanation of LCD technology, you can refer to this Wikipedia page.
Components Required
You’ll need the following components to complete this project:
- Arduino board (e.g., Uno, Nano, or Mega)
- 16×2 LCD display
- 10kΩ potentiometer (for contrast adjustment)
- Breadboard
- Jumper wires
- Optional: Resistor (220Ω or 330Ω) for backlight current limiting
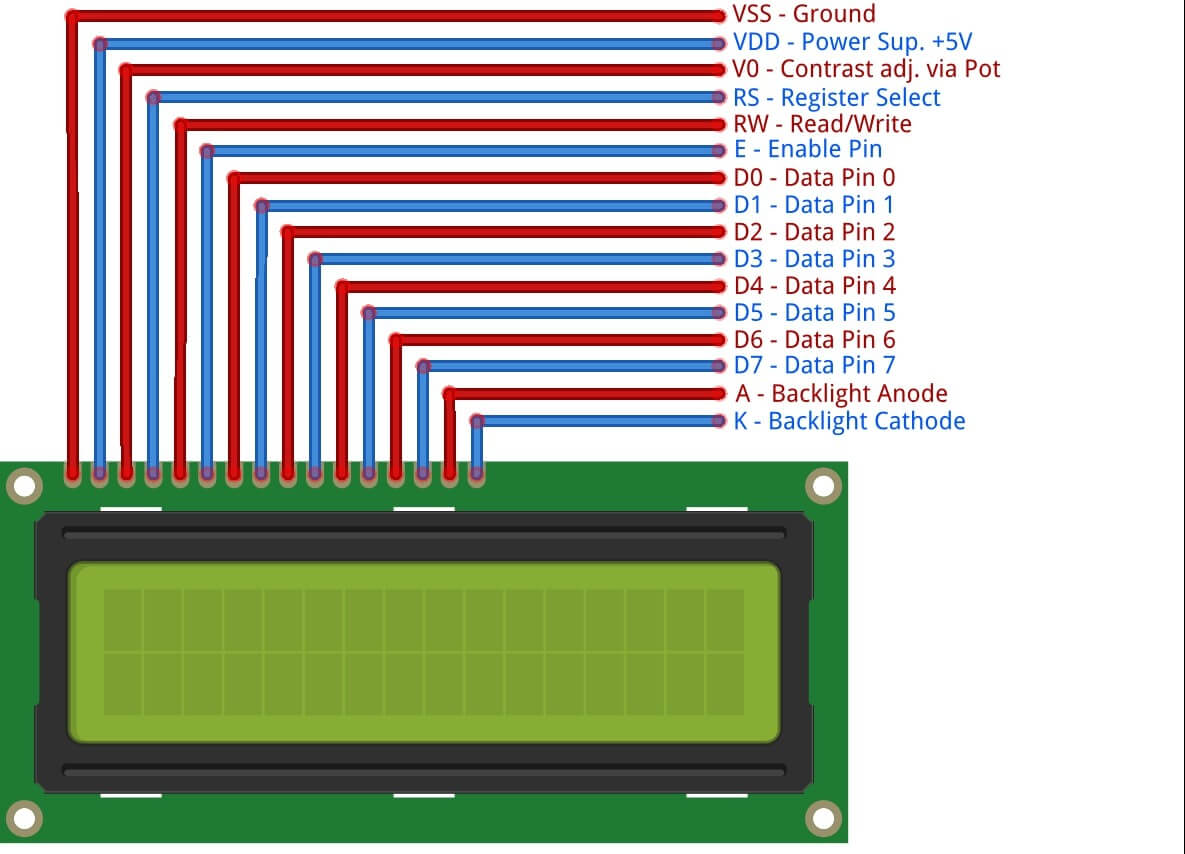
Pinout of the 16×2 LCD Display
Here’s the pinout for the 16×2 LCD module:
| Pin | Name | Function |
|---|---|---|
| 1 | VSS | Ground |
| 2 | VDD | Power supply (+5V) |
| 3 | V0 | Contrast adjustment via potentiometer |
| 4 | RS | Register Select (Command/Data selection) |
| 5 | RW | Read/Write (connect to GND for write) |
| 6 | E | Enable pin |
| 7 | D0 | Data pin 0 (used in 8-bit mode only) |
| 8 | D1 | Data pin 1 (used in 8-bit mode only) |
| 9 | D2 | Data pin 2 (used in 8-bit mode only) |
| 10 | D3 | Data pin 3 (used in 8-bit mode only) |
| 11 | D4 | Data pin 4 |
| 12 | D5 | Data pin 5 |
| 13 | D6 | Data pin 6 |
| 14 | D7 | Data pin 7 |
| 15 | A | Backlight anode (+5V) |
| 16 | K | Backlight cathode (GND) |

Wiring the LCD to the Arduino
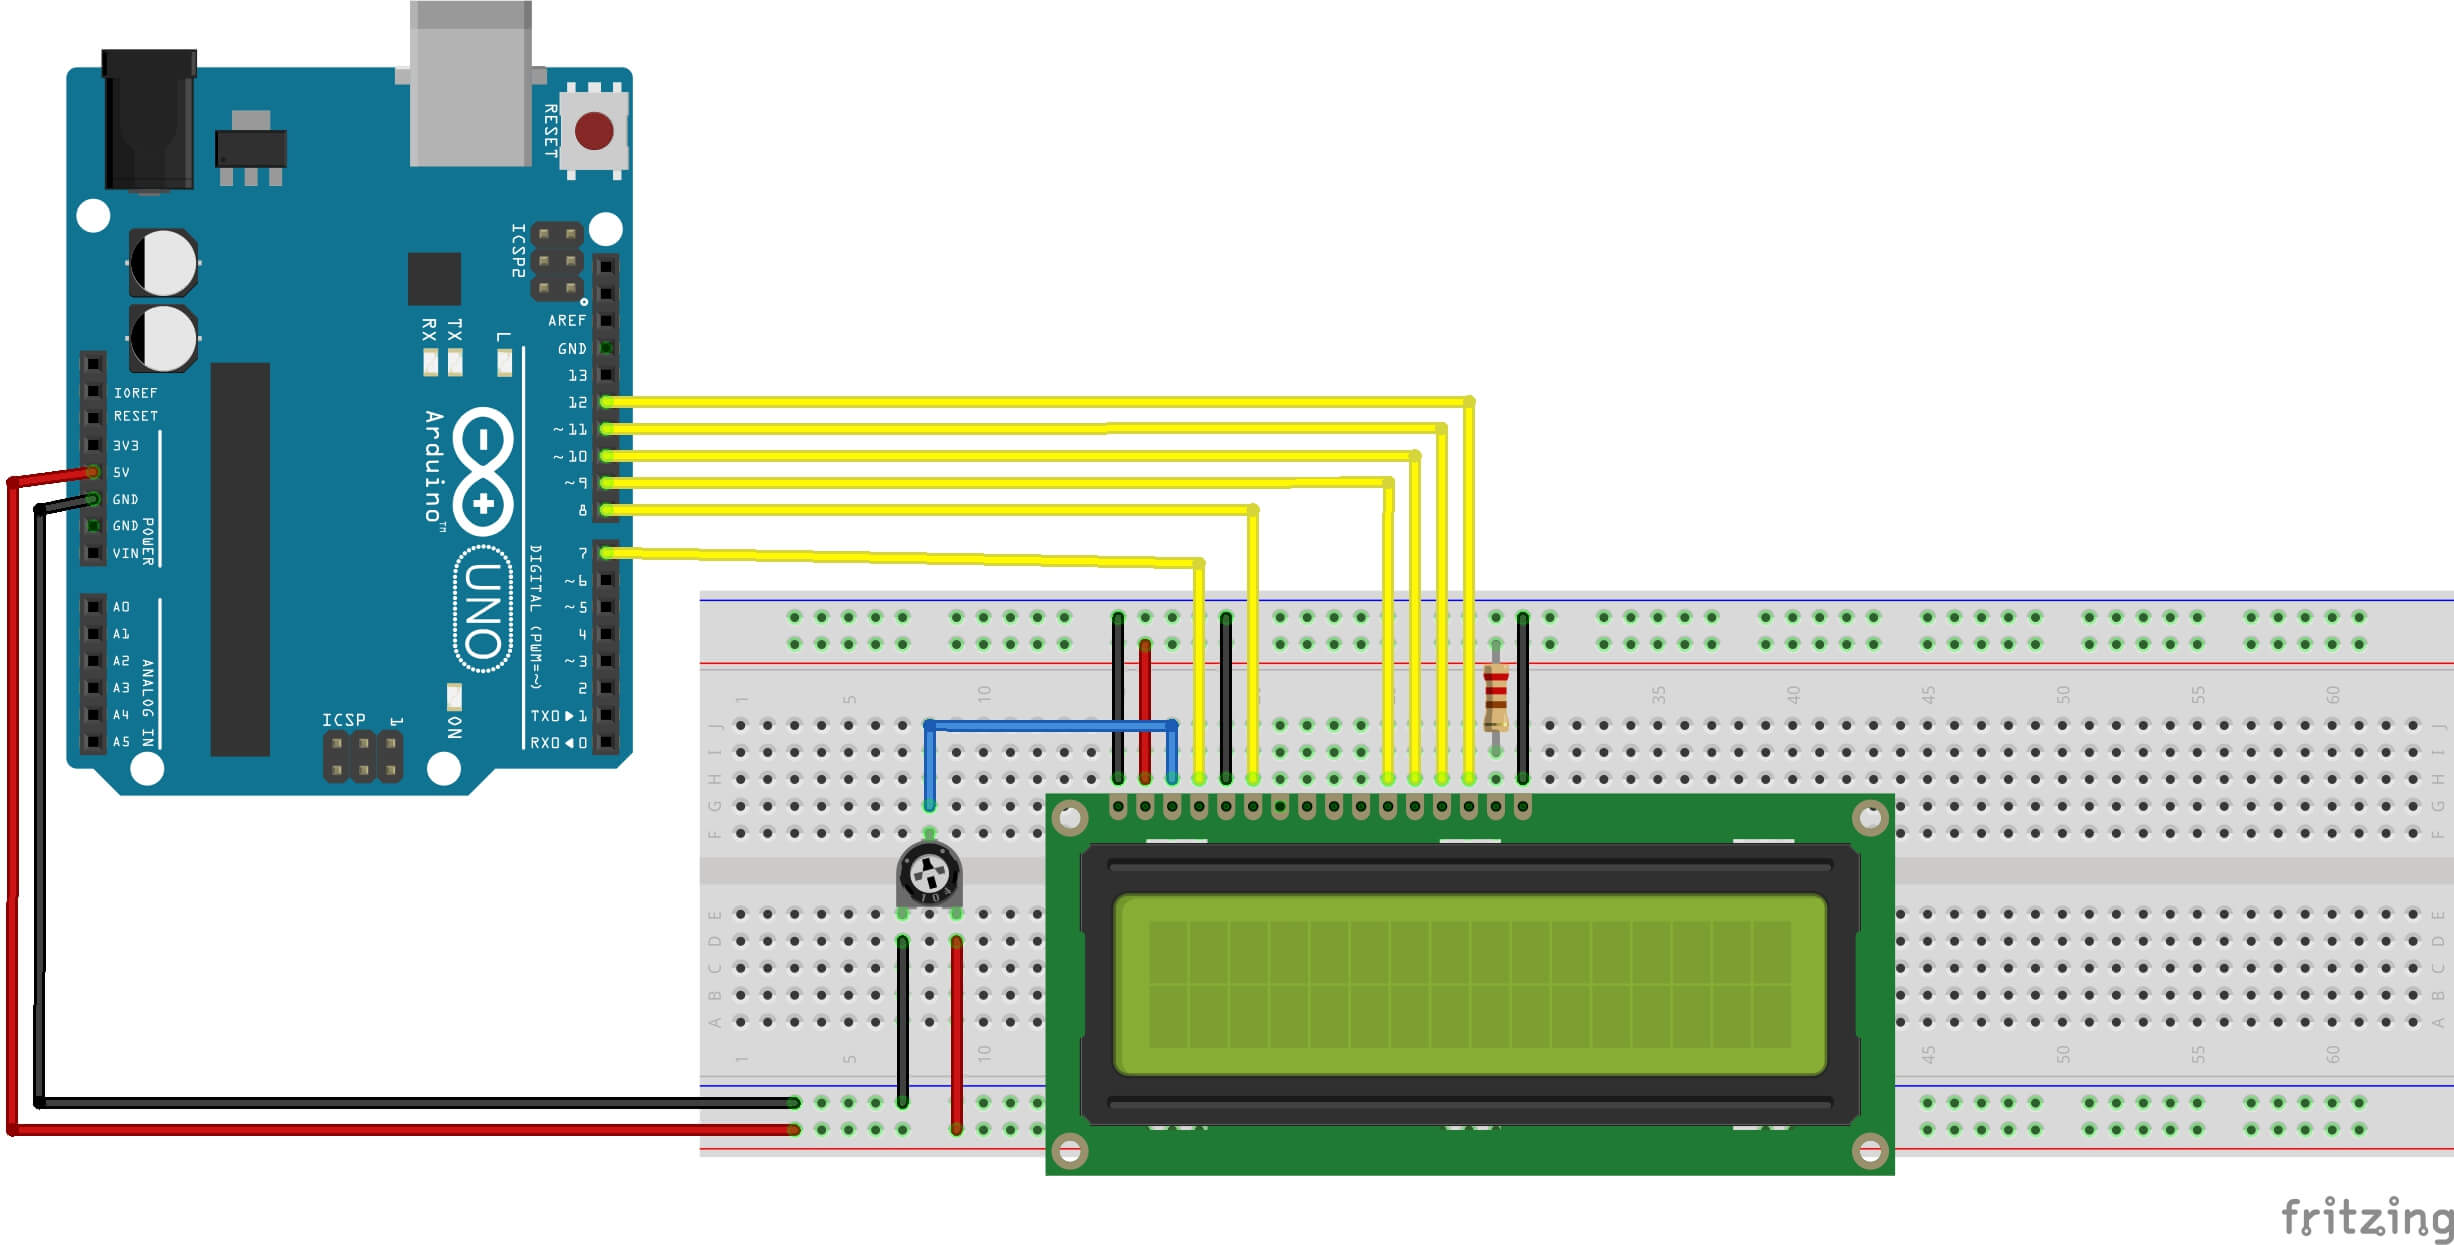
For simplicity, we’ll use the LCD in 4-bit mode, which requires fewer data pins.
Connections Table:
| LCD Pin | Arduino Pin | Purpose |
|---|---|---|
| VSS | GND | Ground connection |
| VDD | 5V | Power supply |
| V0 | Potentiometer center pin | Contrast adjustment |
| RS | Pin 7 | Register Select |
| RW | GND | Set to write mode |
| E | Pin 8 | Enable |
| D4 | Pin 9 | Data pin 4 |
| D5 | Pin 10 | Data pin 5 |
| D6 | Pin 11 | Data pin 6 |
| D7 | Pin 12 | Data pin 7 |
| A | 5V | Backlight power |
| K | GND | Backlight ground |

Installing the LiquidCrystal Library
Before we can use the 16×2 LCD display with Arduino, we need the LiquidCrystal library. This library comes pre-installed with the Arduino IDE, but it’s a good idea to ensure that everything is set up correctly.
Steps to Verify or Install the Library:
- Open the Arduino IDE
Launch the Arduino IDE on your computer. - Check for Pre-installed Library
The LiquidCrystal library is included with the Arduino IDE by default. To check:- Go to Sketch > Include Library > Manage Libraries…
- In the Library Manager, search for “LiquidCrystal.”
- Installing or Updating the Library
If the library isn’t listed or you want to update it:- In the Library Manager, type
LiquidCrystalin the search bar. - Select the library from the results.
- Click Install or Update (if an update is available).
- In the Library Manager, type
- Verify Installation
After installation, go to File > Examples > LiquidCrystal to verify that the library is installed.
Arduino Code Example: Hello World!
Here’s the example code to display “ArduinoYard” on the first line and “Hello World!” on the second:
// 16x2 LCD Display with Arduino by ArduinoYard
#include <LiquidCrystal.h>

// Initialize the library with the numbers of the interface pins
LiquidCrystal lcd(7, 8, 9, 10, 11, 12);

void setup() {
  // Set up the LCD's number of columns and rows
  lcd.begin(16, 2);

  // Print messages to the LCD
  lcd.setCursor(0, 0); // Set cursor to the first line
  lcd.print("ArduinoYard");

  lcd.setCursor(0, 1); // Set cursor to the second line
  lcd.print("Hello World!");
}

void loop() {
  // The loop is empty since this example doesn't need continuous updates
}
Detailed Explanation of the Code
- Including the Library: The
#include <LiquidCrystal.h>statement allows you to use the LiquidCrystal library, which provides simple functions to interact with the LCD.
- Initializing the LCD:
LiquidCrystal lcd(7, 8, 9, 10, 11, 12)sets the pin connections between the Arduino and the LCD.
- Setting the Cursor:
lcd.setCursor(column, row)positions the cursor to a specific spot on the LCD. Columns are numbered from 0 to 15, and rows are numbered 0 (top) and 1 (bottom).
- Printing Text:
lcd.print("Text")displays the given string on the LCD.
Demonstration
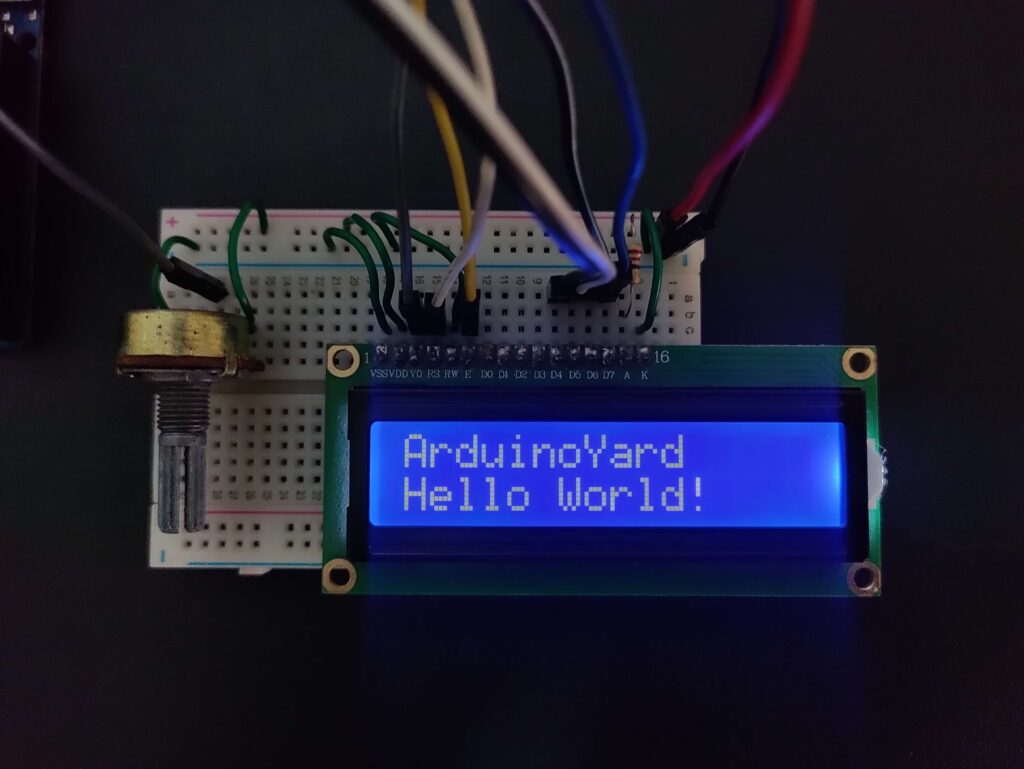
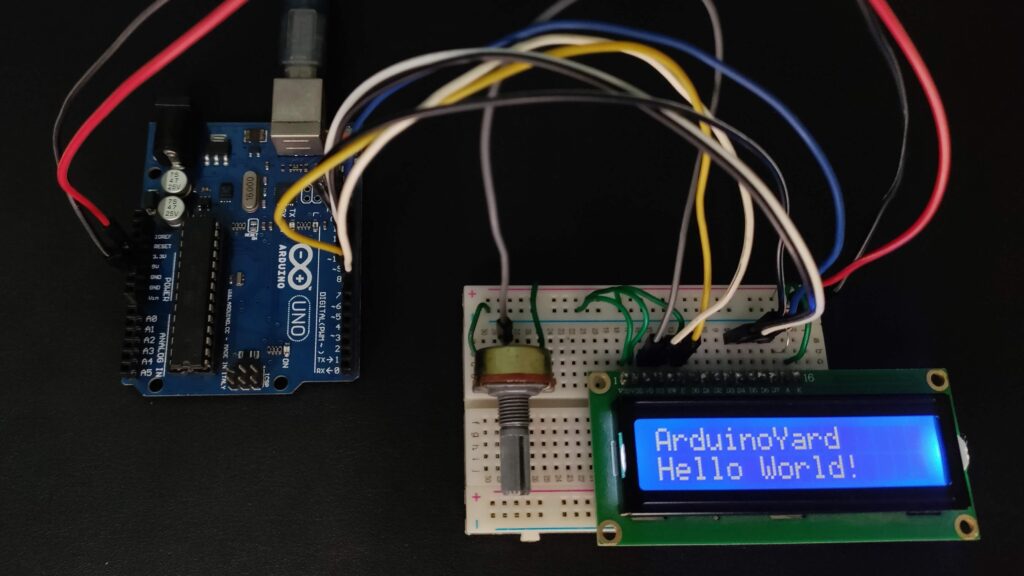
Below is a demonstration of the 16×2 LCD display with Arduino. The first line shows “ArduinoYard”, and the second line displays “Hello World!”, as per the code we provided earlier.


Advanced Example: Dynamic Content
You can enhance this project by displaying dynamic content, such as sensor readings. Here’s a small example:
// 16x2 LCD Display with Arduino by ArduinoYard
#include <LiquidCrystal.h>

LiquidCrystal lcd(7, 8, 9, 10, 11, 12);

void setup() {
  lcd.begin(16, 2);
  lcd.print("ArduinoYard");
}

void loop() {
  lcd.setCursor(0, 1); // Move to the second line
  lcd.print(millis() / 1000); // Display elapsed time in seconds
}
This code will update the second line with the elapsed time since the Arduino was powered on.
Troubleshooting Tips
1. No Display:
- Check your wiring for loose connections.
- Ensure the LCD is powered (5V to VDD and GND to VSS).
- Adjust the contrast using the potentiometer.
2. Blocks Instead of Text:
- This usually means the LCD is not initialized correctly. Double-check the code and connections.
3. Dim or No Backlight:
- Ensure the backlight pins (A and K) are properly connected.
4. Random Characters:
- Verify that the LCD is operating in 4-bit mode and all data connections are secure.
Expanding the Project
Once you’re comfortable with this example, you can try adding the following features:
- Scrolling Text: Use
lcd.scrollDisplayLeft()orlcd.scrollDisplayRight()to create scrolling text effects. - Interactive Menu: Add push buttons to switch between different messages or modes.
- Real-Time Data: Connect sensors and display real-time data, such as temperature, humidity, or light intensity.
Conclusion
The 16×2 LCD display is a powerful yet beginner-friendly module that adds a whole new dimension to your Arduino projects. Whether you’re displaying sensor data, creating menus, or simply experimenting with text-based interfaces, integrating the 16×2 LCD display with Arduino is a valuable skill that can elevate your creations to the next level.
By learning how to work with the 16×2 LCD display with Arduino, you open the door to more interactive and visually engaging designs that enhance the usability of your projects. Stay connected with ArduinoYard for more detailed tutorials and creative projects tailored for beginners and enthusiasts alike.
We’d love to hear your thoughts or answer any questions you have—feel free to leave a comment below. And don’t forget to share your projects with us!
Explore More Beginner Tutorials on ArduinoYard
If you enjoyed this tutorial, check out these beginner-friendly guides to expand your Arduino skills:
- Using an Analog Joystick with Arduino: A Beginner’s Guide
Learn how to interface an analog joystick with Arduino and use it for various control applications. - Using an SD Card Module with Arduino: A Comprehensive Guide
Understand how to store and retrieve data using an SD card module in your Arduino projects. - Using a Rotary Encoder with Arduino
Discover how to implement a rotary encoder for precise input controls.
