
Introduction
In this guide, we will explore how to interface the DS3231 RTC Module with Arduino, set and read the time, use alarms and temperature readings, and display time on an OLED. The DS3231 is a real-time clock (RTC) module that keeps track of time even when the Arduino is powered off. It has a built-in temperature-compensated crystal oscillator, ensuring accurate timekeeping.
Features of DS3231 RTC Module
- High-accuracy real-time clock
- Battery backup support for continuous timekeeping
- Communicates with Arduino via I2C
- Built-in temperature sensor for compensation
- Two programmable alarms
How RTC Modules Work Internally
The DS3231 maintains time using an internal crystal oscillator. Unlike regular RTC modules, it includes a temperature compensation mechanism that adjusts for fluctuations in temperature, ensuring high accuracy. The internal memory stores time and date data even when the main power is lost, thanks to the backup battery.
For more technical details and datasheet visit here.
Components Required
- Arduino UNO
- DS3231 RTC Module
- CR2032 Battery (for backup)
- Jumper Wires
- 0.96-inch OLED Display (for advanced example)
Comparing DS3231 vs DS1307 RTC Modules
| Feature | DS3231 | DS1307 |
|---|---|---|
| Accuracy | ±2ppm | ±20ppm |
| Temperature Compensation | Yes | No |
| Battery Backup | Yes | Yes |
| Interface | I2C | I2C |
| Price | Slightly higher | Lower |
DS3231 is the better choice when accuracy is important, while DS1307 is more cost-effective for less critical applications.
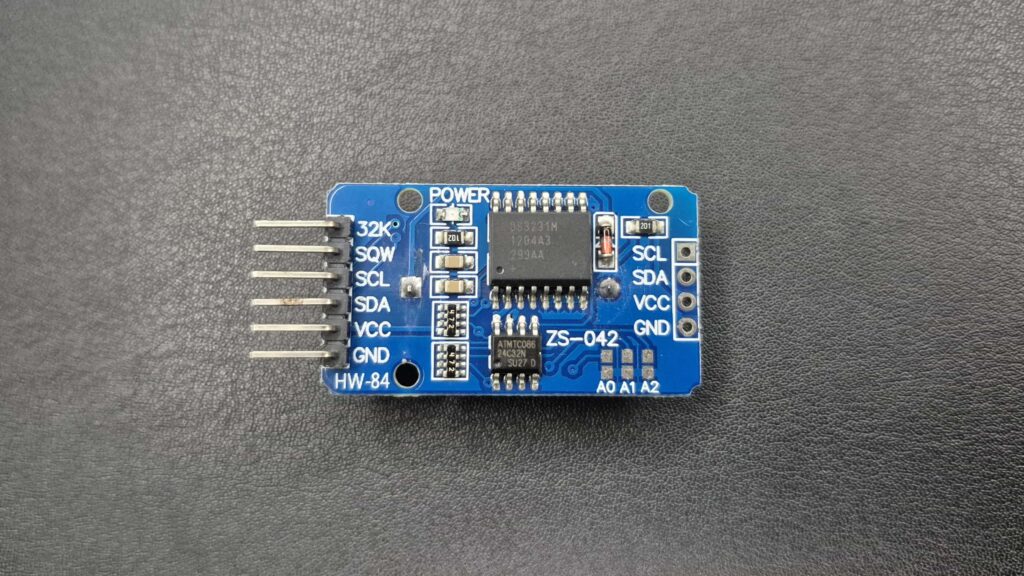
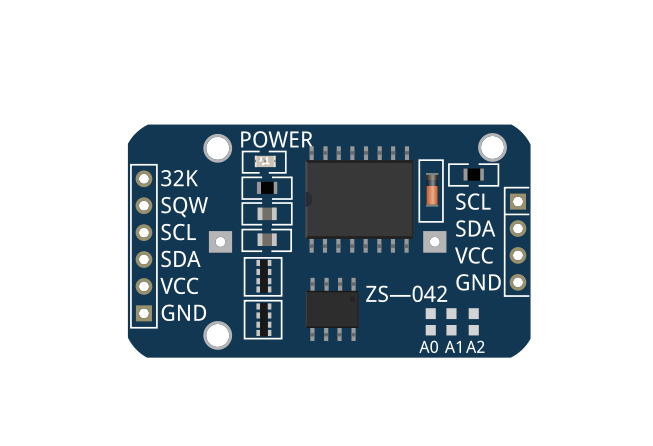
DS3231 RTC Module Pinout
| Pin Name | Description |
| VCC | Power (3.3V – 5V) |
| GND | Ground |
| SDA | I2C Data Line (Connects to Arduino A4) |
| SCL | I2C Clock Line (Connects to Arduino A5) |
| SQW | Square Wave Output (Optional) |
| 32K | 32.768 kHz Output (Optional) |
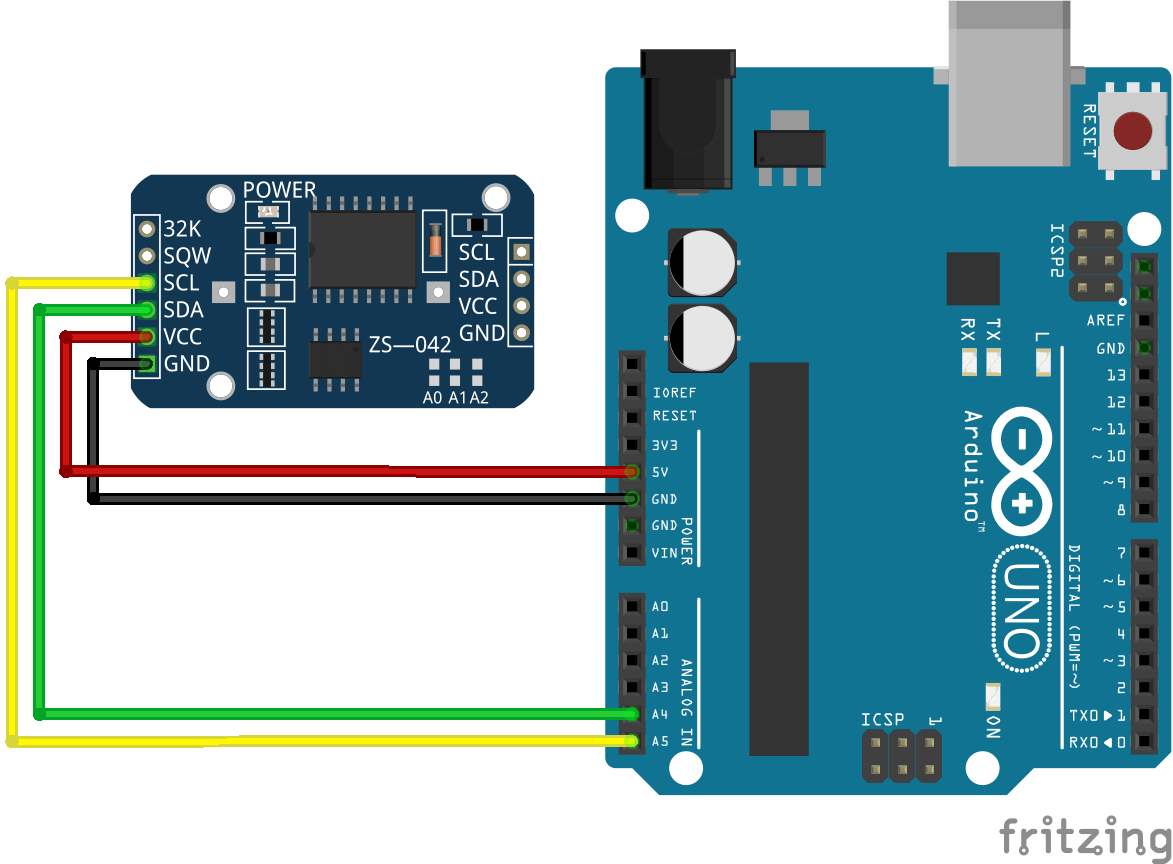
Wiring DS3231 with Arduino
Connection Table
| DS3231 RTC | Arduino UNO |
| VCC | 5V |
| GND | GND |
| SDA | A4 |
| SCL | A5 |
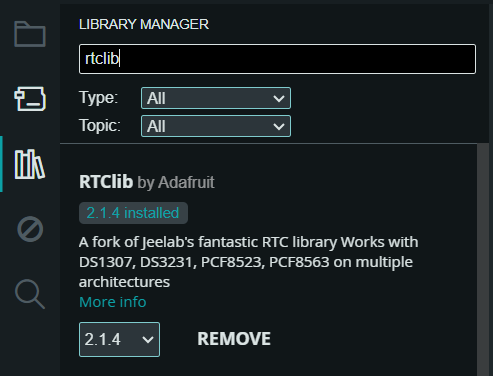
Installing the Required Library
To communicate with the DS3231 module, install the RTClib library.
Steps:
- Open Arduino IDE.
- Go to Sketch → Include Library → Manage Libraries.
- Search for RTClib and install it.
Code For RTC Module with Arduino
Upload the following code to set and read time from the RTC module:
// DS3231 RTC Module with Arduino by ArduinoYard
#include <Wire.h>
#include <RTClib.h>

RTC_DS3231 rtc;

void setup() {
    Serial.begin(9600);
    if (!rtc.begin()) {
        Serial.println("RTC module not found!");
        while (true);
    }
    // Compiler sets the time automatically (comment out when setting time manully)
    if (rtc.lostPower()) {
        rtc.adjust(DateTime(F(__DATE__), F(__TIME__)));
    }
    // Uncomment the next line once to set the date & time manually:
    // Format: rtc.adjust(DateTime(year, month, day, hour, minute, second));
    // rtc.adjust(DateTime(2025, 8, 19, 14, 30, 0));
}

void loop() {
    DateTime now = rtc.now();
    Serial.print(now.year(), DEC);
    Serial.print('/');
    Serial.print(now.month(), DEC);
    Serial.print('/');
    Serial.print(now.day(), DEC);
    Serial.print(" ");
    Serial.print(now.hour(), DEC);
    Serial.print(":");
    Serial.print(now.minute(), DEC);
    Serial.print(":");
    Serial.print(now.second(), DEC);
    Serial.println();
    delay(1000);
}Code Explanation:
- Initializes the RTC module.
- Adjusts the date and time if the module lost power.
- Reads and prints the current time every second.
Demonstration
Hardware:

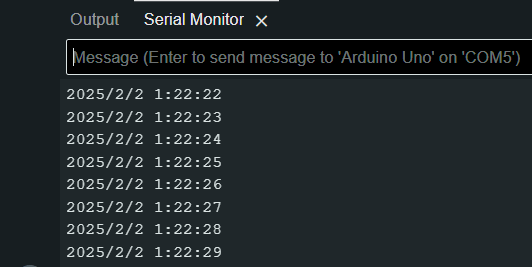
Serial Monitor Output:
Here is the output of the RTC displaying date and time on the Serial Monitor:
Setting a Custom Date and Time on DS3231
Apart from just reading time, you can also manually set the DS3231 clock. This is useful when you first use the module or when you want to update it with the correct date and time.
You can do this with the rtc.adjust() function:
// Format: rtc.adjust(DateTime(year, month, day, hour, minute, second));
rtc.adjust(DateTime(2025, 8, 19, 14, 30, 0));
👉 This sets the RTC to 19th August 2025, 14:30:00 (2:30 PM).
⚠️ Important: You only need to run this once to initialize the clock. After that, the DS3231 will keep time using its internal battery. To avoid resetting the time every time you upload new code, you can comment out or remove this line after the initial setup.
Using Alarms with DS3231
The DS3231 supports two alarms that can trigger an event at a specific time. Below is an example of setting an alarm:
rtc.setAlarm1(DateTime(0, 0, 0, 12, 30, 0), DS3231_A1_Hour);This sets an alarm at 12:30 PM.
Reading Temperature from DS3231
The module has a built-in temperature sensor. To read the temperature:
float temperature = rtc.getTemperature();
Serial.println(temperature);Displaying Time on an OLED Display
Wiring:

Code:
The following code reads the RTC time and displays it on a 0.96-inch OLED screen.
// DS3231 RTC Module with Arduino by ArduinoYard
#include <Wire.h>
#include <RTClib.h>
#include <Adafruit_GFX.h>
#include <Adafruit_SSD1306.h>
RTC_DS3231 rtc;
#define SCREEN_WIDTH 128
#define SCREEN_HEIGHT 64
Adafruit_SSD1306 display(SCREEN_WIDTH, SCREEN_HEIGHT, &Wire, -1);
void setup() {
Serial.begin(9600);
if (!rtc.begin()) {
Serial.println("RTC module not found!");
while (true);
}
if (rtc.lostPower()) {
rtc.adjust(DateTime(F(__DATE__), F(__TIME__)));
}
display.begin(SSD1306_SWITCHCAPVCC, 0x3C);
display.clearDisplay();
}
void loop() {
DateTime now = rtc.now();
display.clearDisplay();
display.setTextSize(1);
display.setTextColor(WHITE);
display.setCursor(10, 10);
display.print("Time: ");
display.print(now.hour()); display.print(":");
display.print(now.minute()); display.print(":");
display.print(now.second());
display.display();
delay(1000);
}Low-Power Mode & Sleep Mode with RTC
In battery-powered projects, putting the Arduino into sleep mode and using the RTC to wake it up saves power. The following example wakes up Arduino when an alarm is triggered:
#include <avr/sleep.h>
#include <Wire.h>
#include <RTClib.h>
RTC_DS3231 rtc;
void wakeUp() {}
void setup() {
pinMode(2, INPUT_PULLUP);
attachInterrupt(0, wakeUp, LOW);
rtc.setAlarm1(DateTime(0, 0, 0, 7, 0, 0), DS3231_A1_Hour);
}
void loop() {
set_sleep_mode(SLEEP_MODE_PWR_DOWN);
sleep_enable();
sleep_mode();
sleep_disable();
}Troubleshooting Tips
- RTC module not detected?
- Check wiring, especially SDA and SCL connections.
- Ensure the RTClib library is installed.
- Incorrect time after power loss?
- Insert a CR2032 battery to maintain timekeeping.
- Manually adjust the time using
rtc.adjust().
- OLED display not working?
- Ensure the I2C address of the OLED is correct (0x3C or 0x3D).
Conclusion
This guide covered how to interface the DS3231 RTC Module with Arduino, display time on an OLED, use alarms, and implement sleep mode. The DS3231 is a great choice for accurate timekeeping in Arduino projects.
Do you have any questions or want additional features? Let us know in the comments! 🚀
More helpful guides:
0.96 inch I2C OLED Display with Arduino
How to Use an I2C LCD with Arduino
L.S.,
What a fine example (coding) of reading_out the DS3231 module,
it solved a longtime problem for me.
I am just starting with coding and reading a shield is way above my skills.
Could you also publish an example to write a date and time to the DS3231?
To set the clock?
(Or did I not look good enough and it is allready there, 🙂 ?).
Thank you.
Hi, thanks a lot for your kind words! Glad to hear the example helped you out 🙂
To answer your question: yes, you can also set the date and time on the DS3231 manually. For that, you just need to use the rtc.adjust() function in your code. The format looks like this:
// Format: rtc.adjust(DateTime(year, month, day, hour, minute, second));
rtc.adjust(DateTime(2025, 8, 19, 14, 30, 0));
You should place this line inside the setup() function, right after initializing the RTC with rtc.begin(). If your sketch already has this line:
rtc.adjust(DateTime(F(__DATE__), F(__TIME__)));
…then replace it with the manual time line above.
💡 Important: Upload the code once to set the time, then comment out or remove the rtc.adjust() line. Otherwise, the RTC will reset to the same time every time you upload the sketch.
I have also updated the article with an extra section on manually setting the date and time, so it’s easier for beginners to follow.