Introduction
In this article, we will learn how to communicate between an ESP32 microcontroller and Telegram with ESP32 Telegram Bot. We will use Telegram Bot API to send and receive messages from ESP32, making it useful for IoT applications like remote monitoring and control.
Install the Telegram App from playstore
Components Required
- ESP32 development board
- USB cable
- Computer with Arduino IDE installed
- Active Telegram account
Setting Up Telegram Bot
- Open Telegram and search for
BotFather.
- Start a chat with BotFather and send the command
/newbot. You must note down the token. You will need to add in code.
- Follow the instructions to set a bot name and username. Search for your bot and give it a proper name.
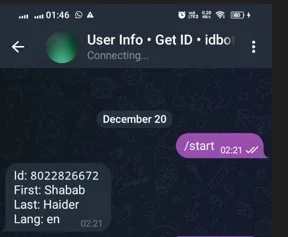
- Search for get
useridin Telegram and start a chat with /start you will get a user id. You can note it down. You may need it further advance programs.
Sending /start message to get userID
Installing Required boards and Libraries
Make sure you have ESP32 boards installed in your Arduino IDE. If haven’t installed yet follow this guide.
How To Install ESP32 And ESP8266 Boards In Arduino IDE (Step-by-Step Guide) – ArduinoYard
Make sure you have installed the following library in Arduino IDE:
- UniversalTelegramBot.h (for Telegram communication)
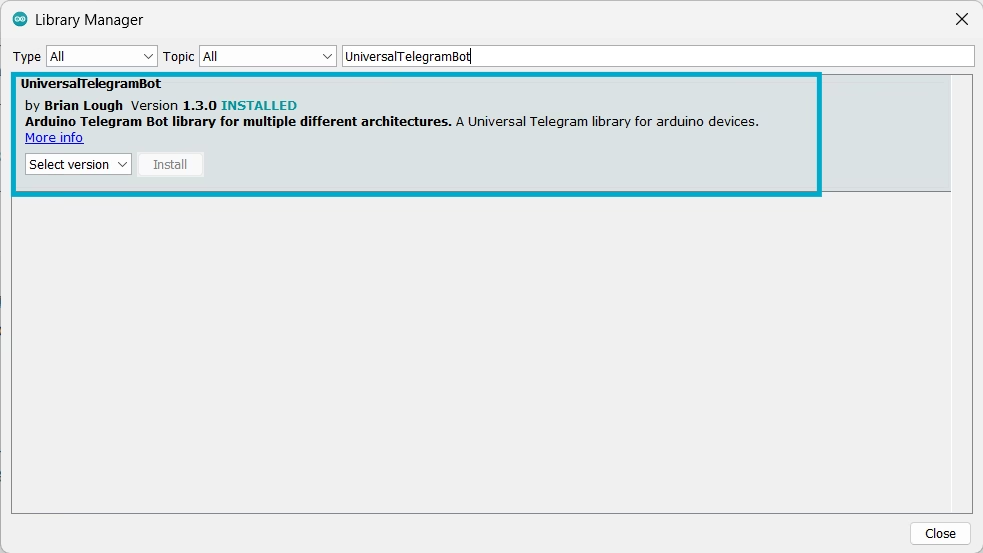
You can install these from the Arduino Library Manager. In Arduino IDE, Go to Sketch-> Include Library->Manage libraries
Search for UniversalTelegramBot and Install the selected library.
Code to Send and Receive Telegram Messages
Add your SSID, Password and Telegram bot token in code where asked. Upload the code to your ESP32 using the Arduino IDE:
// ESP32 Telegram Bot by ArduinoYard

#include <WiFi.h>
#include <WiFiClientSecure.h>
#include <UniversalTelegramBot.h>

// Wifi network station credentials
#define WIFI_SSID "YOUR_SSID"
#define WIFI_PASSWORD "YOUR_PASSWORD"
// Telegram BOT Token (Get from Botfather)
//#define BOT_TOKEN "XXXXXXXXX:XXXXXXXXXXXXXXXXXXXXXXXXXXXXXXXXXXX"
#define BOT_TOKEN "8034737275:AAFzOZOMojY227GwVsrx5CVtKaWZKJFfM1o"

const unsigned long BOT_MTBS = 1000; // mean time between scan messages

WiFiClientSecure secured_client;
UniversalTelegramBot bot(BOT_TOKEN, secured_client);
unsigned long bot_lasttime;          // last time messages' scan has been done
bool Start = false;

void handleNewMessages(int numNewMessages)
{
  Serial.println("handleNewMessages");
  Serial.println(String(numNewMessages));

  for (int i = 0; i < numNewMessages; i++)
  {
    String chat_id = bot.messages[i].chat_id;
    String text = bot.messages[i].text;

    String from_name = bot.messages[i].from_name;
    if (from_name == "")
      from_name = "Guest";

    if (text == "/Hello ESP32")
    {
      bot.sendChatAction(chat_id, "typing");
      delay(4000);
      bot.sendMessage(chat_id, "Hi, Telegram");

      // You can't use own message, just choose from one of bellow

      //typing for text messages
      //upload_photo for photos
      //record_video or upload_video for videos
      //record_audio or upload_audio for audio files
      //upload_document for general files
      //find_location for location data

      //more info here - https://core.telegram.org/bots/api#sendchataction
    }

    if (text == "/start")
    {
      String welcome = "Welcome to Universal Arduino Telegram Bot library, " + from_name + ".\n";
      welcome += "This is Chat Action Bot example.\n\n";
      welcome += "/Hello ESP32 : to send test chat action message\n";
      bot.sendMessage(chat_id, welcome);
    }
  }
}

void setup()
{
  Serial.begin(115200);
  Serial.println();

  // attempt to connect to Wifi network:
  Serial.print("Connecting to Wifi SSID ");
  Serial.print(WIFI_SSID);
  WiFi.begin(WIFI_SSID, WIFI_PASSWORD);
  secured_client.setCACert(TELEGRAM_CERTIFICATE_ROOT); // Add root certificate for api.telegram.org
  while (WiFi.status() != WL_CONNECTED)
  {
    Serial.print(".");
    delay(500);
  }
  Serial.print("\nWiFi connected. IP address: ");
  Serial.println(WiFi.localIP());

  Serial.print("Retrieving time: ");
  configTime(0, 0, "pool.ntp.org"); // get UTC time via NTP
  time_t now = time(nullptr);
  while (now < 24 * 3600)
  {
    Serial.print(".");
    delay(100);
    now = time(nullptr);
  }
  Serial.println(now);
}

void loop()
{
  if (millis() - bot_lasttime > BOT_MTBS)
  {
    int numNewMessages = bot.getUpdates(bot.last_message_received + 1);

    while (numNewMessages)
    {
      Serial.println("got response");
      handleNewMessages(numNewMessages);
      numNewMessages = bot.getUpdates(bot.last_message_received + 1);
    }

    bot_lasttime = millis();
  }
}
// ESP32 Telegram Bot by ArduinoYardExplanation
- Connects ESP32 to WiFi.
- Initializes the Telegram bot.
- Listens for incoming messages and responds accordingly.
- Supports
/startand/Hello ESP32 commands.
Telegram Bot:
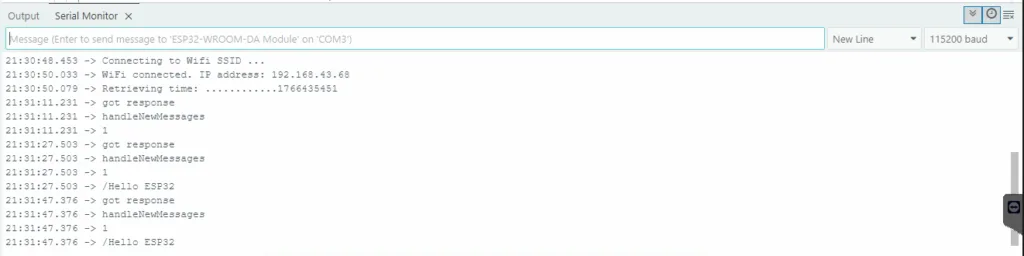
ESP32 Serial Monitor:
Applications and Use Cases
This setup can be used for:
- Home Automation: Control lights, fans, and appliances via Telegram commands.
- Security Systems: Receive alerts for motion detection, door openings, or unauthorized access.
- Weather Monitoring: Request real-time temperature and humidity data from ESP32 sensors.
- Remote Control: Operate IoT devices from anywhere using Telegram messages.
- Industrial Monitoring: Receive alerts for equipment status or environmental conditions.
Conclusion
In this tutorial, we successfully set up communication between ESP32 and Telegram using a bot. This is a powerful and user-friendly method for IoT applications, allowing users to send commands and receive updates remotely via Telegram.