
Introduction
Using a Fingerprint Sensor with Arduino is one of the most effective ways to implement secure biometric authentication in embedded systems. Fingerprint recognition leverages unique physical traits to verify identity, making it highly reliable for applications like access control and attendance tracking.
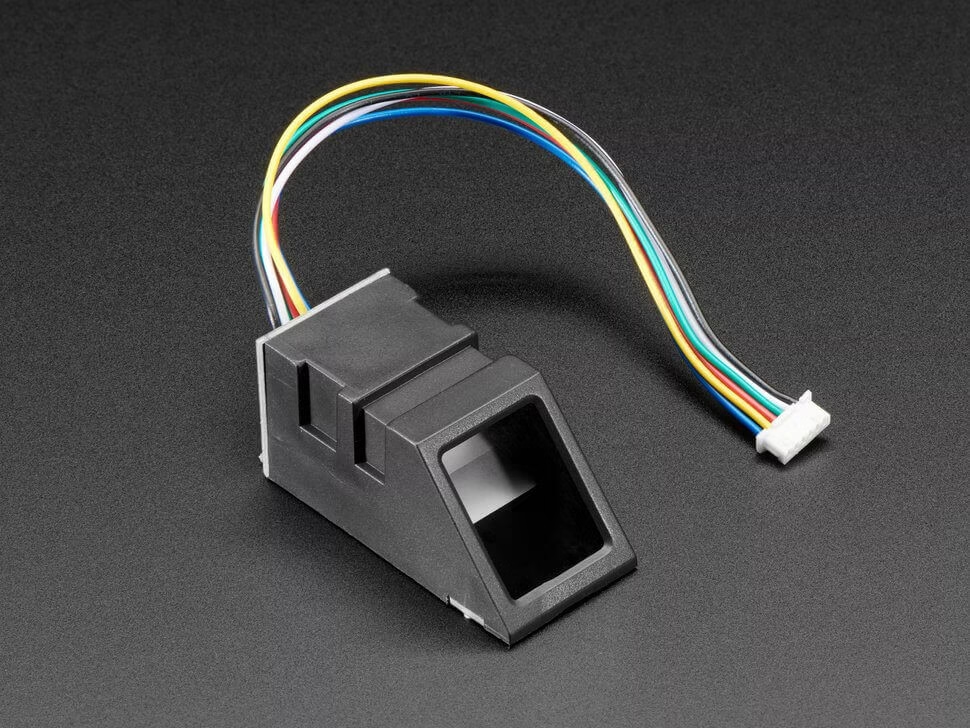
In this tutorial, we’ll focus on integrating the R307 Fingerprint Sensor with Arduino—an affordable and widely-used module in projects and professional security systems. The R307 module can capture, store, and match fingerprints, enabling your Arduino to authenticate users and make decisions based on fingerprint verification.
Whether you’re building a smart lock, secure login system, or attendance tracker, learning how to use a fingerprint sensor with Arduino opens a world of secure and interactive possibilities.
What you will learn in this tutorial
- Basics of biometric authentication and how a Fingerprint Sensor works.
- How to connect a Fingerprint Sensor with Arduino, including wiring and setup.
- How to enroll new fingerprints and store them in the sensor’s internal memory.
- How to verify fingerprints using Arduino code and match them against stored data.
- How to display fingerprint status and messages on the Serial Monitor for real-time feedback.
What is fingerprint sensor
A fingerprint sensor is a biometric device that captures the unique pattern of ridges and valleys found on a person’s fingertip. These patterns are then processed and converted into a digital template, which can be stored and later used for comparison during identity verification.
NOTE: To learn more about Biometrics: What are Biometrics?
Fingerprint sensors play a crucial role in biometric authentication systems because every individual has a unique fingerprint—even identical twins do not share the same fingerprint pattern. This makes fingerprint recognition one of the most secure and reliable forms of identity verification.
When a person places their finger on the sensor:
- The sensor scans the fingerprint image.
- It extracts specific features such as ridge endings, bifurcations, and loops.
- These features are converted into a digital code or template.
- The sensor then compares this code with previously stored fingerprints in its memory to determine if there’s a match.
If the scanned fingerprint matches one of the stored templates, access is granted, or a specific action is triggered by the microcontroller (like Arduino). If not, the system can deny access or take alternative actions.
Types of Fingerprint Sensors
Optical sensors: Use light to capture a fingerprint image.
Capacitive sensors: Use electrical current variations caused by the fingerprint ridges.
Ultrasonic sensors: Use sound waves to detect fingerprint details (usually found in smartphones).
Commonly Used Fingerprint Sensor Modules:
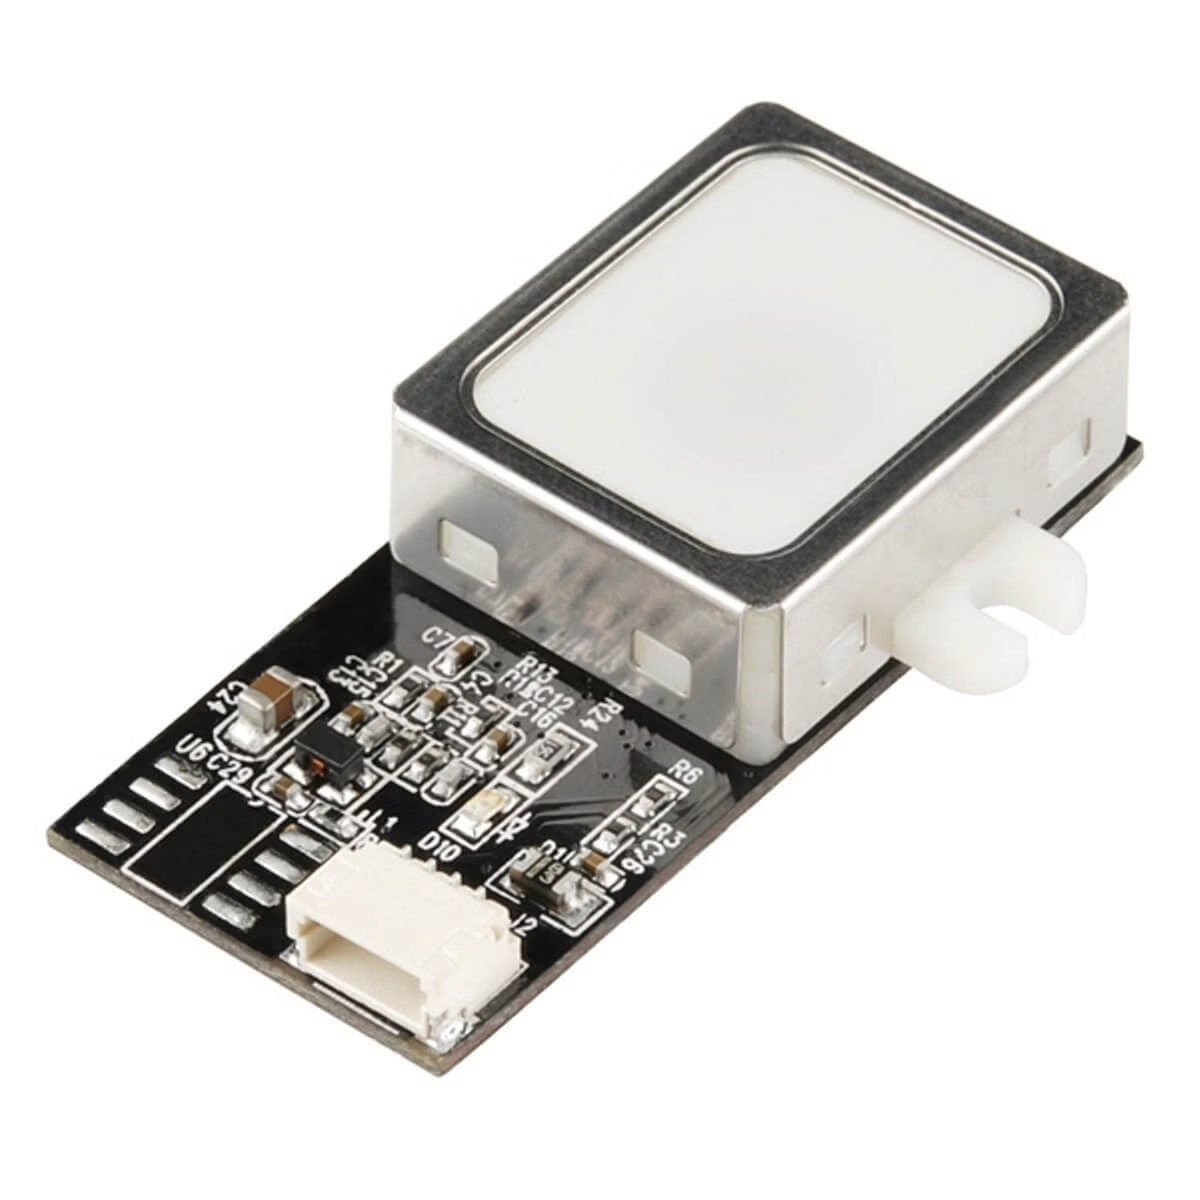
R307: A widely used optical fingerprint sensor, ideal for Arduino-based security and attendance systems. It supports fingerprint capture, storage, and matching in its onboard memory.
GT-521F52: Another compact and reliable fingerprint module with high-speed recognition and built-in storage for fingerprint templates.
These sensors are commonly integrated into Arduino, Raspberry Pi, and other microcontroller-based systems for projects such as smart locks, time attendance, access control systems, and personalized user interfaces.
How the fingerprint sensor works
The R307 sensor works by capturing the fingerprint image and comparing it with the templates stored in the sensor’s database.
The module has built-in processing for:
- Image Capture: The module takes an image of the fingerprint.
- Feature Extraction: It extracts unique patterns like ridges and bifurcations.
- Template Generation: Converts features into a digital fingerprint template.
- Template Storage: Templates are stored in non-volatile memory with a unique ID.
- Matching: Compares new scans against stored templates to find a match.
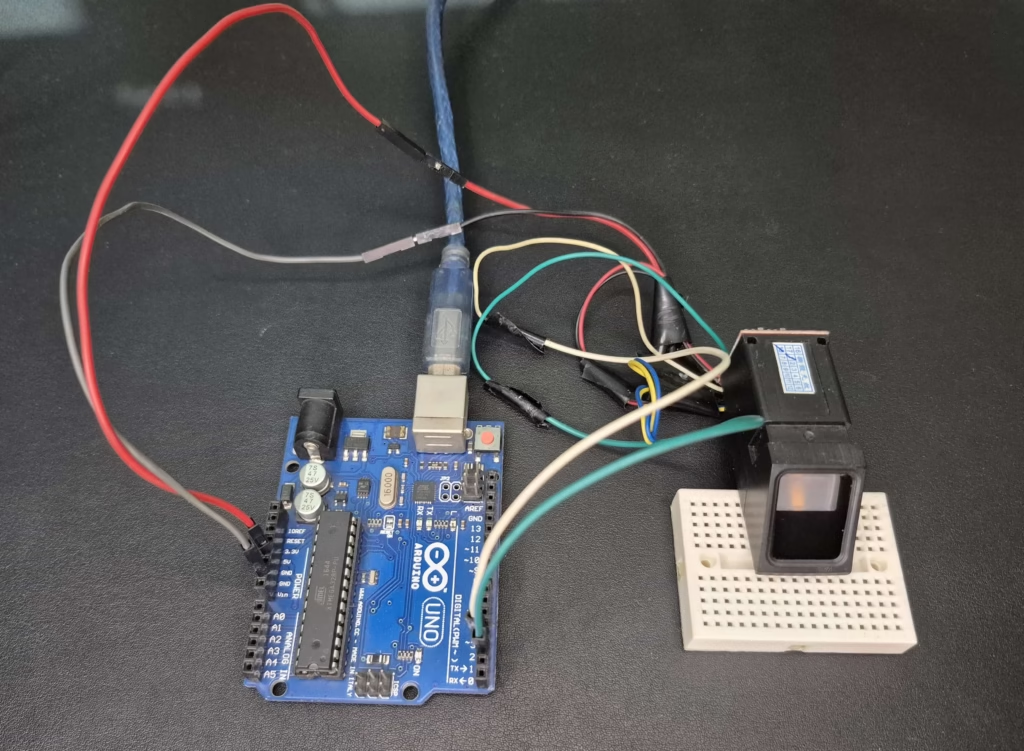
Components required
- Arduino (UNO, MEGA etc.)
- R307 Fingerprint Sensor
- Bread Board
- Jumper wires
- USB Cable for Arduino
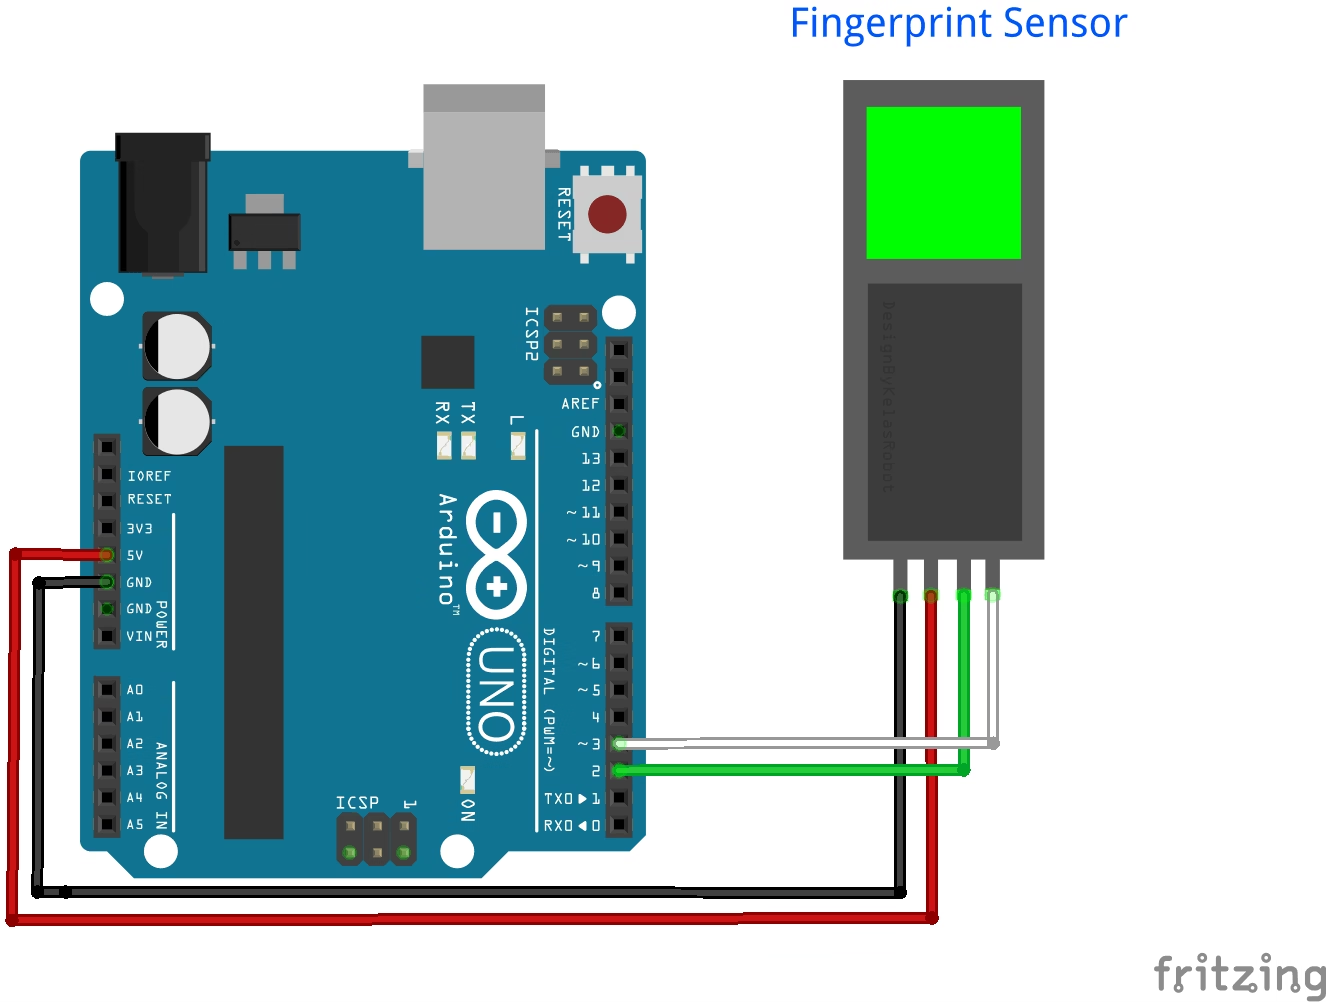
Wiring the Fingerprint sensor with Arduino
- Connect the Vcc of R307 with 5V pin of Arduino.
- Connect the GND of R307 with GND of the Arduino.
- Connect the TX pin of R307 with Digital Pin D2 of the Arduino.
- Connect the RX pin of R307 with Digital Pin D3 of the Arduino.
| Sensor Pin | Arduino |
| Vcc | 5v |
| GND | GND |
| TX | D2 |
| RX | D3 |
Installing the required library
We will need to install the Adafruit Fingerprint sensor library. Here is how to install it:
- Open arduino IDE.
- Go to Sketch > Include Library > Manage Libraries.
- Search for “Adafruit Fingerprint Sensor Library”.
- Click install.
Arduino Code
// Fingerprint Sensor with Arduino by ArduinoYard
#include <Adafruit_Fingerprint.h>      // Include the Adafruit library for the fingerprint sensor
#include <SoftwareSerial.h>            // Include SoftwareSerial for communication with the sensor

SoftwareSerial mySerial(2, 3);         // Create a software serial port on pins 2 (RX) and 3 (TX)
Adafruit_Fingerprint finger = Adafruit_Fingerprint(&mySerial);  // Initialize fingerprint sensor using software serial

void setup() {
  Serial.begin(9600);                  // Start the main serial communication with PC
  while (!Serial) ;                    // Wait for serial monitor to open
  delay(100);
  Serial.println("Fingerprint Sensor Ready");

  finger.begin(57600);                 // Begin communication with the fingerprint sensor at 57600 baud
  if (finger.verifyPassword()) {      // Check if sensor responds correctly
    Serial.println("Sensor detected!");
  } else {
    Serial.println("Sensor not detected. Check wiring.");
    while (1);                         // Stop the program if sensor is not found
  }

  Serial.println("Type ID (1-127) to enroll a new fingerprint:");
}

void loop() {
  // Check if user has entered a new ID to enroll
  if (Serial.available()) {
    int id = Serial.parseInt();       // Read ID entered in Serial Monitor
    if (id < 1 || id > 127) {
      Serial.println("Invalid ID. Must be between 1 and 127.");
      return;
    }
    Serial.print("Enrolling ID #");
    Serial.println(id);

    // Start fingerprint enrollment process
    if (enrollFingerprint(id)) {
      Serial.println("New fingerprint added!");
    } else {
      Serial.println("Enrollment failed. Try again.");
    }

    delay(2000);
    Serial.println("You can enter another ID to enroll.");
  }

  // Continuously check if a finger is placed for identification
  Serial.println("Place finger to identify...");
  uint8_t result = getFingerprintID();

  if (result == FINGERPRINT_OK) {
    Serial.print("Fingerprint matched! ID: ");
    Serial.println(finger.fingerID);
  } else if (result == FINGERPRINT_NOTFOUND) {
    Serial.println("Fingerprint not recognized.");
  }

  delay(3000);  // Wait before next scan
}

bool enrollFingerprint(uint8_t id) {
  int p = -1;
  Serial.println("Place finger...");

  // Wait until a valid fingerprint image is captured
  while (p != FINGERPRINT_OK) {
    p = finger.getImage();            // Capture image from sensor
    if (p == FINGERPRINT_NOFINGER) continue;
    if (p != FINGERPRINT_OK) return false;
  }

  p = finger.image2Tz(1);             // Convert image to fingerprint template (first scan)
  if (p != FINGERPRINT_OK) return false;

  Serial.println("Remove finger...");
  delay(2000);
  while (finger.getImage() != FINGERPRINT_NOFINGER);  // Wait until finger is removed

  Serial.println("Place same finger again...");
  while ((p = finger.getImage()) != FINGERPRINT_OK) { // Capture second fingerprint image
    if (p != FINGERPRINT_NOFINGER) return false;
  }

  p = finger.image2Tz(2);             // Convert second image to fingerprint template
  if (p != FINGERPRINT_OK) return false;
  p = finger.createModel();           // Combine the two templates into a model
  if (p != FINGERPRINT_OK) return false;
  p = finger.storeModel(id);         // Store the model in the sensor’s memory with given ID
  if (p != FINGERPRINT_OK) return false;

  return true;                        // Enrollment successful
}

uint8_t getFingerprintID() {
  uint8_t p = finger.getImage();      // Capture fingerprint image
  if (p != FINGERPRINT_OK) return p;

  p = finger.image2Tz();              // Convert image to template
  if (p != FINGERPRINT_OK) return p;

  p = finger.fingerSearch();          // Search for a matching fingerprint in stored templates
  return p;
}Explanation
This code allows you to enroll fingerprints and identify them later using the Adafruit Fingerprint Sensor module with Arduino.
#include <Adafruit_Fingerprint.h>
#include <SoftwareSerial.h>These libraries are used to communicate with the fingerprint sensor.SoftwareSerial lets us use any digital pins as serial ports.
SoftwareSerial mySerial(2, 3);
Adafruit_Fingerprint finger = Adafruit_Fingerprint(&mySerial);The sensor is connected to pins 2 (RX) and 3 (TX).finger is the object used to interact with the sensor.
Serial.begin(9600);
finger.begin(57600);Serial.begin starts communication with the Serial Monitor.finger.begin starts communication with the fingerprint sensor at 57600 baud rate.
if (finger.verifyPassword()) {
  Serial.println("Sensor detected!");
}This checks if the fingerprint sensor is working properly and correctly connected.
if (Serial.available()) {
  int id = Serial.parseInt();
  ...
  enrollFingerprint(id);
}If you type a number (ID) in the Serial Monitor, the code starts the enrollment process.
Each fingerprint is stored with an ID between 1 and 127.
bool enrollFingerprint(uint8_t id)This function handles the enrollment:
- Captures the same finger twice
- Converts both images into templates
- Creates a fingerprint model
- Saves it under the provided ID
If anything goes wrong during the steps, it returns false.
uint8_t getFingerprintID()This function checks if a finger is placed on the sensor and tries to match it with stored fingerprints. If a match is found, it returns FINGERPRINT_OK.
Serial.println("Place finger to identify...");The main loop keeps asking the user to place their finger and then prints whether a match is found or not.
Demonstration
Enroll:
- At first the serial monitor shows us a message that fingerprint sensor is connected properly.
- Then it will ask us to write a number from 1 to 127 to enroll a new fingerprint at that specific ID.
- In this image I write 3 and press enter then it will ask me to place the finger on the fingerprint sensor. It will keep asking me until I place my finger on the fingerprint sensor.
- After it identifies my finger, it will ask me again to cross check.
- After cross-checking the new fingerprint will be added at ID 1.
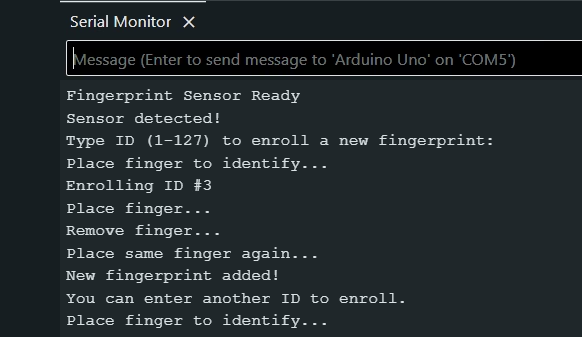
- Now if we want to add another fingerprint, we will write another numeric ID from 1 to 127.
- If a number other than 1-127 is entered, it shows the message Invalid ID. (Must be between 1 and 127).
Detect:
- Now if you detect a fingerprint already enrolled (one at index 1 in our case) in the sensor memory, it will print “Fingerprint matched! ID: 1”

- And then the loop continues, and you can save up to 127 fingerprints.
Applications for Fingerprint sensor with Arduino
- Biometric Door Lock: Control a solenoid or servo motor to lock/unlock doors.
- Attendance System: Log student or employee entries.
- Security Systems: Add an extra layer of security to safes or drawers.
- Time Logging Devices: Track in/out times using fingerprint authentication.
Tips and Troubleshooting
- Clean the sensor regularly to ensure accurate reading.
- Avoid direct sunlight during scanning to reduce false negatives.
- Make sure your fingers are dry and clean while scanning.
- Use external power if arduino can’t supply enough current for the sensor.
Conclusion
Using a Fingerprint Sensor with Arduino is a simple yet powerful way to bring biometric security to your DIY electronics projects. With just a few components and the Adafruit library, you can create secure and interactive systems for various applications.
Whether you’re making a smart door lock or a personal attendance system, fingerprint sensors provide an efficient and user-friendly solution for identity verification.
Thank You
Interesting Arduino Tutorials you may like:
Sound Sensor with Arduino: Build Sound-Reactive Projects
Voltage Sensor with Arduino: Measure DC Voltages up to 25V Easily