Introduction
In this article, we’ll explore the basics of using an IR Sensor with ESP32 and create a simple project to demonstrate its functionality: turning an LED ON or OFF based on the proximity of an obstacle. Infrared (IR) sensors are widely used in electronics for detecting objects and measuring distance. They operate by emitting infrared light and detecting its reflection from nearby objects. These sensors are especially popular in projects like obstacle detection, line-following robots, and automation systems.
Understanding the IR Sensor Module
The IR sensor module typically consists of two main components:
- IR Emitter (LED): Emits infrared light.
- IR Receiver (Photodiode): Detects the reflected infrared light when it hits an obstacle.
The module also includes supporting circuitry, such as:
- A comparator to provide a digital output based on the intensity of reflected light.
- A potentiometer to adjust the sensitivity of the sensor.
Pinout of a Typical IR Sensor Module
Here is the pinout of an IR sensor:
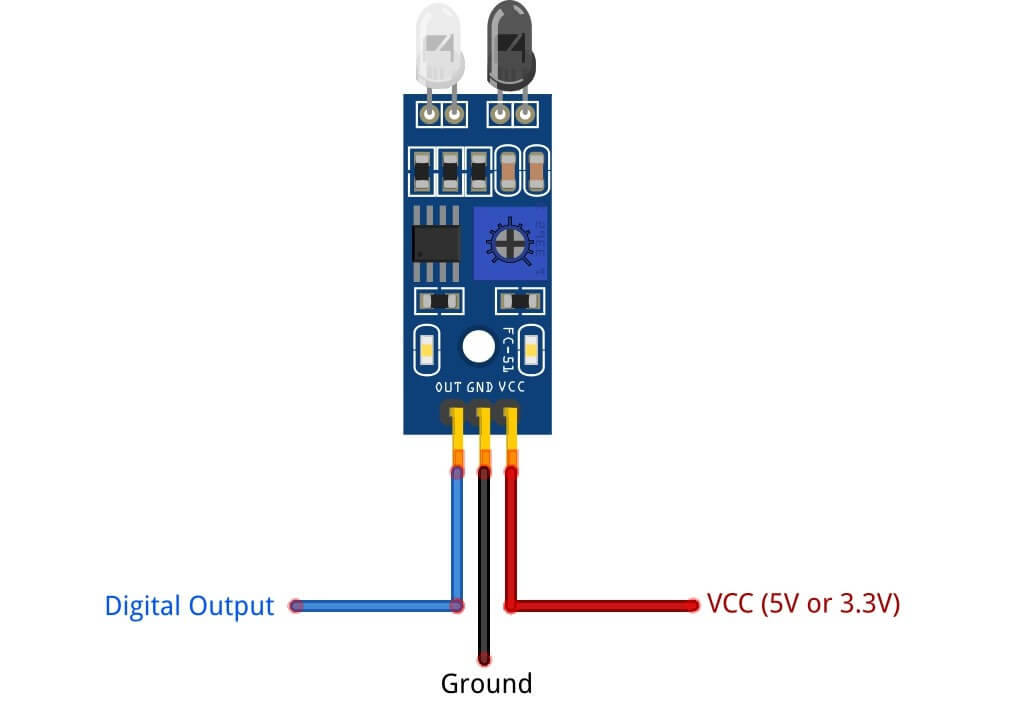
- VCC: Connects to a 5V or 3.3V or a microcontroller or a power supply.
- GND: Connects to ground.
- OUT: Digital output that goes HIGH or LOW based on obstacle detection.
How the IR Sensor Works
- The IR LED continuously emits infrared light.
- When an object comes into the range of the sensor, the infrared light reflects off the object and is detected by the photodiode.
- The module processes this reflected light and outputs a HIGH or LOW signal to indicate the presence of an object.
Learn more about Infrared: Wikipedia – Infrared
Learn more about Infrared Sensors/Modules: Understanding IR Sensors and IR LEDs
Components Required
- ESP32 Dev Board
- IR Sensor Module
- LED
- 220-ohm Resistor
- Breadboard and Jumper Wires
Wiring the IR Sensor with ESP32
Here’s how to connect the IR Sensor with ESP32 and an LED:
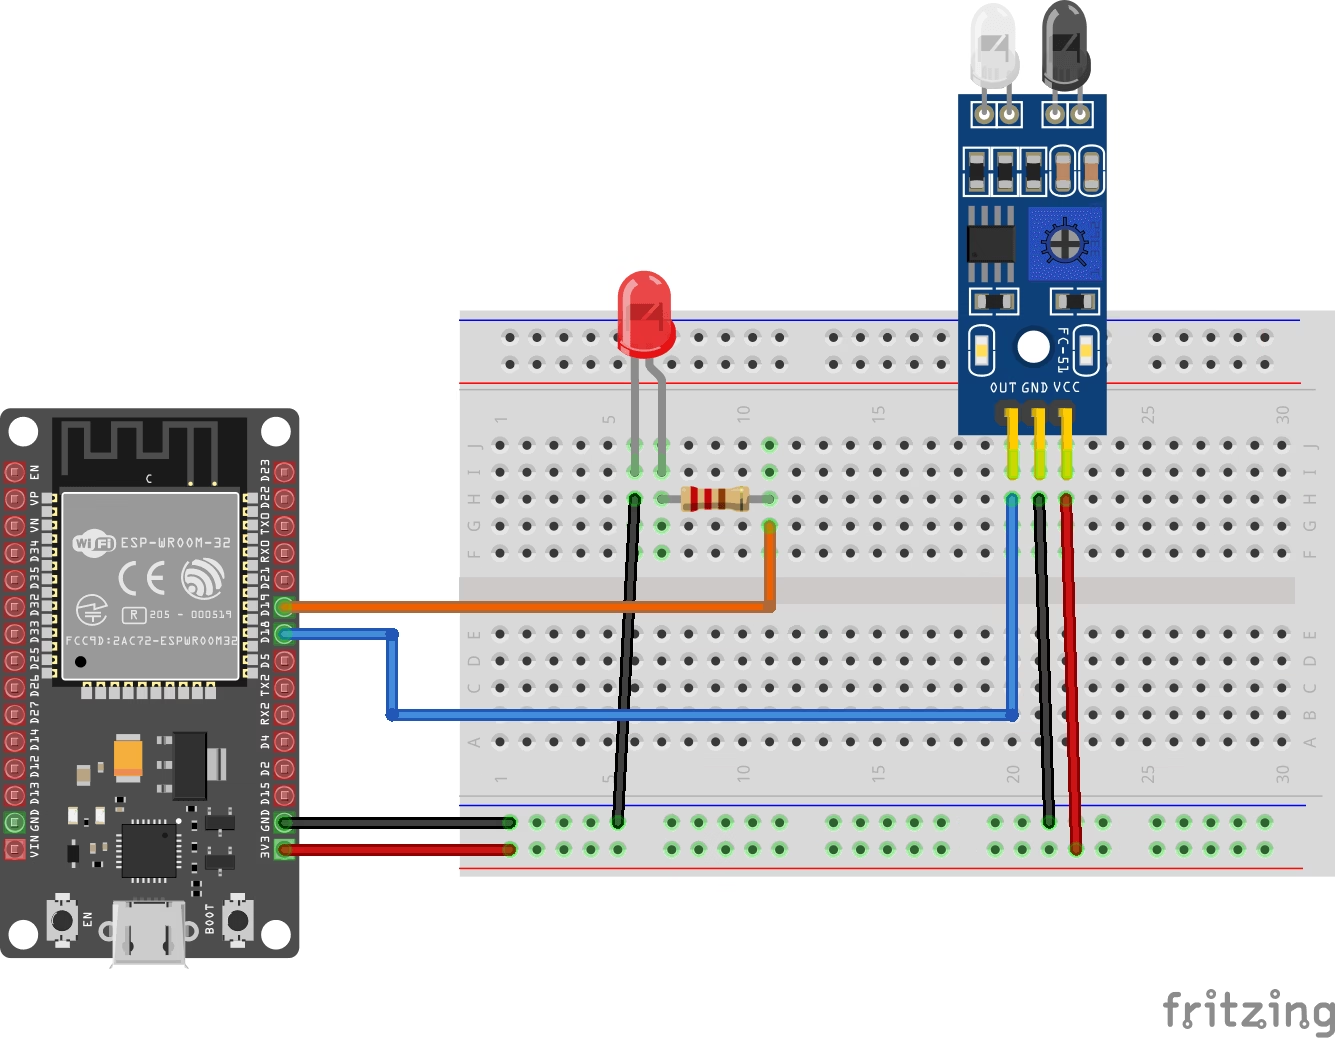
Here’s how to connect everything:
IR Sensor Module:
- VCC to 3.3V on ESP32
- GND to GND on ESP32
- OUT to GPIO 18 (or any digital pin)
LED Circuit:
- Anode (long leg) to GPIO 19 on ESP32 (via a 220-ohm resistor)
- Cathode to GND
💡 Refer to our ESP32 Pinout Guide if you’re unsure about GPIO pins.
ESP32 Code for the IR Sensor Project
The following code turns the LED ON when an obstacle is detected and OFF when there is no obstacle:
// Using IR Sensor with ESP32 - Complete Guide by ArduinoYard

const int irSensorPin = 18;  // IR Sensor connected to GPIO18
const int ledPin = 19;       // LED connected to GPIO19

void setup() {
  pinMode(irSensorPin, INPUT);
  pinMode(ledPin, OUTPUT);
  Serial.begin(115200);
  delay(100);
  Serial.println("IR Sensor with ESP32 Ready");
}

void loop() {
  int sensorValue = digitalRead(irSensorPin);

  if (sensorValue == LOW) {
    digitalWrite(ledPin, HIGH);
    Serial.println("Obstacle detected!");
  } else {
    digitalWrite(ledPin, LOW);
    Serial.println("No obstacle.");
  }

  delay(100);
}How the Code Works
- The IR sensor output is read using
digitalRead(). - If
LOWis detected (i.e., object present), the LED turns ON. - If
HIGHis detected (i.e., no object), the LED turns OFF. - Messages are printed to the Serial Monitor for live feedback.
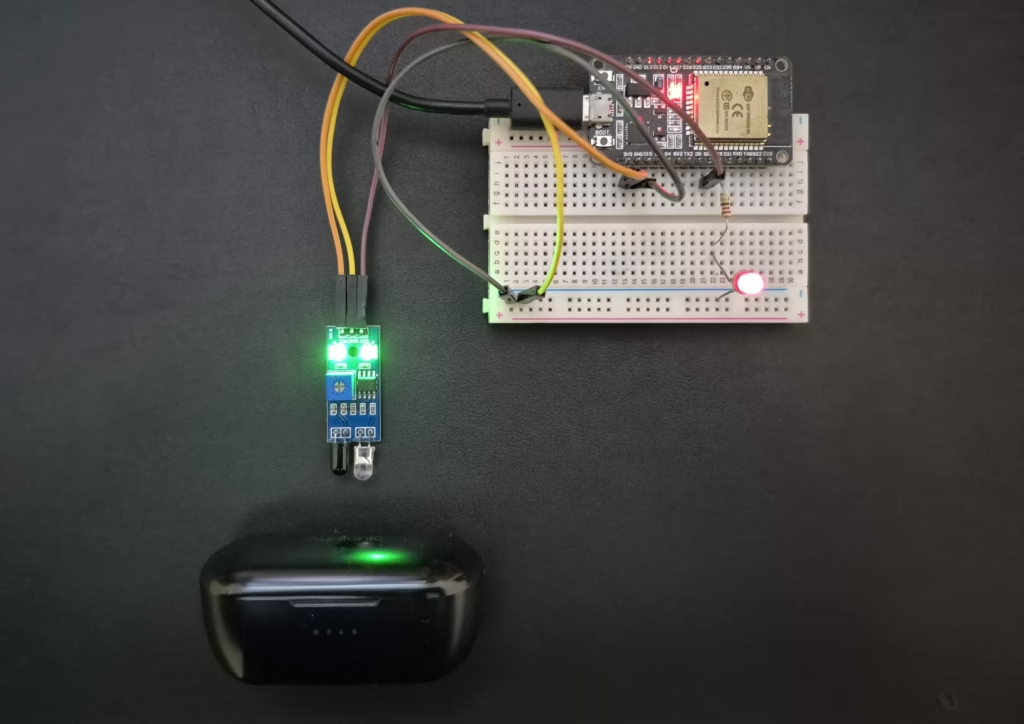
Testing the Project
- Upload the code to your ESP32 board.
- Open the Serial Monitor (set baud to 115200).
- Place an object in front of the IR sensor.
- You should see “Obstacle detected!” and the LED will turn ON.
- Remove the object to turn the LED OFF.
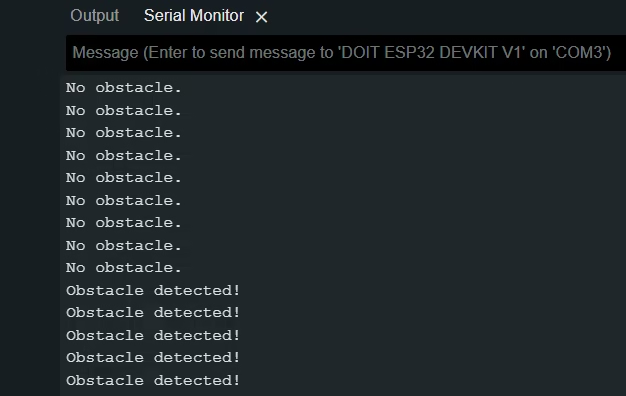
Serial Monitor:
Troubleshooting Tips
- Sensitivity Adjustment: Use the onboard potentiometer to adjust the detection range.
- Ambient Light Interference: IR sensors may be affected by sunlight or other strong light sources. Test your setup in a controlled environment.
- Stable Connections: Ensure all connections are secure and there are no loose wires.
Conclusion
Using an IR Sensor with ESP32 is a great starting point for building smart detection systems. Whether you’re working on automation, robotics, or interactive installations, this simple IR project can be a useful building block.
Applications of IR Sensor with ESP32
- Obstacle avoidance in ESP32 robots
- Smart trash cans
- Automatic lighting systems
- Touchless counters and triggers
Want to go further? Try making a line-following robot or gesture-activated device using IR sensors!
If you’re excited to explore more complex applications of IR sensors, check out this related project on Autonomous Edge Detection Robot with Arduino. This project demonstrates the advanced use of IR sensor with Arduino in robotics, helping you take your skills to the next level.
Explore more projects and tutorials at ArduinoYard!