What is FreeRTOS on ESP32?
FreeRTOS on ESP32 is the real-time operating system that manages multitasking on the dual-core ESP32 microcontroller. Unlike traditional Arduino boards, which run everything inside a single loop(), the ESP32 comes with FreeRTOS built-in. This allows developers to run multiple tasks at the same time, such as reading sensors, handling Wi-Fi, and blinking LEDs — all without interfering with one another.
Think of FreeRTOS as a traffic controller that decides which task should run and when, so your ESP32 can perform smoothly without getting “stuck” on one process.
Why ESP32 Uses FreeRTOS by Default
The ESP32 is a powerful chip with:
- Two processor cores (Core 0 and Core 1).
- Integrated Wi-Fi and Bluetooth.
- Multiple peripherals like I2C, SPI, UART, ADC, and more.
Managing these efficiently would be hard with a simple loop(). That’s why Espressif includes FreeRTOS on ESP32 as the default operating system in ESP-IDF, and it’s also running silently in the background when you use the Arduino IDE.
Make sure ESP32 Boards are installed in your Arduino IDE.
Read more about FreeRTOS:
FreeRTOS Overview – ESP32 – — ESP-IDF Programming Guide v5.5 documentation
Arduino loop() vs FreeRTOS Tasks
When using the Arduino framework, your structure looks like this:
void setup() {
  pinMode(2, OUTPUT);
}

void loop() {
  digitalWrite(2, HIGH);
  delay(500);
  digitalWrite(2, LOW);
  delay(500);
}
Here, the loop() is a single-task system. Everything you want to run must go inside this loop. If one function takes too long, everything else has to wait.
With FreeRTOS on ESP32, you can create separate tasks that run independently. One task can blink an LED, another can read a sensor, while another handles Wi-Fi — all in parallel.
Example: Simple LED Blink with FreeRTOS on ESP32
#include <Arduino.h>

// Task function
void blinkTask(void *pvParameters) {
  pinMode(2, OUTPUT);
  while (1) {
    digitalWrite(2, HIGH);
    vTaskDelay(500 / portTICK_PERIOD_MS); // FreeRTOS delay
    digitalWrite(2, LOW);
    vTaskDelay(500 / portTICK_PERIOD_MS);
  }
}

void setup() {
  // Create a FreeRTOS task
  xTaskCreate(
    blinkTask,    // Task function
    "Blink Task", // Task name
    1024,         // Stack size
    NULL,         // Task parameter
    1,            // Priority
    NULL          // Task handle
  );
}

void loop() {
  // Empty - FreeRTOS tasks run independently
}
How It Works
xTaskCreate(): Creates a new task.- Task function (
blinkTask): Runs in an infinite loop. vTaskDelay(): Non-blocking delay — unlikedelay(), it lets other tasks run during the wait.
Expected Output
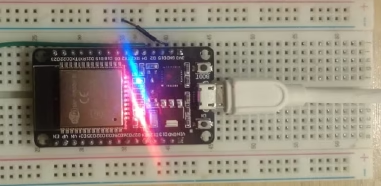
- The LED on GPIO 2 will blink every 500 ms.
- FreeRTOS ensures this task runs without blocking other tasks you may add later.
Next Step for You
To get hands-on practice with FreeRTOS on ESP32, try adding a second task that prints a message to the Serial Monitor every second. You’ll see how the LED keeps blinking while messages are still printed — proving true multitasking on ESP32.
By the end of this blog, The readers should have understood:
- What FreeRTOS is.
- Why ESP32 uses it.
- How to create their first FreeRTOS task.
LEARN HOW TO USE FIREBASE REAL -TIME DATABASE WITH ESP32:
Firebase To ESP32: Read Realtime Data From Firebase Realtime Database – ArduinoYard
ESP32 Firebase Guide: Send Any Sensor Data To Firebase Using Esp32 – ArduinoYard