
Introduction
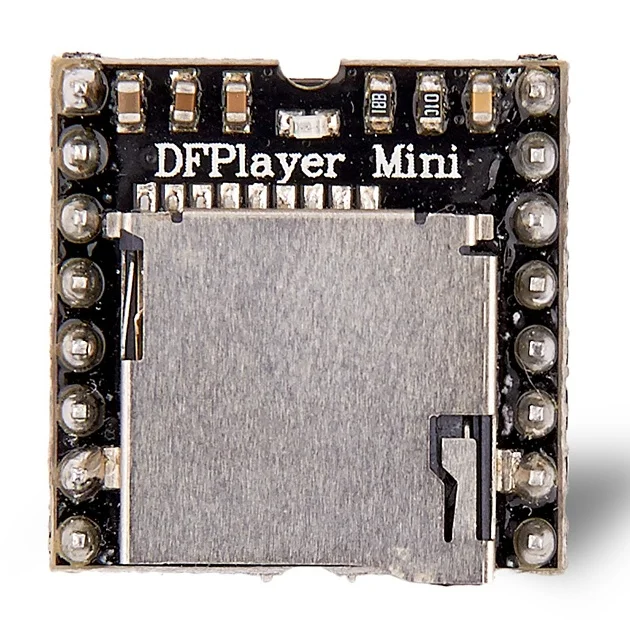
The DFPlayer Mini is a compact and low-cost MP3 module that allows you to play MP3 and WAV audio files from a microSD card without requiring an external decoder. It is an excellent choice for projects involving sound effects, music playback, or voice alerts. In this guide, we will learn how to interface DFPlayer Mini with Arduino UNO, explore its connections, commands, and libraries, and create a sample project to play audio files.
Features of DFPlayer Mini
- Supports MP3 and WAV audio formats.
- Works with microSD cards (FAT16 and FAT32, up to 32GB).
- Built-in 3W amplifier for direct speaker connection.
- Serial communication with Arduino via UART (TX/RX pins).
- Supports playback control (Next, Previous, Play, Pause, Volume Up/Down).
- Can be powered with 3.3V to 5V, making it compatible with Arduino.
Components Required
To follow along with this guide, you will need:
- Arduino UNO
- DFPlayer Mini MP3 Module
- MicroSD Card (FAT32 formatted, with MP3 files)
- Speaker (3W)
- Jumper Wires
- 1kΩ resistor (for RX pin voltage protection)
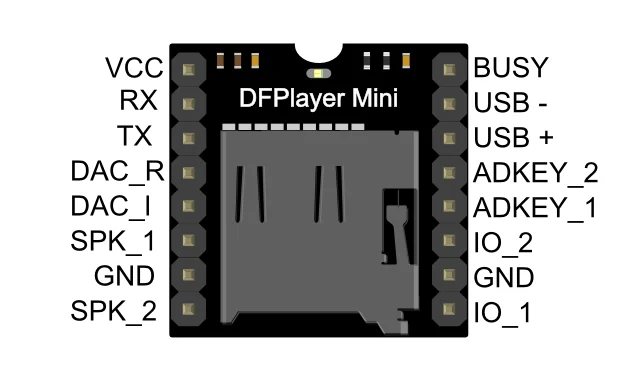
Pinout of DFPlayer Mini
The DFPlayer Mini has 16 pins, each serving a specific function. Below is a detailed DFPlayer pinout table covering all the available pins and their uses:
| Pin | Description | Note |
|---|---|---|
| VCC | Input Voltage | DC 3.2~5.0V; Type: DC 4.2V |
| RX | UART serial input | – |
| TX | UART serial output | – |
| DAC_R | Audio output right channel | Drives earphones and amplifiers |
| DAC_L | Audio output left channel | Drives earphones and amplifiers |
| SPK2 | Speaker- | Drives speakers (less than 3W) |
| GND | Ground | Power GND |
| SPK1 | Speaker+ | Drives speakers (less than 3W) |
| IO1 | Trigger port 1 | Short press to play previous (long press to decrease volume) |
| GND | Ground | Power GND |
| IO2 | Trigger port 2 | Short press to play next (long press to increase volume) |
| ADKEY1 | AD Port 1 | Trigger play first segment |
| ADKEY2 | AD Port 2 | Trigger play fifth segment |
| USB+ | USB+ DP | USB Port |
| USB- | USB- DM | USB Port |
| BUSY | Playing Status | Low = Playing, High = Not Playing |
For more detailed specifications visit DFRobot Wiki page.
Wiring DFPlayer Mini with Arduino
Connection Table
| DFPlayer Mini | Arduino UNO |
| VCC | 5V |
| GND | GND |
| RX | Arduino TX (Pin 11) |
| TX | Arduino RX (Pin 10) |
| SPK1 | Speaker + |
| SPK2 | Speaker – |
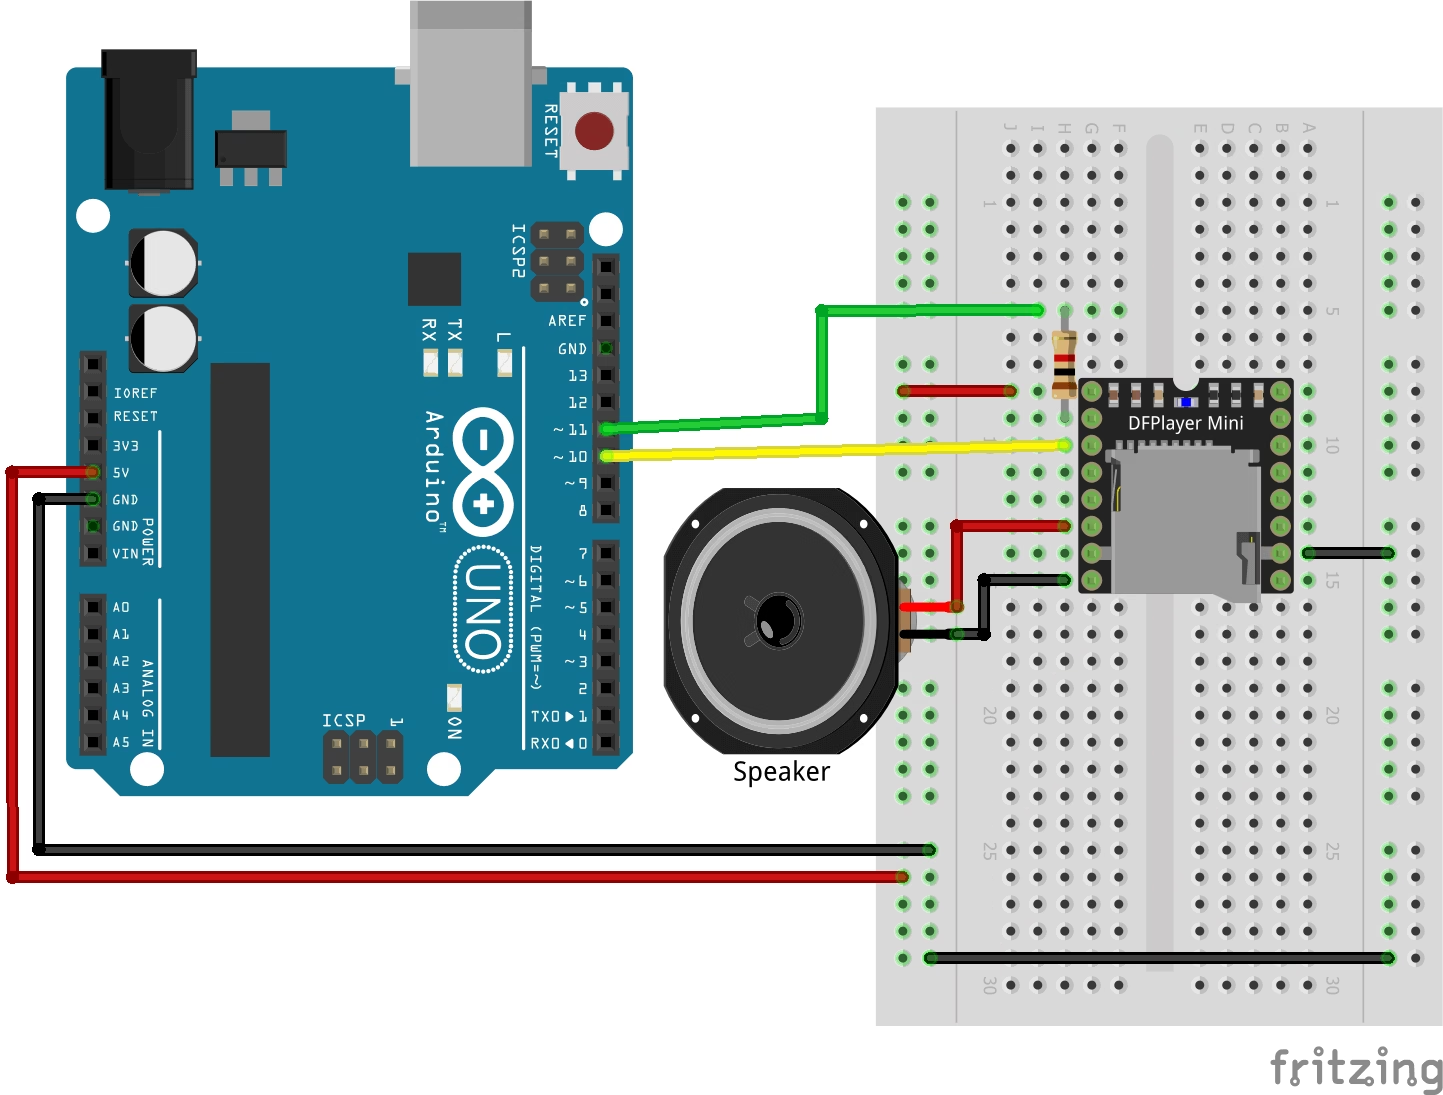
Here’s a description of the wiring in the circuit diagram:
- Power Connections:
- The VCC pin of the DFPlayer Mini is connected to the 5V pin of the Arduino.
- The GND pin of the DFPlayer Mini is connected to the GND pin of the Arduino.
- Communication Connections:
- The RX pin of the DFPlayer Mini is connected to Arduino’s D11 pin via a 1kΩ resistor (to protect the module from higher logic levels).
- The TX pin of the DFPlayer Mini is connected directly to Arduino’s D10 pin.
- Speaker Connections:
- The SPK1 pin of the DFPlayer Mini is connected to one terminal of the speaker.
- The SPK2 pin of the DFPlayer Mini is connected to the other terminal of the speaker.
- Additional Components:
- A 1kΩ resistor is placed in series with the RX pin to ensure safe voltage levels.
This setup allows the Arduino to communicate with the DFPlayer Mini via software serial while the module plays audio files stored on a microSD card.
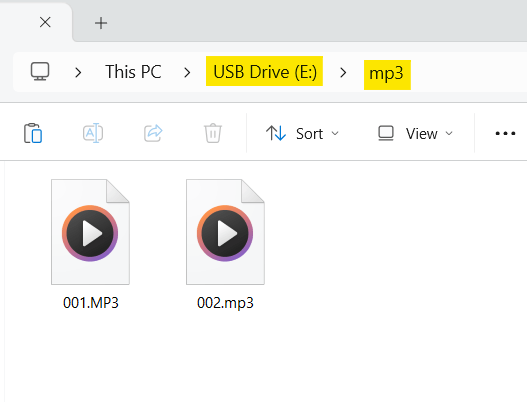
Preparing the microSD Card
- Format the microSD card to FAT32.
- Create a folder named
mp3. - Rename MP3 files in the format
0001.mp3,0002.mp3, etc. - Insert the SD card into DFPlayer Mini.
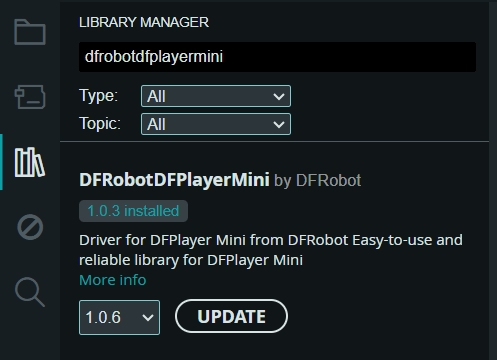
Installing DFPlayer Mini Library
To control the DFPlayer Mini with Arduino, we use the DFRobotDFPlayerMini library.
Steps:
- Open Arduino IDE.
- Go to Sketch → Include Library → Manage Libraries.
- Search for DFRobotDFPlayerMini and install it.
Arduino Code for Playing MP3 Files
Upload the following code to your Arduino UNO:
// DFPlayer Mini with Arduino by ArduinoYard
#include "SoftwareSerial.h"
#include "DFRobotDFPlayerMini.h"

SoftwareSerial mySerial(10, 11); // RX, TX
DFRobotDFPlayerMini myDFPlayer;

void setup() {
    Serial.begin(9600);
    mySerial.begin(9600);

    if (!myDFPlayer.begin(mySerial)) {
        Serial.println("DFPlayer Mini not detected!");
        while (true);
    }

    Serial.println("DFPlayer Mini ready!");
    myDFPlayer.volume(25);  // Set volume (0 to 30)
    Serial.println("Playing File 001.mp3");
    myDFPlayer.play(1);      // Play first MP3 file
}

void loop() {
}Code Explanation:
SoftwareSerial(10, 11): Uses pins 10 and 11 for serial communication.myDFPlayer.begin(mySerial): Initializes DFPlayer Mini.myDFPlayer.volume(25): Sets volume level.myDFPlayer.play(1): Plays the first MP3 file.
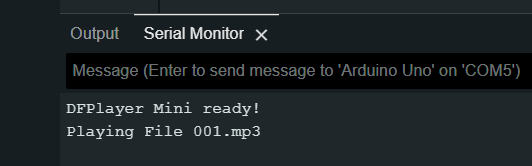
Demostration
Serial Monitor Output:
DEMO Video:
Additional DFPlayer Mini Commands
| Command | Function |
myDFPlayer.next(); | Play next track |
myDFPlayer.previous(); | Play previous track |
myDFPlayer.pause(); | Pause playback |
myDFPlayer.start(); | Resume playback |
myDFPlayer.volume(10); | Set volume (0-30) |
myDFPlayer.playFolder(2, 5); | Play file 5 from folder 2 |
Troubleshooting Tips
- DFPlayer Mini not detected?
- Check connections, especially RX/TX pins.
- Use a 1kΩ resistor for RX pin if using 5V logic.
- No sound from the speaker?
- Ensure MP3 files are named correctly (0001.mp3, 0002.mp3).
- Check speaker connections (SPK1, SPK2).
- Playback stops randomly?
- Format the microSD card properly.
- Use good quality SD cards (Sandisk recommended).
Conclusion
In this guide, we explored how to interface DFPlayer Mini with Arduino, wire it properly, and control playback using code. You can extend this project by adding buttons, sensors, or Bluetooth control for a smart audio system.
Next Project Idea
After learning how to use the DFPlayer Mini, you can try building a Voice Controlled Arduino MP3 Player. Check out this detailed project guide: Arduino Voice Controlled MP3 Player
Do you have any questions or want additional features? Let us know in the comments! 🚀
If you found this guide helpful, consider subscribing to our YouTube channel for more tutorials! 🎥