DHT11 and DHT22 are widely used sensors for measuring temperature and humidity. These sensors are popular due to their simplicity, affordability, and compatibility with Arduino. In this tutorial, we’ll cover everything you need to know about interfacing these sensors with Arduino, including example code for both DHT11 and DHT22.
What Are DHT11 and DHT22 Sensors?
DHT sensors are digital temperature and humidity sensors. While DHT11 is an entry-level sensor, DHT22 offers higher accuracy and a wider range. Both sensors are commonly used in weather monitoring systems, IoT projects, and home automation setups.
DHT11 vs. DHT22: Key Differences
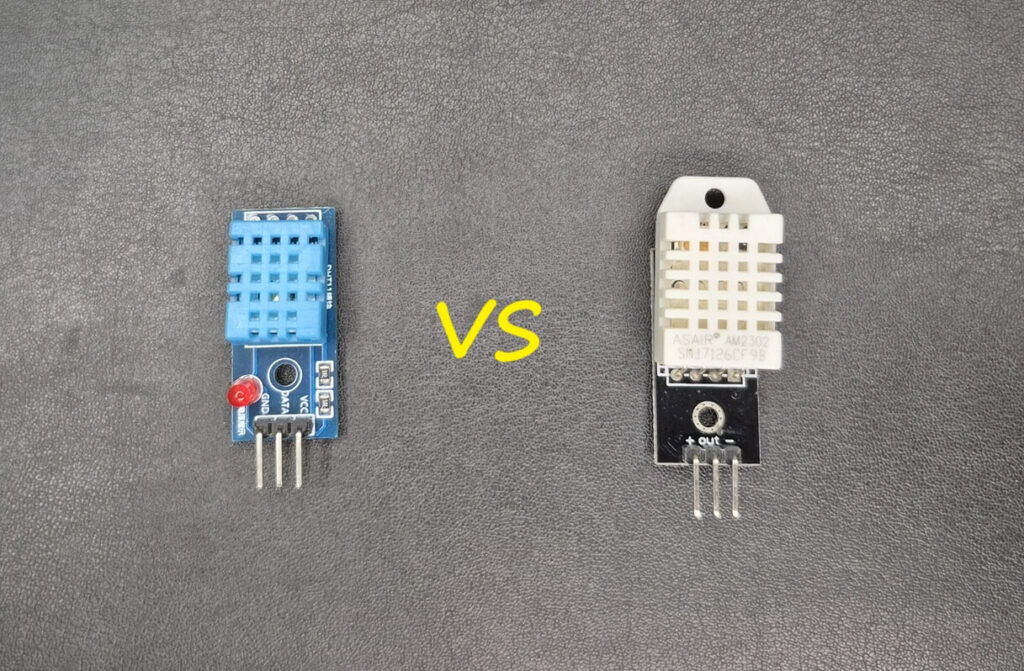
| Feature | DHT11 | DHT22 |
|---|---|---|
| Temperature Range | 0-50 °C | -40 to 80 °C |
| Temperature Accuracy | ±2 °C | ±0.5 °C |
| Humidity Range | 20-90% RH | 0-100% RH |
| Humidity Accuracy | ±5% RH | ±2-5% RH |
| Sampling Rate | 1 Hz (1 second) | 0.5 Hz (2 seconds) |
| Cost | Cheaper | Slightly more expensive |
For detailed technical specifications, refer to the DHT11 datasheet and DHT22 datasheet.
Required Components
- Arduino Uno (or any compatible board)
- DHT11 or DHT22 sensor
- 10kΩ pull-up resistor (optional)
- Breadboard and jumper wires
DHT11 and DHT22 Pinout
Both sensors have three or four pins. For this tutorial, we’ll focus on the three-pin variant:
| Pin | Description |
| VCC | Power (3.3V or 5V) |
| GND | Ground |
| DATA | Data Output |
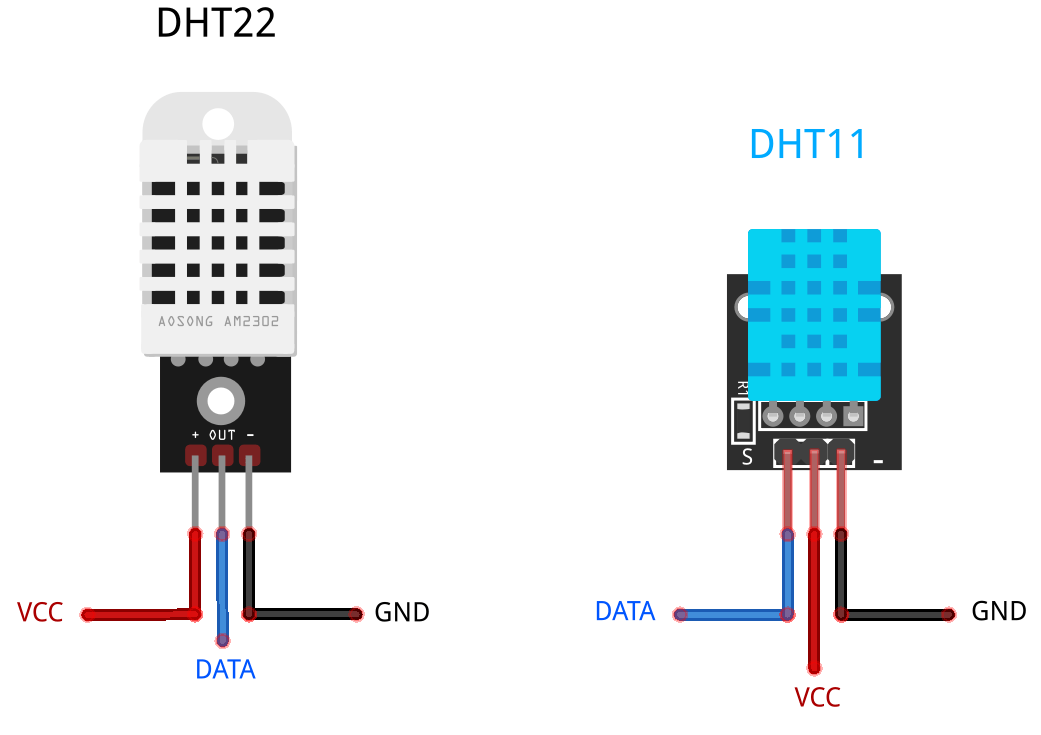
Note:
- The VCC pin supports 3.3V or 5V for both DHT11 and DHT22 sensors.
- Always check your sensor’s datasheet to confirm the pinout.
- Observe your specific module carefully, as different manufacturers may use varying pin orientations and configurations.
Circuit Diagram
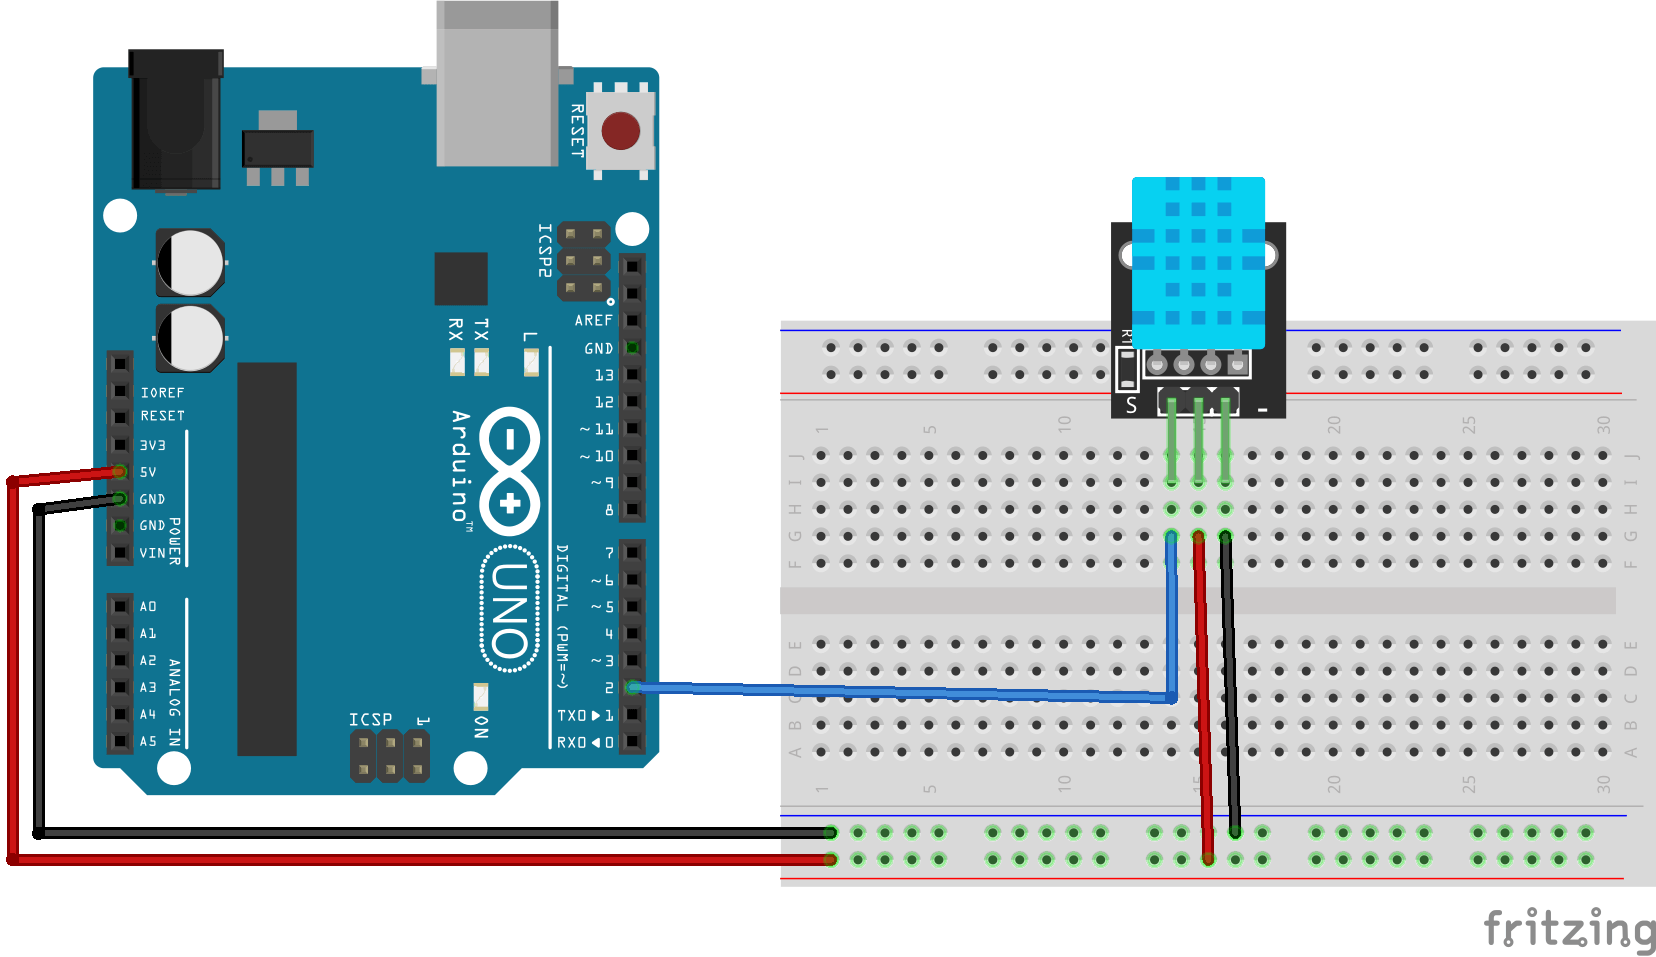
To interface the DHT sensor with Arduino, connect the pins as follows:
| DHT Pin | Connection |
| VCC | 5V on Arduino |
| GND | GND on Arduino |
| Data | Digital Pin 2 |
For DHT11:
For DHT22:
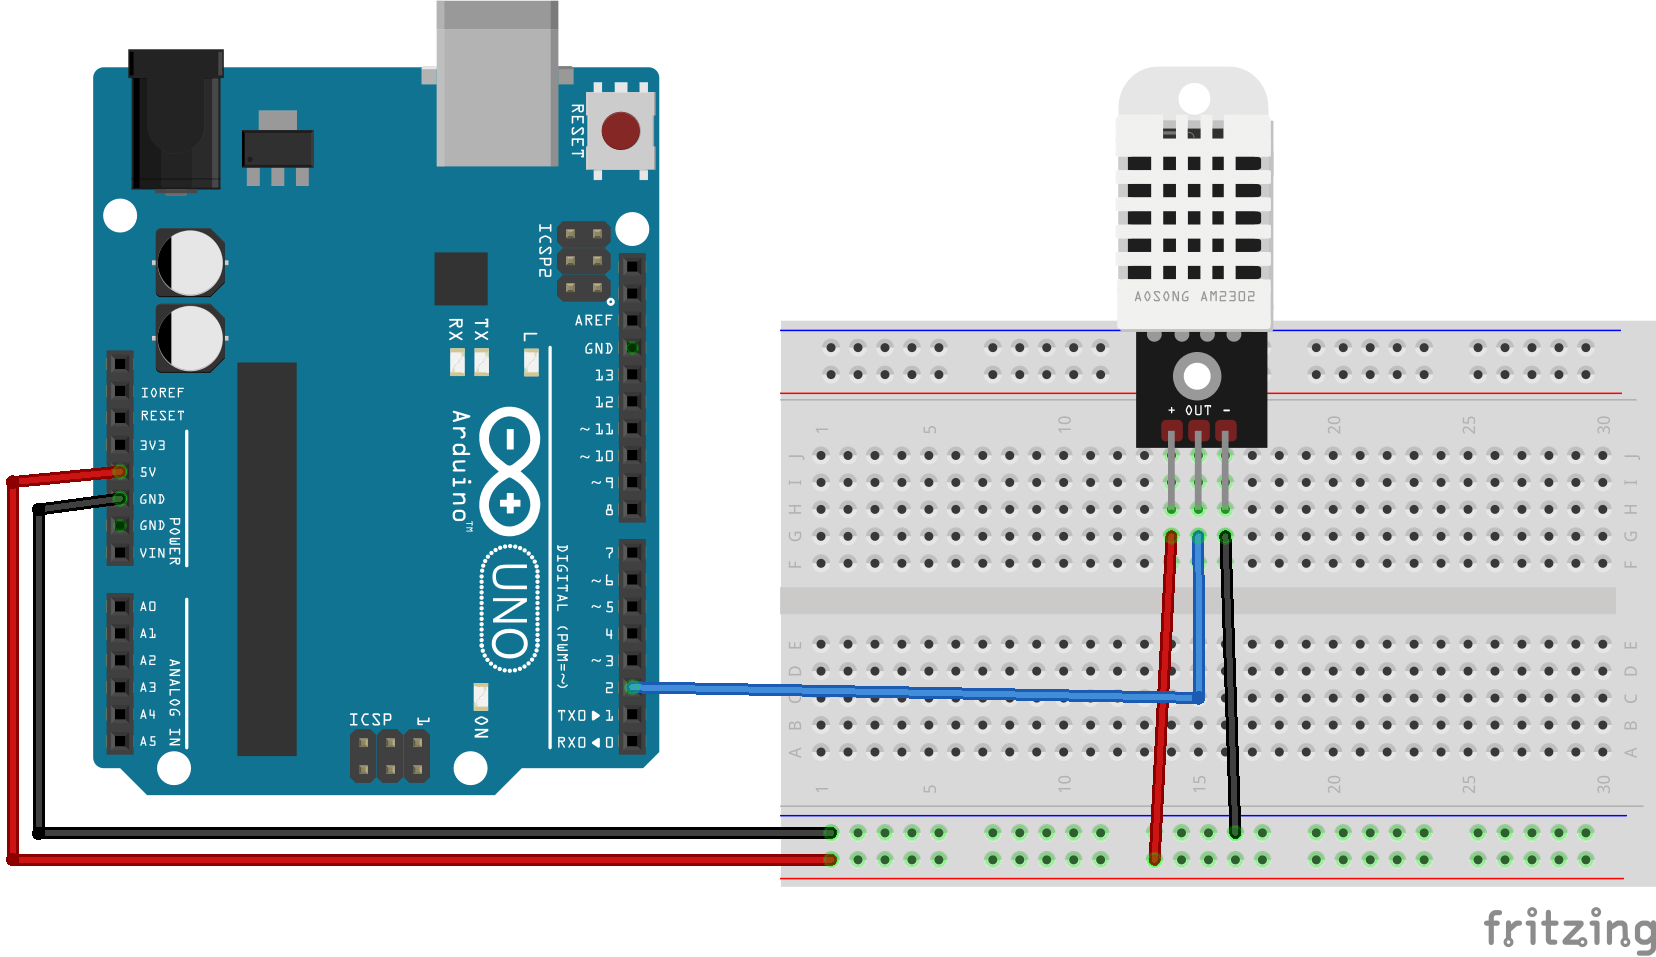
Installing the DHT Library
Before using the DHT sensors, you need to install the DHT library in the Arduino IDE:
- Open the Arduino IDE and go to Sketch > Include Library > Manage Libraries…
- In the Library Manager, search for DHT Sensor Library by Adafruit.
- Click Install and wait for the installation to complete.
For more details or manual installation, you can visit the Adafruit DHT Sensor Library GitHub repository.
Code Example: Reading Temperature and Humidity with DHT Sensors
Below is a simple and efficient code snippet for reading temperature and humidity using either the DHT11 or DHT22 sensor with Arduino.
// Interfacing DHT11 and DHT22 Sensors with Arduino by ArduinoYard
#include "DHT.h"

// Define DHT type and pin
#define DHTPIN 2       // Data pin connected to digital pin 2
#define DHTTYPE DHT11  // DHT11 or DHT22 (change according to the sensor you are using)

DHT dht(DHTPIN, DHTTYPE);

void setup() {
  Serial.begin(9600);
  dht.begin();
  Serial.println("DHT Arduino Tutorial: Reading Temperature and Humidity");
}

void loop() {
  float temperature = dht.readTemperature(); // Read temperature in Celsius
  float humidity = dht.readHumidity();      // Read humidity percentage

  // Check if any reads failed
  if (isnan(temperature) || isnan(humidity)) {
    Serial.println("Failed to read from DHT sensor!");
    return;
  }

  // Print values to Serial Monitor
  Serial.print("Temperature: ");
  Serial.print(temperature);
  Serial.println(" °C");

  Serial.print("Humidity: ");
  Serial.print(humidity);
  Serial.println(" %");

  delay(2000); // Wait 2 seconds before reading again
}How This Code Works
- Library Inclusion:
TheDHT.hlibrary simplifies reading data from the sensor. Make sure to install it via the Arduino IDE Library Manager. - Sensor Type and Pin Definition:
ChangeDHTTYPEtoDHT22if you’re using a DHT22 sensor. The data pin is connected to digital pin 2 in this example. - Reading Data:
dht.readTemperature()reads the temperature in Celsius.dht.readHumidity()reads the relative humidity percentage.- The
isnan()function ensures valid readings.
- Delay Between Readings:
The delay of 2 seconds ensures proper sampling, matching the sensor’s specifications.
Output Example
Hardware:
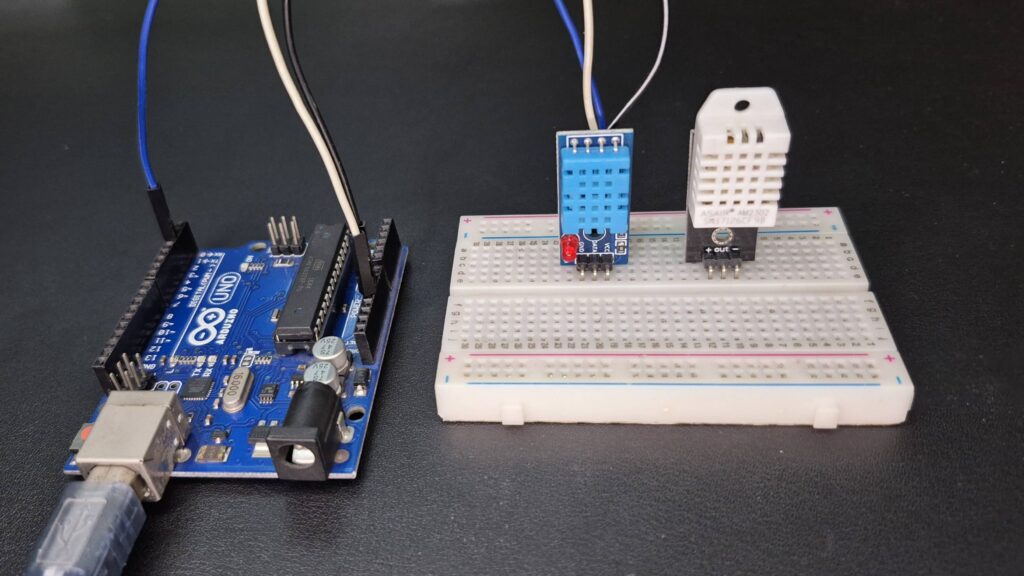
When the code runs, the Arduino Serial Monitor will display:
DHT11:
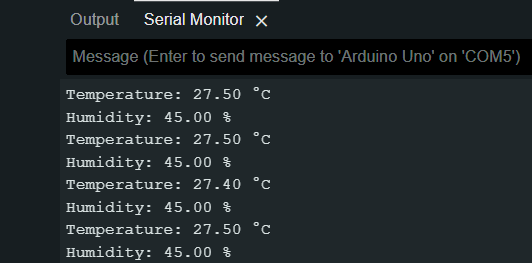
DHT22:
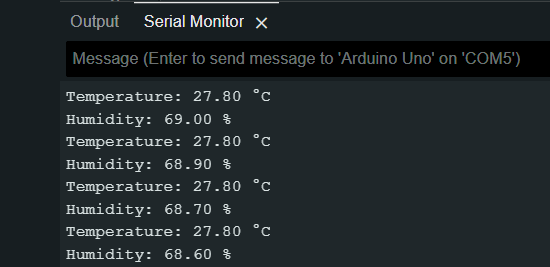
As you can see the DHT22 output is more precise and stable compared to the DHT11 sensor.
Error Handling and Troubleshooting Tips
- Error: Failed to read from DHT sensor!
Ensure the wiring is correct and stable. Check the sensor pinout and verify the pull-up resistor. - Random Values:
- Avoid long jumper wires as they may cause signal interference.
- Verify the power supply voltage.
- No Output in Serial Monitor:
Confirm that the Serial Monitor baud rate matches the code (9600in this case).
Practical Applications of DHT Sensors
- Weather Monitoring Systems:
Measure temperature and humidity in real-time for weather forecasting. - IoT Devices:
Integrate with IoT platforms to monitor environmental conditions remotely. - HVAC Systems:
Use the data for smart heating, ventilation, and air conditioning systems. - Greenhouses:
Maintain optimal conditions for plant growth by monitoring humidity and temperature.
Conclusion
With this detailed guide, you’ve learned how to interface both DHT11 and DHT22 sensors with Arduino to measure temperature and humidity. We covered everything from installing the necessary library to troubleshooting common issues. This tutorial serves as a foundation for building more advanced projects, such as IoT weather stations. In future articles, we’ll explore additional sensors and how to integrate them with Arduino. Stay tuned and happy coding!
