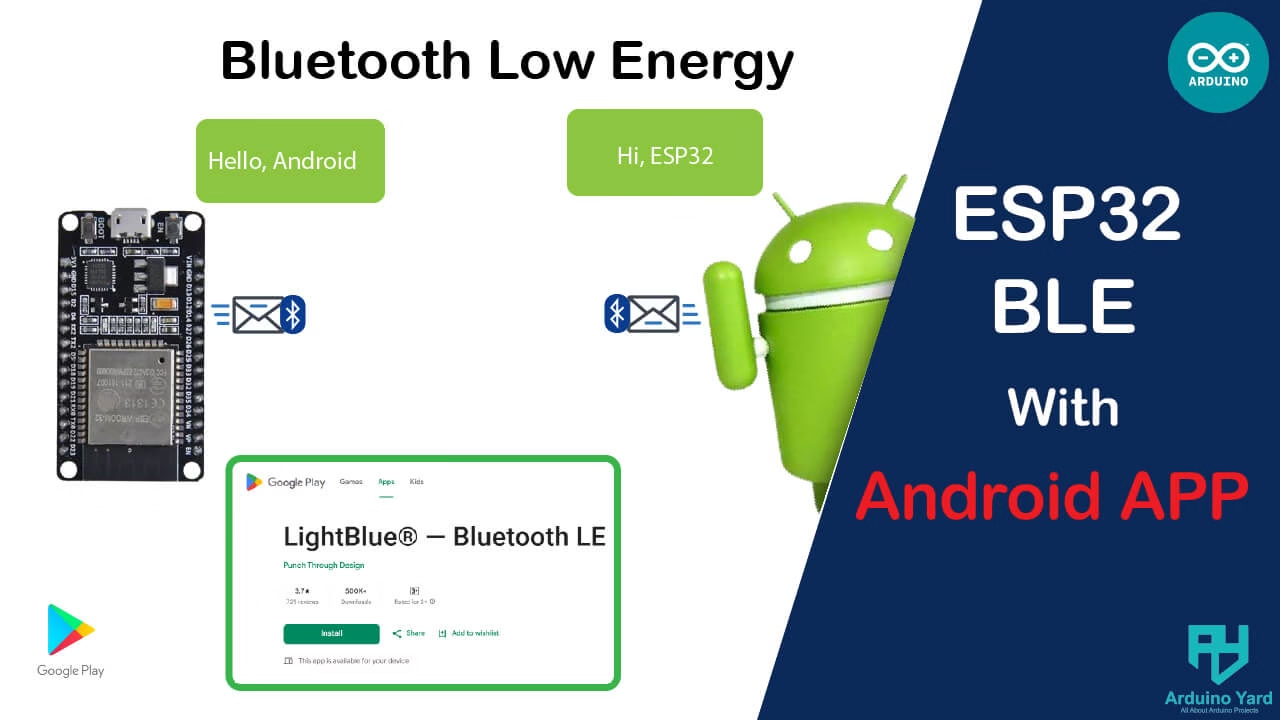
In this tutorial, we’ll learn how to set up ESP32 BLE with Android phone using a free Bluetooth app. The ESP32 is famous for its powerful wireless features like Wi-Fi, Classic Bluetooth, and Bluetooth Low Energy (BLE).
What is BLE?
BLE stands for Bluetooth Low Energy. It is a modern version of Bluetooth designed for low power consumption and simple wireless communication. BLE is mainly used in devices like:
- Fitness trackers (Fitbit, smartwatches)
- Wireless health monitors
- Smart locks and smart home devices
- IoT (Internet of Things) gadgets
BLE is ideal when you need occasional short data exchange without draining the battery.
BLE vs Classic Bluetooth
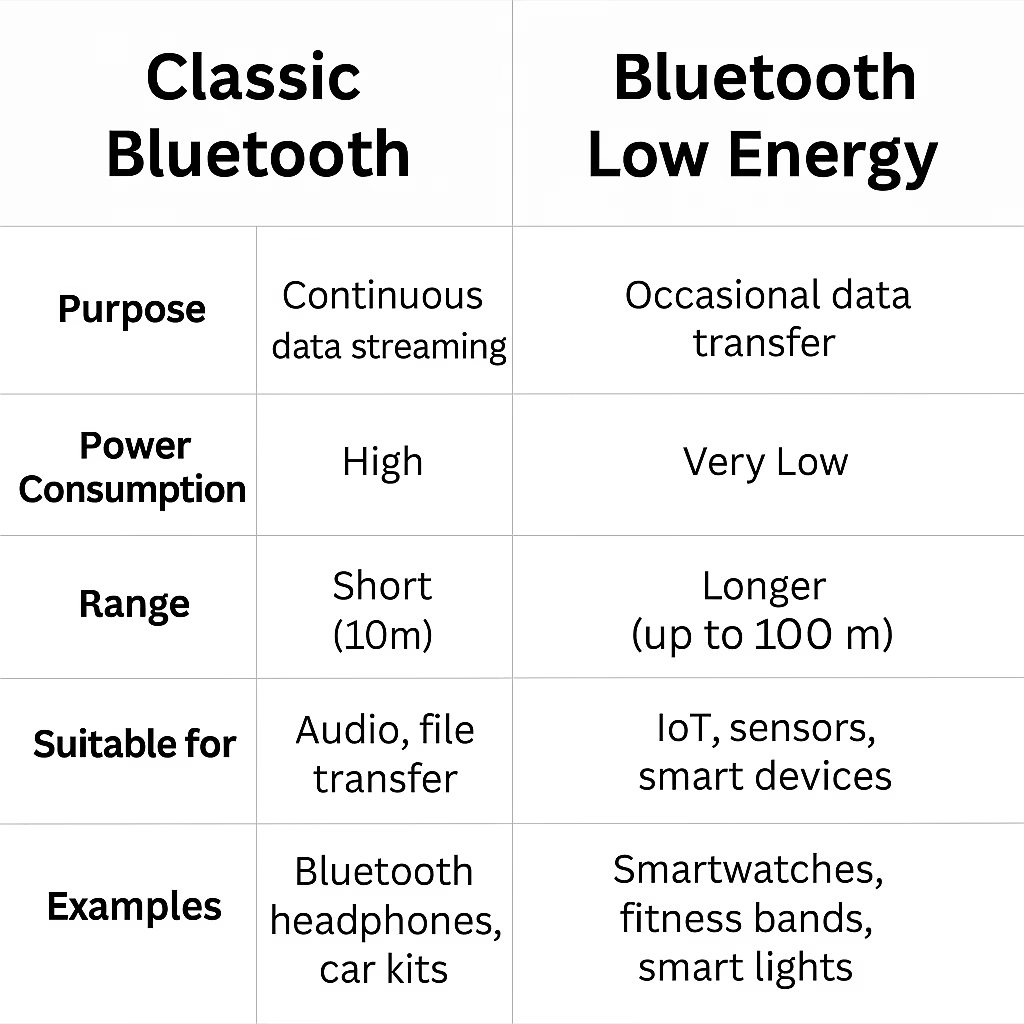
- Classic Bluetooth is better for audio and big data transfer (like headphones).
- BLE is better for small, quick communication (like reading sensor data or sending commands).
Now that you understand BLE, let’s move on to testing it with your ESP32!
What You Will Need
- ESP32 Dev Board
- Arduino IDE installed on your PC
- Android smartphone with Bluetooth enabled
- A USB cable for programming
- A free app like nRF Connect or LightBlue installed on your Android
Step 1: Set up Arduino IDE for ESP32
If you haven’t installed ESP32 support, You should visit:
How To Install ESP32 And ESP8266 Boards In Arduino IDE (Step-by-Step Guide) – ArduinoYard
Step 2: Write and Upload ESP32 BLE Sketch
Here’s a simple example that turns your ESP32 into a BLE UART (Serial over BLE) device:
//ESP32 BLE with Android
#include <BLEDevice.h>
#include <BLEServer.h>
#include <BLEUtils.h>
#include <BLE2902.h>

BLEServer *pServer = NULL;
BLECharacteristic *pTxCharacteristic;
bool deviceConnected = false;

#define SERVICE_UUID        "6E400001-B5A3-F393-E0A9-E50E24DCCA9E"
#define CHARACTERISTIC_UUID_RX "6E400002-B5A3-F393-E0A9-E50E24DCCA9E"
#define CHARACTERISTIC_UUID_TX "6E400003-B5A3-F393-E0A9-E50E24DCCA9E"

class MyServerCallbacks: public BLEServerCallbacks {
  void onConnect(BLEServer* pServer) {
    deviceConnected = true;
  }

  void onDisconnect(BLEServer* pServer) {
    deviceConnected = false;
  }
};

class MyCallbacks: public BLECharacteristicCallbacks {
void onWrite(BLECharacteristic *pCharacteristic) {
  String rxValue = pCharacteristic->getValue().c_str();  // Use Arduino String
  if (rxValue.length() > 0) {
    Serial.println("Received via BLE:");
    Serial.println(rxValue);
  }
}
};

void setup() {
  Serial.begin(115200);

  BLEDevice::init("ESP32_BLE_UART"); // BLE device name

  pServer = BLEDevice::createServer();
  pServer->setCallbacks(new MyServerCallbacks());

  BLEService *pService = pServer->createService(SERVICE_UUID);

  pTxCharacteristic = pService->createCharacteristic(
                        CHARACTERISTIC_UUID_TX,
                        BLECharacteristic::PROPERTY_NOTIFY
                      );
  pTxCharacteristic->addDescriptor(new BLE2902());

  BLECharacteristic * pRxCharacteristic = pService->createCharacteristic(
                                            CHARACTERISTIC_UUID_RX,
                                            BLECharacteristic::PROPERTY_WRITE
                                          );
  pRxCharacteristic->setCallbacks(new MyCallbacks());

  pService->start();

  pServer->getAdvertising()->start();
  Serial.println("BLE UART service started, waiting for connection...");
}

void loop() {
  if (deviceConnected) {
    // Optional: send some test data every second
    pTxCharacteristic->setValue("Hello from ESP32!");
    pTxCharacteristic->notify();
    delay(1000);
  }
}
Upload this code to your ESP32.
Step 3: Install a BLE App on Android
You can use any of these free apps but i’m using LightBlue:
- nRF Connect for Mobile
- LightBlue (recommended)
Download from Google Play Store.
Step 4: Connect Android to ESP32
- Open LightBlue (or your BLE app).
- It will scan the devices automatically.
- Look for a device called ESP32_BLE_UART.
- Tap Connect.
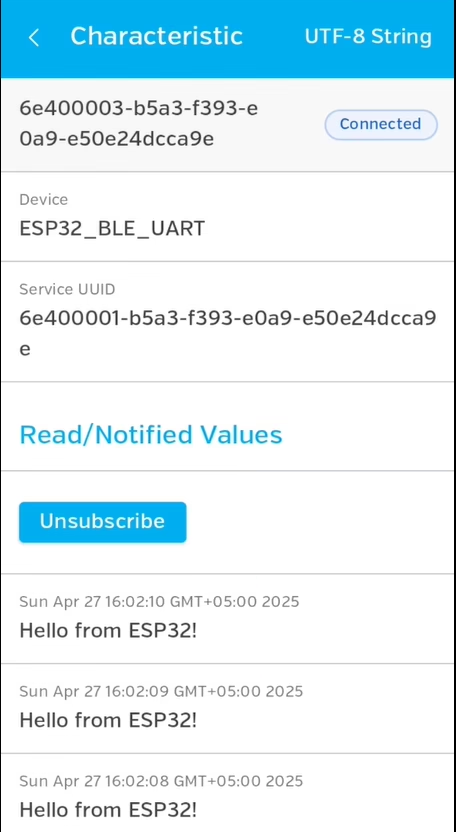
- After connection, you will see the UART Service and Characteristics.
- Tap on the RX characteristic to Write data to the ESP32.
- Tap on the TX characteristic to Read/Notify data from the ESP32.
Here is the detailed video:
You should now be able to send messages from your Android to ESP32 and receive replies from ESP32.
Data received in APP:
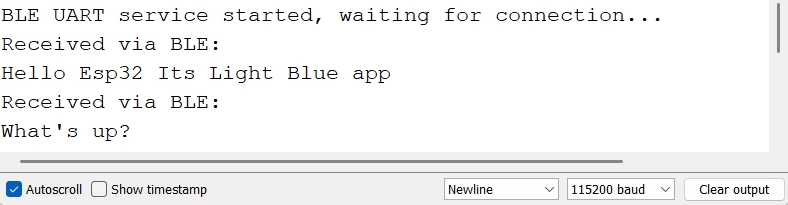
Data received in ESP32 Serial Monitor:
If You Face Connection Problems
- Make sure Bluetooth is turned on and Location permission is allowed (required for BLE).
- Reset your ESP32 after uploading.
- Stay close to the ESP32 during testing (~2-3 meters).
Final Result of configuring ESP32 BLE WITH ANDROID
You have successfully turned your ESP32 into a BLE UART device, allowing wireless communication with any Android phone!
BLE is very low power, fast, and easy to integrate into projects like:
- Remote sensors
- IoT gadgets
- Home automation
- Health devices
Conclusion
Testing ESP32 BLE with Android is simple, powerful and very useful. Instead of complicated pairing like Classic Bluetooth, BLE just needs a quick connection through any BLE app. You can now expand this project to build BLE-controlled robots, BLE data loggers, or smartphone-based IoT dashboards!