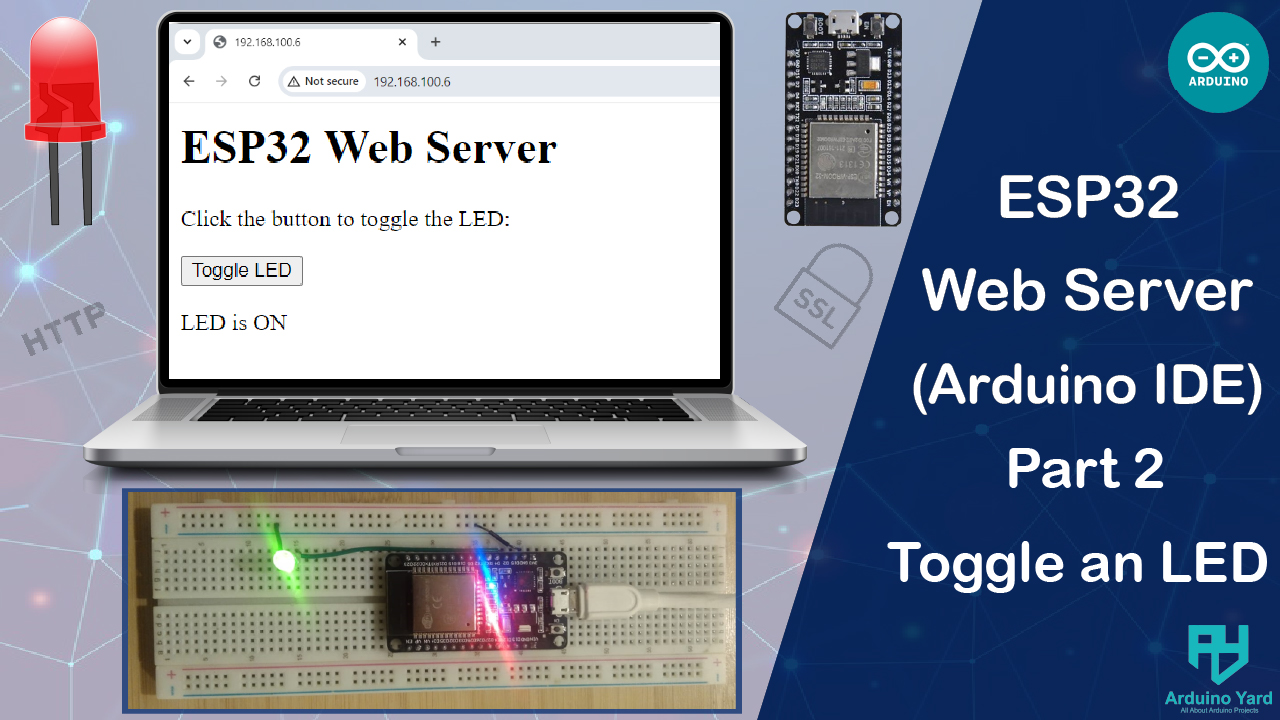
In this tutorial, you’ll learn how to create an ESP32 webserver LED control project, where you can toggle an LED using a button on a webpage. By setting up a simple web server on the ESP32, you’ll be able to control an LED wirelessly through your browser. This project is perfect for beginners exploring IoT concepts or for anyone looking to integrate ESP32 with interactive web interfaces. Let’s dive into building this practical and engaging project!
What You’ll Learn
- Setting up an asynchronous web server with ESPAsyncWebServer library.
- Creating a simple webpage to toggle an LED on and off.
- Using JavaScript for dynamic webpage updates.
What You’ll Need
- ESP32 development board
- USB cable
- An LED
- Breadboard and jumper wires
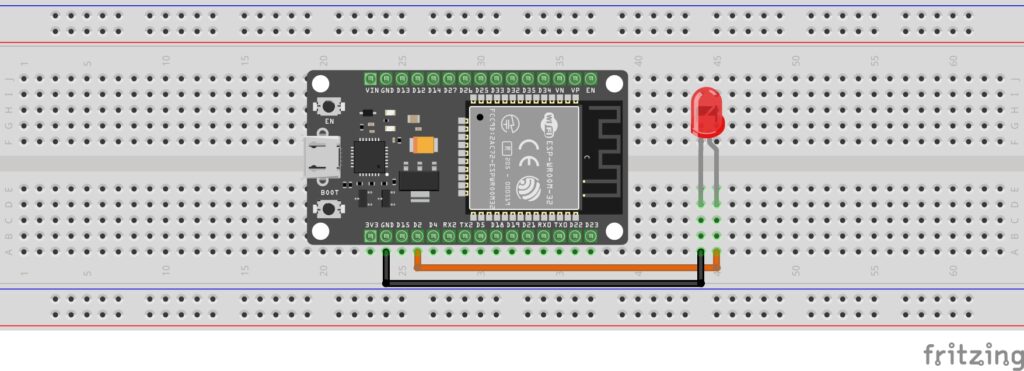
Circuit Diagram

- Connect the longer leg (positive) of the LED to GPIO 2 on the ESP32.
- Connect the shorter leg (negative) of the LED to the ESP32’s GND pin.
Circuit Setup

Step 1: Install Required Libraries
- Open Arduino IDE.
- Go to Sketch > Include Library > Manage Libraries.
- Search for ESPAsyncWebServer and install it.

- Search for AsyncTCP and install it.

Step 2: Write the Code
Below is the complete code for your ESP32 Webserver LED Control project, allowing you to create a web server and toggle an LED using a webpage button:
// ESP32 Webserver LED Control: Toggle an LED Using a Webpage by ArduinoYard
#include <WiFi.h>
#include <AsyncTCP.h>
#include <ESPAsyncWebServer.h>

// Replace with your Wi-Fi credentials
const char* ssid = "Your_SSID";
const char* password = "Your_PASSWORD";

// Create an AsyncWebServer object on port 80
AsyncWebServer server(80);

// LED pin
const int ledPin = 2;

// LED state
bool ledState = false;

// HTML for the webpage
const char webpage[] PROGMEM = R"rawliteral(
<!DOCTYPE html>
<html>
<head>
  <title>ESP32 LED Control</title>
</head>
<body>
  <h1>ESP32 Web Server</h1>
  <p>Click the button to toggle the LED:</p>
  <button onclick="toggleLED()">Toggle LED</button>
  <p id="status">LED is OFF</p>
  <script>
    function toggleLED() {
      fetch('/toggle').then(response => response.text()).then(status => {
        document.getElementById('status').innerText = "LED is " + status;
      });
    }
  </script>
</body>
</html>
)rawliteral";

void setup() {
  Serial.begin(9600);

  // Initialize LED pin
  pinMode(ledPin, OUTPUT);
  digitalWrite(ledPin, LOW);

  // Connect to Wi-Fi
  Serial.println("Connecting to Wi-Fi...");
  WiFi.begin(ssid, password);
  while (WiFi.status() != WL_CONNECTED) {
    delay(1000);
    Serial.print(".");
  }
  Serial.println("\nWi-Fi connected!");
  Serial.print("IP Address: ");
  Serial.println(WiFi.localIP());

  // Serve the HTML webpage
  server.on("/", HTTP_GET, [](AsyncWebServerRequest *request) {
    request->send_P(200, "text/html", webpage);
  });

  // Handle LED toggle
  server.on("/toggle", HTTP_GET, [](AsyncWebServerRequest *request) {
    ledState = !ledState;  // Toggle LED state
    digitalWrite(ledPin, ledState ? HIGH : LOW);
    request->send(200, "text/plain", ledState ? "ON" : "OFF");
  });

  // Start the server
  server.begin();
  Serial.println("Web server started.");
}

void loop() {
  // No loop code is required
}
HTML code explanation and customization
1. Header Section
<h1>ESP32 Web Server</h1>
<p>Click the button to toggle the LED:</p>
Explanation:
<h1>: Displays a large, prominent heading on the webpage. Here, it announces the purpose of the server.<p>: Represents a paragraph of text providing instructions.
Customization:
- Replace the heading and instructions with descriptions for your application, such as “Control Fan Speed” or “Monitor Room Temperature.”
2. Button
<button onclick="toggleLED()">Toggle LED</button>
Explanation:
<button>: Creates a clickable button.onclick="toggleLED()": Adds a JavaScript event listener to trigger thetoggleLED()function when the button is clicked.
Customization:
- Change the button label (
Toggle LED) to match your application, like “Turn On Fan” or “Start Motor.” - Add multiple buttons to control multiple devices. For example:
<button onclick="toggleFan()">Toggle Fan</button> <button onclick="toggleLight()">Toggle Light</button>3. Status Display
<p id="status">LED is OFF</p>Explanation:
<p id="status">: This paragraph element has an ID ofstatus, allowing JavaScript to dynamically update its content.- Initially displays “LED is OFF.”
Customization:
- Change the initial message to something relevant to your application.
- Add multiple
<p>elements to show the status of different devices:
<p id="fanStatus">Fan is OFF</p> <p id="lightStatus">Light is OFF</p>5. JavaScript for Interactivity
<script>
  function toggleLED() {
    fetch('/toggle').then(response => response.text()).then(status => {
      document.getElementById('status').innerText = "LED is " + status;
    });
  }
</script>
Explanation:
<script>: Embeds JavaScript code in the webpage.function toggleLED():- Uses the
fetch()API to send an HTTP GET request to the/toggleendpoint on the ESP32. - Processes the server’s response (the LED’s state) and updates the
<p>element with IDstatus.
- Uses the
Customization:
- Modify the
toggleLED()function to interact with different server endpoints:
function toggleFan() { fetch('/toggleFan').then(response => response.text()).then(status => { document.getElementById('fanStatus').innerText = "Fan is " + status; }); }- Add error handling for better robustness:
function toggleDevice(endpoint, statusId) { fetch(endpoint).then(response => { if (!response.ok) throw new Error("Network error"); return response.text(); }).then(status => { document.getElementById(statusId).innerText = "Status: " + status; }).catch(err => { console.error("Error:", err); }); }How to Use This HTML for Custom Applications
- Change the Heading and Text: Update the
<h1>and<p>elements to reflect the purpose of your project. - Add New Buttons: Use additional
<button>elements for controlling multiple devices or triggering different actions. - Update JavaScript: Write separate JavaScript functions for each device or action. Use unique IDs for each device’s status.
- Dynamic Updates: Use the
fetch()API to request data from your ESP32 (e.g., sensor readings) and update the webpage dynamically.
Example: Adding a Temperature Display
<p id="temperature">Temperature: Loading...</p>
<script>
  function updateTemperature() {
    fetch('/temperature').then(response => response.text()).then(temp => {
      document.getElementById('temperature').innerText = "Temperature: " + temp + " °C";
    });
  }
  setInterval(updateTemperature, 5000); // Update every 5 seconds
</script>
This HTML is highly modular and can be adapted for a wide range of IoT applications. With minimal changes, you can build interactive web interfaces for monitoring and controlling devices via the ESP32.
Step 3: Upload the Code
- Open the Arduino IDE and paste the above code.
- Replace
Your_SSIDandYour_PASSWORDwith your Wi-Fi credentials. - Select ESP32 Dev Module under Tools > Board.
- Choose the correct COM port under Tools > Port.
- Click Upload to flash the code onto your ESP32.
Step 4: Access the Web Server
- Open the Serial Monitor (baud rate: 9600) to find the ESP32’s IP address.
- Enter the IP address in your browser (e.g.,
http://192.168.1.10). - You’ll see a webpage with a button labeled Toggle LED and the LED status.
How It Works
- ESPAsyncWebServer: This library creates an asynchronous server that handles HTTP requests without blocking the main program.
- Dynamic Webpage: JavaScript is used to send requests to the
/toggleendpoint, allowing dynamic updates without refreshing the page. - LED Control: The
/togglehandler toggles the LED state and sends the updated state back to the browser.
Expected Output
Serial Monitor Output:

Webpage:
- Displays a button to toggle the LED and shows the current LED state.
- Clicking the button updates the state dynamically.
LED Behavior:
- When the button is clicked, the LED toggles on or off.
Common Issues
- No Wi-Fi Connection: Double-check your SSID and password.
- No Response from ESP32: Ensure your ESP32 and browser are connected to the same network.
- Upload Errors: Press and hold the BOOT button on the ESP32 during the upload process if necessary.
Next Steps
You can extend this project to:
- Control multiple LEDs or devices.
- Add sliders or input fields to adjust brightness or parameters.
- Integrate sensor readings into the webpage.
With this tutorial, you’ve learned how to set up an ESP32 Webserver LED Control project, creating an interactive web server to toggle an LED using a webpage. This project serves as a solid foundation for developing more advanced IoT applications. In our next tutorial, we’ll show you how to control the PWM value on an ESP32 pin using a slider on a webpage. Stay tuned and happy coding!
If you missed the Part 1 of getting started on ESP32 Web Server:
Getting Started With The ESP32 Web Server: Hello World! – ArduinoYard
