
In this tutorial, you’ll learn how to set up a ESP32 WebSocket Server and use it to send real-time sensor data (temperature and humidity from a DHT11 sensor) to a web client. By the end, you’ll have a solid foundation to build more advanced IoT applications.
What is a WebSocket?
WebSocket is a powerful communication protocol that enables real-time, bidirectional communication between a client (e.g., a web browser) and a server (e.g., an ESP32). Unlike HTTP, which requires constant polling, WebSocket allows the server to push updates to the client instantly. This makes it ideal for IoT projects like real-time sensor monitoring, home automation, and interactive dashboards.
Learn, how is a WebSocket different from HTTP?
What is web socket and how it is different from the HTTP? – GeeksforGeeks
What You’ll Learn
- How to set up a ESP32 WebSocket server.
- How to send real-time sensor data to a web client.
- How to create a simple web interface to display the data.
Components Required
- ESP32 Development Board
- DHT11 Temperature and Humidity Sensor
- Breadboard and Jumper Wires
- Micro-USB Cable
Wiring Diagram

- Connect the VCC pin of the DHT11 to the VIN pin of the ESP32.
- Connect the GND pin of the DHT11 to the GND pin of the ESP32.
- Connect the Data pin of the DHT11 to GPIO 27 of the ESP32.
Setting Up the ESP32 WebSocket Server
1. Installing ESP32 boards in arduino IDE
Before starting, make sure you have the ESP32 boards installed in your Arduino IDE:
How To Install ESP32 And ESP8266 Boards In Arduino IDE (Step-by-Step Guide) – ArduinoYard
2. Install Required Libraries
Make sure you have the following libraries installed in your Arduino IDE:
In Arduino IDE, Go to Sketch > Include Library > Manage Libraries.
- Search for DHT Sensor Library (for reading data from the DHT11).

- Search for WebSockets (for WebSocket communication).
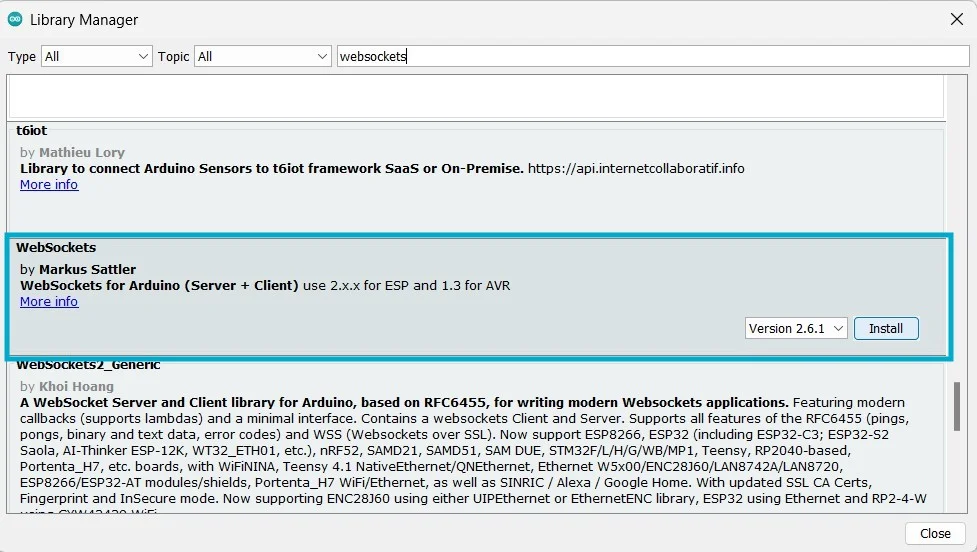
- Search for ESPAsyncWebServer (for handling HTTP and WebSocket requests).
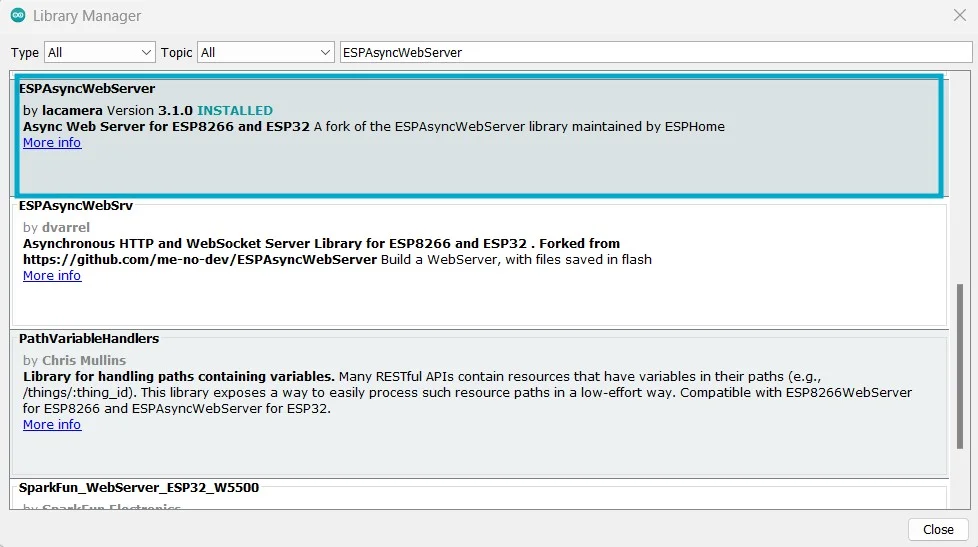
- Search for AsyncTCP and install it.

3. WebSocket Server Code
Here’s the complete code to set up the ESP32 WebSocket server and integrate the DHT11 sensor:
//ESP32 WebSocket Server Example by ArduinoYard
#include <WiFi.h>
#include <WebSocketsServer.h>
#include <ESPAsyncWebServer.h>
#include <DHT.h>
// Replace with your network credentials
// Replace with your network credentials
const char* ssid = "YOUR_WIFI_SSID";
const char* password = "YOUR_WIFI_PASSWORD";
// DHT11 setup
#define DHTPIN 27
#define DHTTYPE DHT11
DHT dht(DHTPIN, DHTTYPE);
// WebSocket and Web Server setup
WebSocketsServer webSocket = WebSocketsServer(81);
AsyncWebServer server(80);
// HTML and JavaScript for the web interface
const char* htmlPage = R"rawliteral(
<!DOCTYPE html>
<html>
<head>
<title>ESP32 WebSocket</title>
</head>
<body>
<h1>Real-Time Sensor Data</h1>
<p>Temperature: <span id="temperature">--</span> C</p>
<p>Humidity: <span id="humidity">--</span> %</p>
<script>
const ws = new WebSocket('ws://' + window.location.hostname + ':81/');
ws.onmessage = function(event) {
const data = JSON.parse(event.data);
document.getElementById('temperature').innerText = data.temperature;
document.getElementById('humidity').innerText = data.humidity;
};
</script>
</body>
</html>
)rawliteral";
// Variables to store sensor data
float temperature = 0;
float humidity = 0;
// Function to read sensor data
void readSensorData() {
temperature = dht.readTemperature();
humidity = dht.readHumidity();
if (isnan(temperature) || isnan(humidity)) {
Serial.println("Failed to read from DHT sensor!");
return;
}
Serial.printf("Temperature: %.2f °C, Humidity: %.2f %%\n", temperature, humidity);
}
// WebSocket event handler
void onWebSocketEvent(uint8_t num, WStype_t type, uint8_t* payload, size_t length) {
switch (type) {
case WStype_DISCONNECTED:
Serial.printf("[%u] Disconnected!\n", num);
break;
case WStype_CONNECTED:
Serial.printf("[%u] Connected!\n", num);
break;
case WStype_TEXT:
// Handle incoming text messages (if needed)
break;
}
}
void setup() {
// Start Serial Monitor
Serial.begin(9600);
// Initialize DHT sensor
dht.begin();
// Connect to Wi-Fi
WiFi.begin(ssid, password);
while (WiFi.status() != WL_CONNECTED) {
delay(1000);
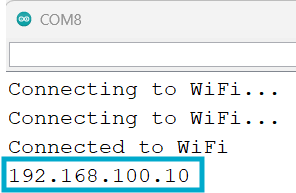
Serial.println("Connecting to WiFi...");
}
Serial.println("Connected to WiFi");
Serial.println(WiFi.localIP());
// Start WebSocket server
webSocket.begin();
webSocket.onEvent(onWebSocketEvent);
// Serve HTML page
server.on("/", HTTP_GET, [](AsyncWebServerRequest* request) {
request->send(200, "text/html", htmlPage);
});
server.begin();
}
void loop() {
webSocket.loop(); // Handle WebSocket events
// Read sensor data
readSensorData();
// Send sensor data to all connected WebSocket clients
String data = "{\"temperature\":" + String(temperature) + ",\"humidity\":" + String(humidity) + "}";
webSocket.broadcastTXT(data);
delay(2000); // Update data every 2 seconds
}
How It Works
- The ESP32 connects to Wi-Fi and starts a WebSocket server on port 81.
- The DHT11 sensor reads temperature and humidity data every 2 seconds.
- The WebSocket server sends the sensor data to the connected client (web browser) in JSON format.
- The web interface displays the real-time data without refreshing the page.
Testing the Web Interface
- Upload the code to your ESP32.
- Open the Serial Monitor to get the ESP32’s IP address.
- Open a web browser and navigate to
http://<ESP32_IP>. - You should see the temperature and humidity values updating in real-time after getting the connected message for WebSocket. It will take few seconds to connect.

Customization
This ESP32 WebSocket server and web interface can be customized for various IoT applications. Here are some ideas:
1. Adding More Sensors
Let’s say you want to add a light sensor (LDR) to measure light intensity.
Changes in the Code:
a. Modify readSensorData():
/ Add LDR pin
#define LDR_PIN 34

// Add light intensity variable
float lightIntensity = 0;

void readSensorData() {
  temperature = dht.readTemperature();
  humidity = dht.readHumidity();
  lightIntensity = analogRead(LDR_PIN); // Read light intensity
  if (isnan(temperature) || isnan(humidity)) {
    Serial.println("Failed to read from DHT sensor!");
    return;
  }
  Serial.printf("Temperature: %.2f °C, Humidity: %.2f %%, Light: %.2f\n", temperature, humidity, lightIntensity);
}
b. Update WebSocket Data Format:
String data = "{\"temperature\":" + String(temperature) +
              ",\"humidity\":" + String(humidity) +
              ",\"light\":" + String(lightIntensity) + "}";
webSocket.broadcastTXT(data);
c. Update JavaScript to Display Light Intensity:
<p>Light Intensity: <span id="light">--</span></p>
<script>
  const ws = new WebSocket('ws://' + window.location.hostname + ':81/');
  ws.onmessage = function(event) {
    const data = JSON.parse(event.data);
    document.getElementById('temperature').innerText = data.temperature;
    document.getElementById('humidity').innerText = data.humidity;
    document.getElementById('light').innerText = data.light;
  };
</script>
2. Controlling ESP32 Outputs
Let’s add an LED that can be controlled from the web interface.
Changes in the Code:
a. Add LED Pin:
#define LED_PIN 2  // GPIO 2 for the LED
bool ledState = false; // Track LED state
b. Update onWebSocketEvent() to Handle Commands:
void onWebSocketEvent(uint8_t num, WStype_t type, uint8_t* payload, size_t length) {
  switch (type) {
    case WStype_DISCONNECTED:
      Serial.printf("[%u] Disconnected!\n", num);
      break;
    case WStype_CONNECTED:
      Serial.printf("[%u] Connected!\n", num);
      break;
    case WStype_TEXT:
      // Handle incoming commands
      String message = (char*)payload;
      if (message == "ON") {
        digitalWrite(LED_PIN, HIGH);
        ledState = true;
      } else if (message == "OFF") {
        digitalWrite(LED_PIN, LOW);
        ledState = false;
      }
      // Send updated LED state to the client
      String response = "{\"ledState\":" + String(ledState ? "true" : "false") + "}";
      webSocket.sendTXT(num, response);
      break;
  }
}
c. Add LED Control Buttons to the HTML:
<button onclick="sendCommand('ON')">Turn LED ON</button>
<button onclick="sendCommand('OFF')">Turn LED OFF</button>
<p>LED State: <span id="ledState">OFF</span></p>
<script>
  const ws = new WebSocket('ws://' + window.location.hostname + ':81/');
  ws.onmessage = function(event) {
    const data = JSON.parse(event.data);
    if (data.ledState !== undefined) {
      document.getElementById('ledState').innerText = data.ledState ? "ON" : "OFF";
    }
  };

  function sendCommand(command) {
    ws.send(command);
  }
</script>
3. Enhancing the Web Interface
Let’s use Bootstrap to improve the design of the web interface.
Changes in the HTML:
a. Include Bootstrap CSS:
<!-- wp:preformatted -->
<pre class="wp-block-preformatted"><!DOCTYPE html>
<html>
<head>
  <title>ESP32 WebSocket Server</title>
  <link href="https://cdn.jsdelivr.net/npm/bootstrap@5.3.0/dist/css/bootstrap.min.css" rel="stylesheet">
</head>
<body class="container mt-5">
  <h1 class="text-center">Real-Time Sensor Data</h1>
  <div class="card mt-3">
    <div class="card-body">
      <p class="card-text">Temperature: <span id="temperature">--</span> °C</p>
      <p class="card-text">Humidity: <span id="humidity">--</span> %</p>
      <p class="card-text">Light Intensity: <span id="light">--</span></p>
    </div>
  </div>
  <div class="mt-3">
    <button class="btn btn-primary" onclick="sendCommand('ON')">Turn LED ON</button>
    <button class="btn btn-danger" onclick="sendCommand('OFF')">Turn LED OFF</button>
    <p class="mt-2">LED State: <span id="ledState">OFF</span></p>
  </div>
  <script>
    const ws = new WebSocket('ws://' + window.location.hostname + ':81/');
    ws.onmessage = function(event) {
      const data = JSON.parse(event.data);
      if (data.temperature !== undefined) {
        document.getElementById('temperature').innerText = data.temperature;
      }
      if (data.humidity !== undefined) {
        document.getElementById('humidity').innerText = data.humidity;
      }
      if (data.light !== undefined) {
        document.getElementById('light').innerText = data.light;
      }
      if (data.ledState !== undefined) {
        document.getElementById('ledState').innerText = data.ledState ? "ON" : "OFF";
      }
    };

    function sendCommand(command) {
      ws.send(command);
    }
  </script>
</body>
</html>
4. Adding Security
Let’s add basic user authentication to restrict access to the web interface.
Changes in the Code:
a. Add Username and Password:
const char* username = "admin";
const char* password = "password";
b. Update server.on() to Require Authentication:
server.on("/", HTTP_GET, [](AsyncWebServerRequest* request) {
  if (!request->authenticate(username, password)) {
    return request->requestAuthentication();
  }
  request->send(200, "text/html", htmlPage);
});
c. Update HTML to Prompt for Credentials:
When you access the web interface, the browser will prompt for a username and password.
Optional: SSL/TLS for Secure WebSocket (WSS)
To enable secure WebSocket communication (WSS), you’ll need to:
- Generate SSL/TLS certificates.
- Use the
WiFiClientSecurelibrary instead ofWiFiClient. - Update the WebSocket server to use the secure client.
This is more advanced and requires additional setup, such as using a certificate authority (CA) or self-signed certificates.
Conclusion
In this tutorial, you learned how to set up a ESP32 WebSocket server, use it to send real-time sensor data to a web client and how can we customize this code to improve it and use it for different applications. This is a powerful foundation for building IoT projects that require real-time communication.
Thank You!!!
IN CASE YOU HAVE MISSED PREVIOUS ESP32 WEBSERVER PARTS:
Part 1: Getting Started With The ESP32 Web Server: Hello World! – ArduinoYard
Part 2: ESP32 Webserver LED Control: Toggle An LED Using A Webpage – ArduinoYard
Part 3: ESP32 Webserver PWM Control: Control Brightness Of An LED Using A Webpage – ArduinoYard
Part 4: ESP32 Webserver Alarm System: Building An Alarm System Using A Webpage – ArduinoYard
Part 5: ESP32 OTA Firmware Update: Update The ESP32 Firmware Using A Local Webpage – ArduinoYard‘
Part 6: ESP32 WiFi Manager: Creating A Simple WiFi Manager With Static IP Support – ArduinoYard