
Introduction
In this article, we will learn how to send WhatsApp messages from an ESP32 microcontroller using ESP32 Whatsapp CallMeBot. We will utilize a serial monitor to send messages. Since WhatsApp does not provide direct API access for free, we will use a third-party service like CallMeBot to bridge the ESP32 with WhatsApp.
If you want to explore CallMeBot API service, you can visit: CallMeBot API – Telegram Audio Calls and WhatsApp Messages
Components Required
- ESP32 development board
- USB cable
- Computer with Arduino IDE installed
- Active WhatsApp account
Setting Up CallMeBot API
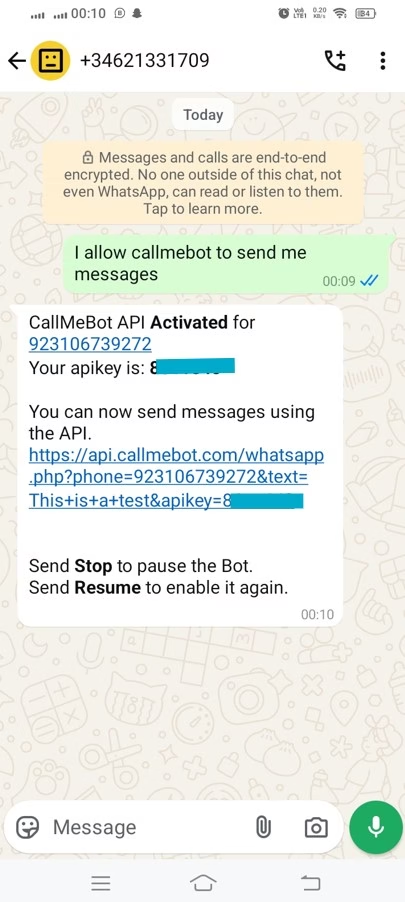
CallMeBot is a free service that allows sending WhatsApp messages via an API. To use CallMeBot:
- Save the number +34 621 331 709 in your WhatsApp contacts. (Name it as you wish) — please double-check the number on the CallMeBot website, because it sometimes changes.
- Send the following message:
I allow callmebot to send me messages - Wait for a reply with your unique API key.
INSTALLING THE ESP32 BOARDS IN Arduino IDE
If your Arduino IDE doesn’t have ESP32 boards installed, here is the guide:
How To Install ESP32 And ESP8266 Boards In Arduino IDE (Step-by-Step Guide) – ArduinoYard
Code to Send WhatsApp Messages
Upload the following code to your ESP32 using the Arduino IDE:
#include <WiFi.h>
#include <HTTPClient.h>

const char* ssid = "Your_SSID";
const char* password = "Your_PASSWORD";
const char* phoneNumber = "Your_Phone_Number";
const char* apiKey = "Your_API_Key";

void setup() {
    Serial.begin(115200);
    WiFi.begin(ssid, password);
    Serial.print("Connecting to WiFi");
    while (WiFi.status() != WL_CONNECTED) {
        Serial.print(".");
        delay(1000);
    }
    Serial.println("\nConnected to WiFi");
}

void loop() {
    if (Serial.available()) {
        String message = Serial.readStringUntil('\n');
        sendMessage(message);
    }
}

void sendMessage(String message) {
    if (WiFi.status() == WL_CONNECTED) {
        HTTPClient http;
        String url = "https://api.callmebot.com/whatsapp.php?phone=" + String(phoneNumber) + "&text=" + message + "&apikey=" + String(apiKey);
        url.replace(" ", "%20");

        http.begin(url);
        int httpCode = http.GET();
        if (httpCode > 0) {
            Serial.println("Message Sent Successfully");
        } else {
            Serial.println("Error Sending Message");
        }
        http.end();
    }
}
How It Works
- In Code, add your
- WiFi SSID
- WiFi Password
- Your Whatsapp number where you have created Bot
- The ESP32 Whatsapp CallmeBot API Key.
- Select right COM port and ESP32 Board.
- Upload the code.
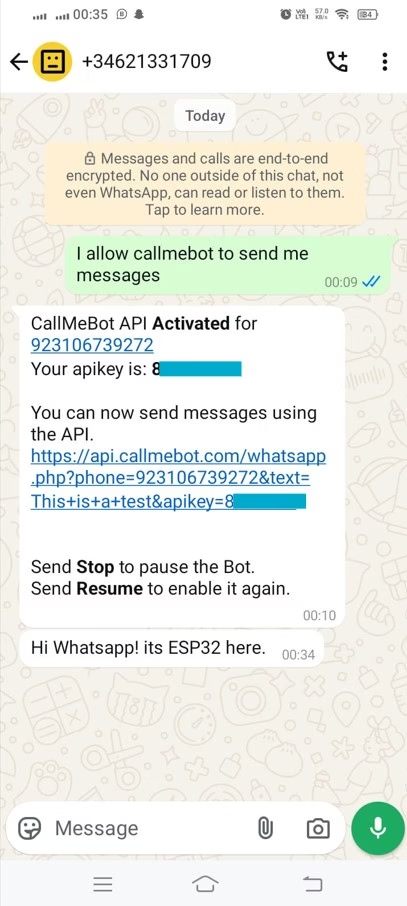
- Open Serial Monitor, type the message and press Send.
- It will Send the input as a WhatsApp message using CallMeBot API.
ESP32 Serial Monitor

ESP32 WHATSAPP CALLMEBOT
Applications and Use Cases
This setup can be used in various IoT applications, including:
- Home Automation: Send alerts when motion is detected, doors are opened, or sensors trigger an event.
- Industrial Monitoring: Notify users about temperature fluctuations, pressure changes, or machine faults.
- Weather Stations: Send periodic weather updates, including temperature and humidity data.
- Smart Agriculture: Send notifications for soil moisture levels or automated irrigation systems.
- Security Systems: Alert users about unauthorized access, fire alarms, or gas leak detections.
- Remote Monitoring: Useful for keeping track of important data in remote locations without direct internet access.
Conclusion
In this tutorial, we successfully sent WhatsApp messages using an ESP32 via a serial monitor. This setup is useful for IoT applications that need remote notifications via WhatsApp. The ability to send alerts and notifications in real-time makes it a valuable addition to smart systems and automation projects.
Here are some Exciting ESP32 projects you might be interested in:
DIY Home Security: Arduino Intruder Alarm System With ESP32 & Blynk Cloud Integration – ArduinoYard
Web Based Weather Station With ESP32 And DHT11 Sensor – ArduinoYard
ESP32 Parking System: Creating A Simple Web Based Parking Space Monitoring System – ArduinoYard