Table of Contents
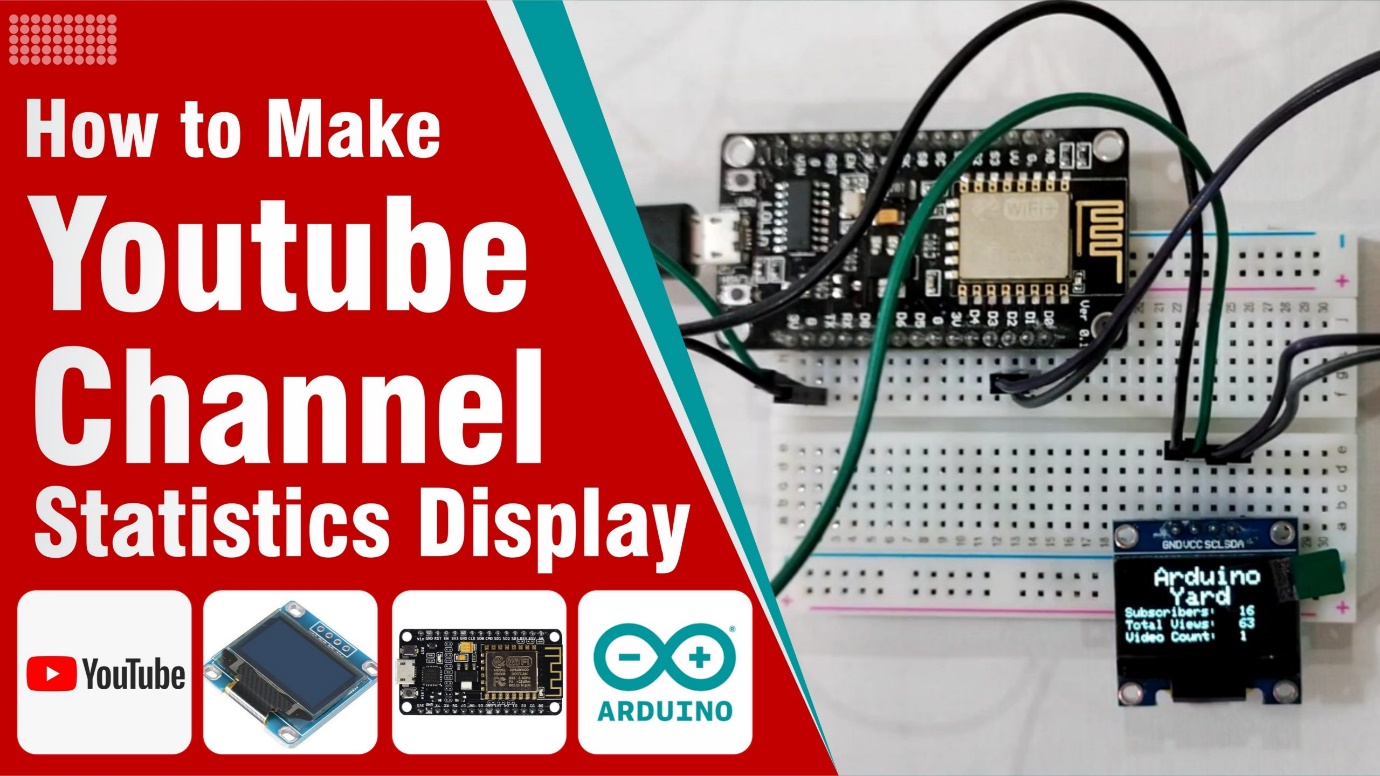
In this project we are goin to make a YouTube Channel Statistics Display with NodeMCU(ESP8266). In this project we make you familiar using and OLED with NodeMCU and using Google Cloud Console . We are reading the channel statistics using the Google API service and displaying that data to the OLED. This project can be very useful to continuously monitor your Channel’s growth.
The link to enable YouTube API on Google Cloud Console: https://console.cloud.google.com/apis/dashboard
Link to get you Channel ID: https://www.youtube.com/account_advanced
Components List
The components we will require for this project are:
• NodeMCU (ESP8266)
• 0.96 Inch I2C OLED Display
• Breadboard
• Jumper Wires
Wiring Diagram
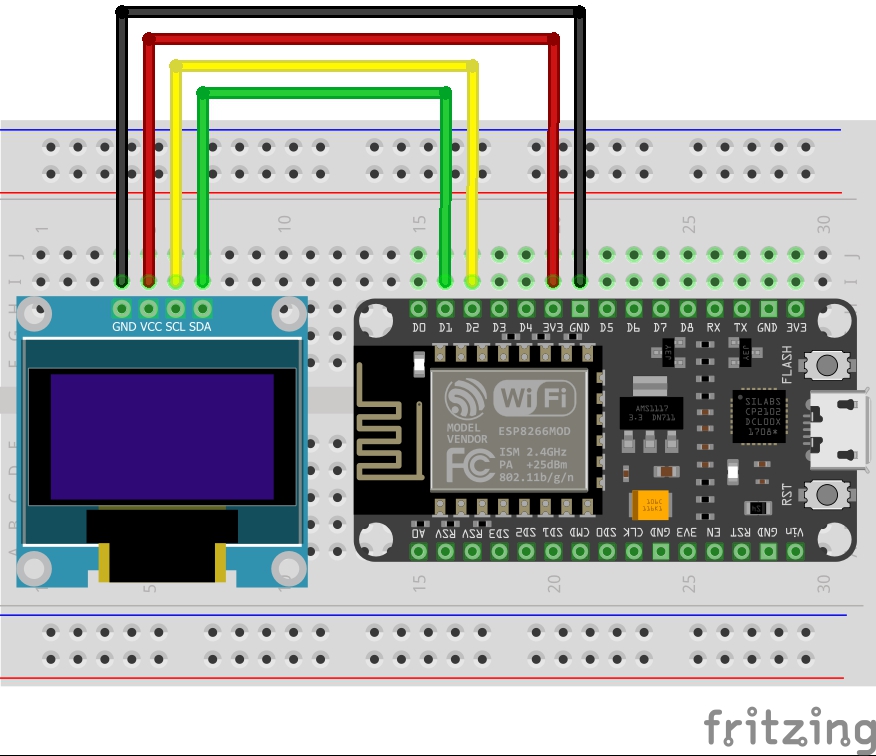
Wire up the circuit for the YouTube Channel Statistics Display with NodeMCU according to the below diagram:
Code
Here is the complete code for YouTube Channel Statistics Display with NodeMCU:
/* ----------------------------
Visit ArduinoYard.com for more details.
Connections:
NODEMCU OLED DISPLAY
GND - - - -> GND
3.3V - - - -> Vcc
SDA - - - -> D1
SCL - - - -> D2
// ---------------------------- */
//Add following libraries from sketch->library manager
#include <ESP8266WiFi.h>
#include <WiFiClientSecure.h>
#include <Wire.h>
#include <Adafruit_GFX.h>
#include <Adafruit_SSD1306.h>
#include <YoutubeApi.h>
#include <ArduinoJson.h>
#define SCREEN_WIDTH 128 // OLED display width, in pixels
#define SCREEN_HEIGHT 64 // OLED display height, in pixels
// Declaration for an SSD1306 display connected to I2C (SDA, SCL pins)
#define OLED_RESET -1 // Reset pin # (or -1 if sharing Arduino reset pin)
Adafruit_SSD1306 display(SCREEN_WIDTH, SCREEN_HEIGHT, &Wire, OLED_RESET);
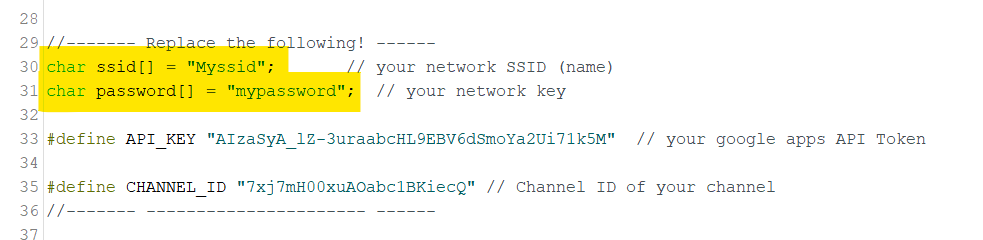
//------- Replace the following! ------
char ssid[] = "Myssid"; // your network SSID (name)
char password[] = "mypassword"; // your network key
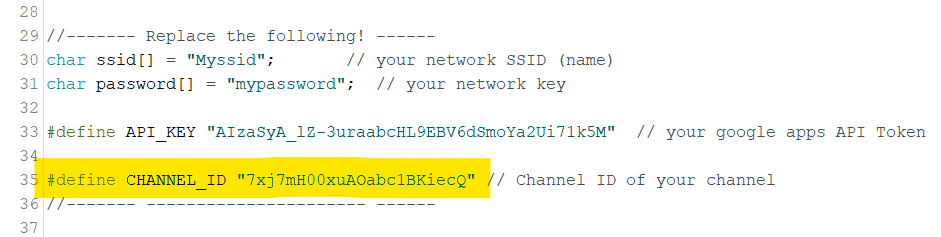
#define API_KEY "AIzaSyA_lZ-3uraabcHL9EBV6dSmoYa2Ui71k5M" // your google apps API Token
#define CHANNEL_ID "7xj7mH00xuAOabc1BKiecQ" // Channel ID of your channel
//------- ---------------------- ------
WiFiClientSecure client;
YoutubeApi api(API_KEY, client);
unsigned long timeBetweenRequests = 6000; // delay between request for new data 6000 means 6 seconds because this time is in milliseconds
unsigned long nextRunTime; // variable to initialize timer
long subs = 0;
void setup() {
Serial.begin(115200); // Open serial monitor at 115200 baud
Wire.begin(D1, D2); // Initializing I2C pins for OLED display to work
// SSD1306_SWITCHCAPVCC = generate display voltage from 3.3V internally
if (!display.begin(SSD1306_SWITCHCAPVCC, 0x3C)) { // Address 0x3C for 128x64
Serial.println(F("FAILED TO DISPLAY"));
for (;;); // Don't proceed, loop forever
}
display.clearDisplay(); // Clear the display and ram
display.display();
display.clearDisplay();
display.setTextSize(2); //Set the text size
display.setTextColor(SSD1306_WHITE);
display.setCursor(0, 0); //Set the display cursor position
display.print(" YouTube"); //Set the display text
display.setCursor(0, 20);
display.print(" Channel");
display.setCursor(0, 40);
display.print("Statistics");
display.display();
// Set WiFi to station mode and disconnect from an AP if it was Previously connected
delay(1000);
WiFi.mode(WIFI_STA); //set the mode for ESP8266 as station mode so it connects to a wifi netowork as client device
WiFi.disconnect(); //disconnect from prev connection and restart
delay(100);
// Attempt to connect to Wifi network:
Serial.print("Connecting Wifi: ");
Serial.println(ssid);
WiFi.begin(ssid, password);
while (WiFi.status() != WL_CONNECTED) {
Serial.print(".");
delay(500);
}
Serial.println("");
Serial.println("WiFi connected");
Serial.println("IP address: ");
IPAddress ip = WiFi.localIP();
Serial.println(ip);
// Required if you are using ESP8266 V2.5 or above
client.setInsecure();
// If you want to enable some extra debugging
api._debug = true;
}
void loop() {
if (millis() > nextRunTime) //when timer approaches 6 seconds
{
if (api.getChannelStatistics(CHANNEL_ID)) { //get channel statistics using this command
//we can retrieve following parameters in ESP8266 to show
//we can comment out any parameter which we don't want to see
Serial.println("---------Stats---------");
Serial.print("Subscriber Count: ");
Serial.println(api.channelStats.subscriberCount);
Serial.print("View Count: ");
Serial.println(api.channelStats.viewCount);
Serial.print("Comment Count: ");
Serial.println(api.channelStats.commentCount);
Serial.print("Video Count: ");
Serial.println(api.channelStats.videoCount);
// Probably not needed :)
//Serial.print("hiddenSubscriberCount: ");
//Serial.println(api.channelStats.hiddenSubscriberCount);
Serial.println("------------------------");
display.clearDisplay(); //clear the data on display every interval
//Clear display
display.setTextSize(2); //Set the text size
display.setTextColor(SSD1306_WHITE); //set text color
display.setCursor(0, 0); //Set the display cursor position
display.print(F(" Arduino")); //Set the display text
display.print(F(" Yard"));
display.setTextSize(1); //Set the text size
display.setTextColor(SSD1306_WHITE);
display.setCursor(0, 32); //Set the display cursor position
display.print(F("Subscribers: ")); //Set the display text
display.setCursor(90, 32);
display.println(api.channelStats.subscriberCount); //Number of subscribers
display.setCursor(0, 42);
display.print(F("Total Views: "));
display.setCursor(90, 42);
display.println(api.channelStats.viewCount); //number of total views of channel
display.setCursor(0, 52);
display.print(F("Video Count: "));
display.setCursor(90, 52);
display.println(api.channelStats.videoCount); //number of videos uploaded on channel
display.display();
}
nextRunTime = millis() + timeBetweenRequests; //re-initializing the timer
}
}Required Code Changes
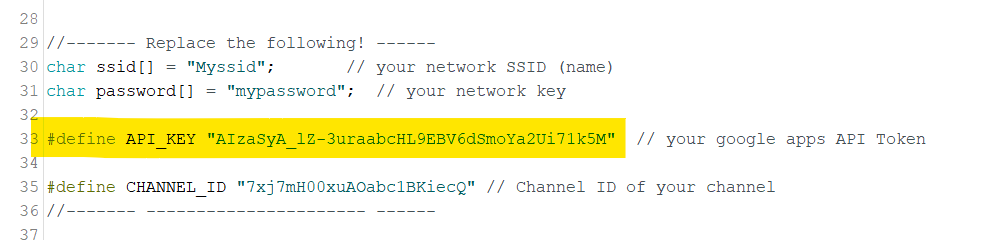
- Change the SSID and Password in the code to your own Wi-Fi credentials. This is to connect the device to the internet so it can fetch the YouTube channel data.
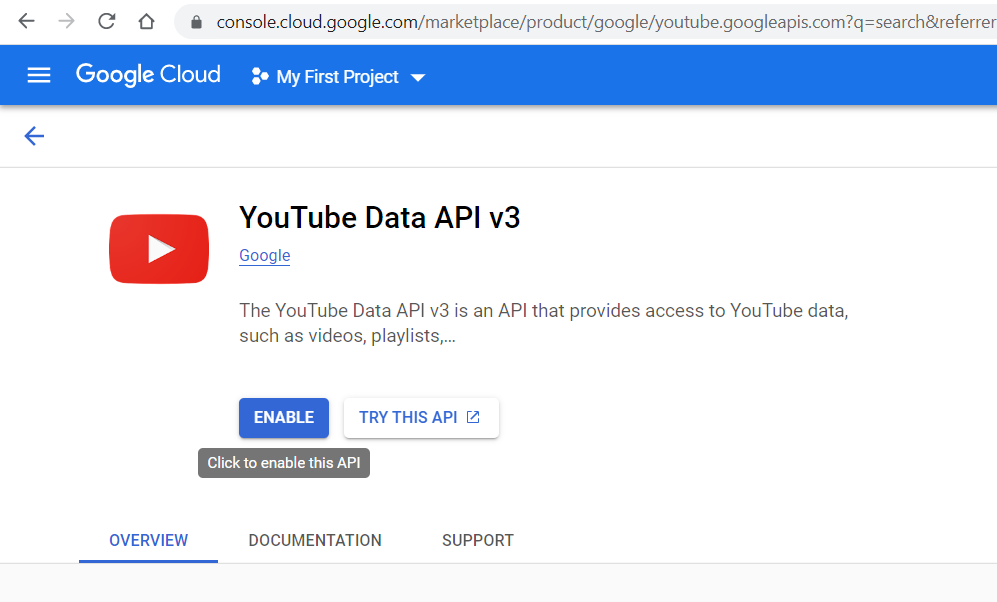
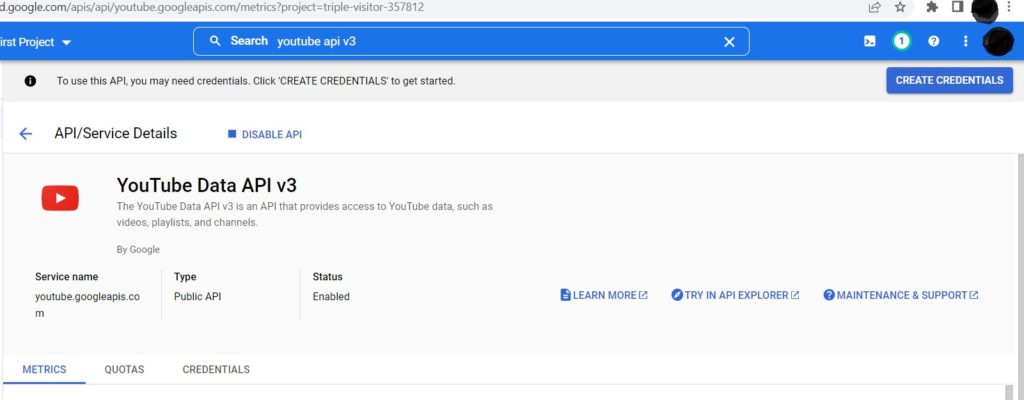
- Then go to: https://console.cloud.google.com/apis/dashboard and search for “youtube api v3” in the search box. Click on YouTube Data API v3.

- Click on ENABLE.
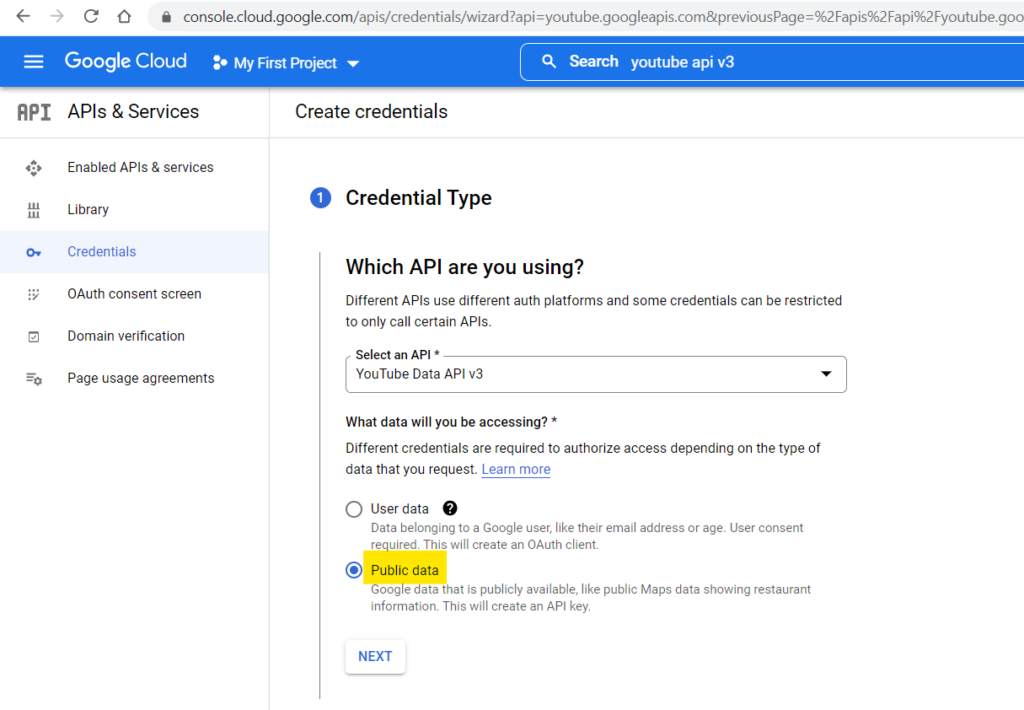
- Then click on CREATE CREDENTIALS.
- Select Public Data and click Next.
- You will get the API key. Copy this API key.
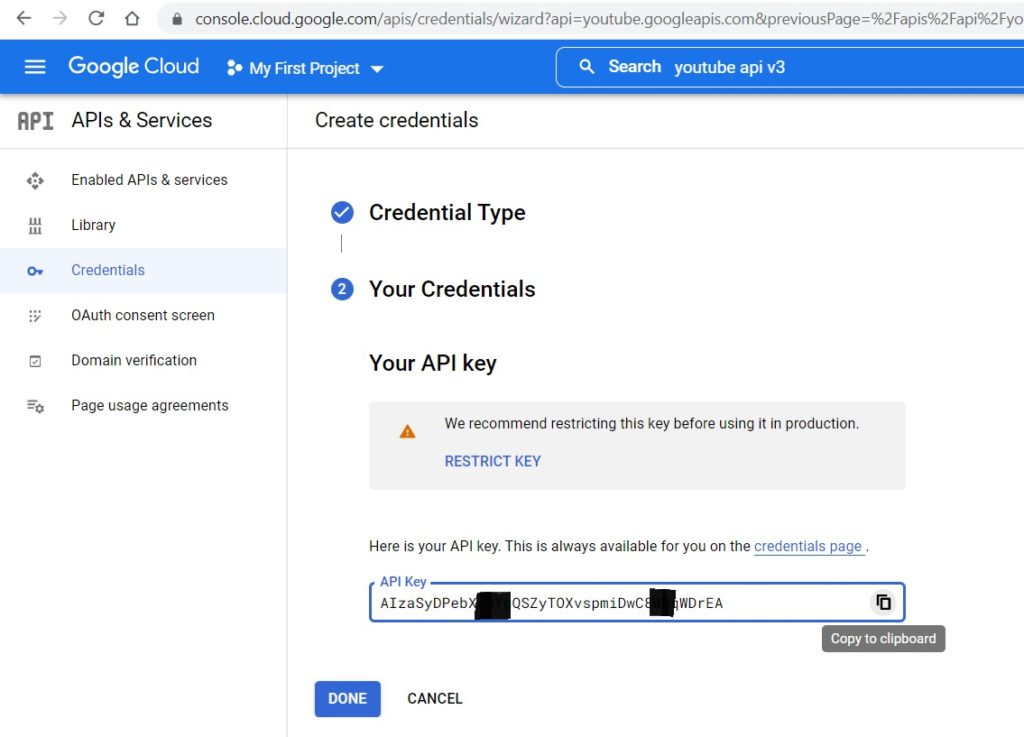
- Replace the API key in the code with the key you got from your Google Console.
- Go to this link to get your YouTube Channel ID: https://www.youtube.com/account_advanced and copy the Channel ID.
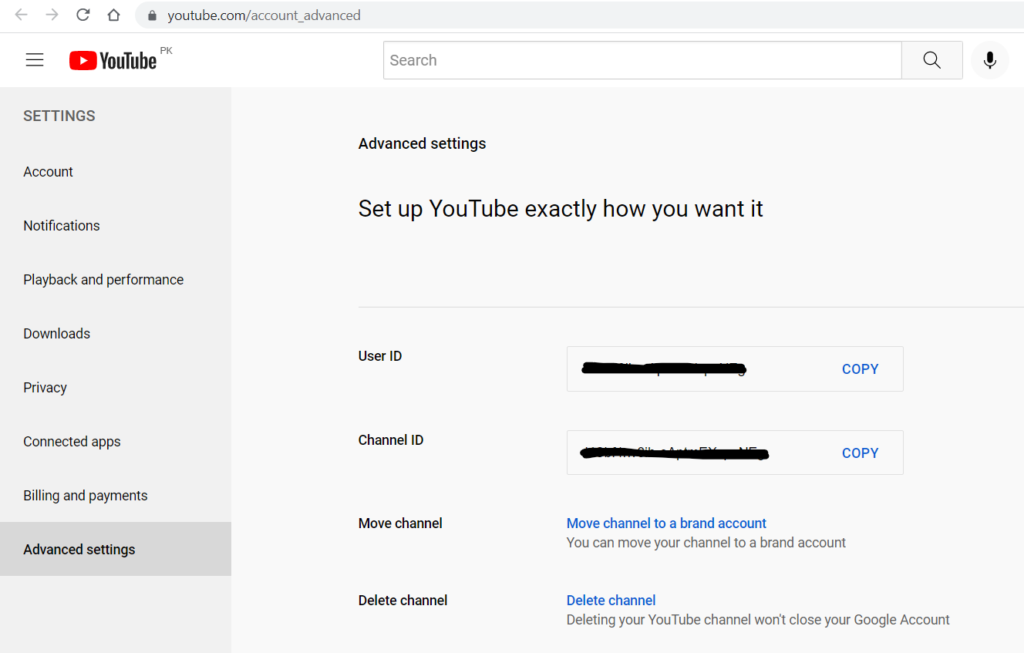
- Replace the Channel ID in the code with the ID you got for your Channel.
- Install the required Libraries like Adafruit GFX, YouTube API and Arduino JSON from the Libraries manager.
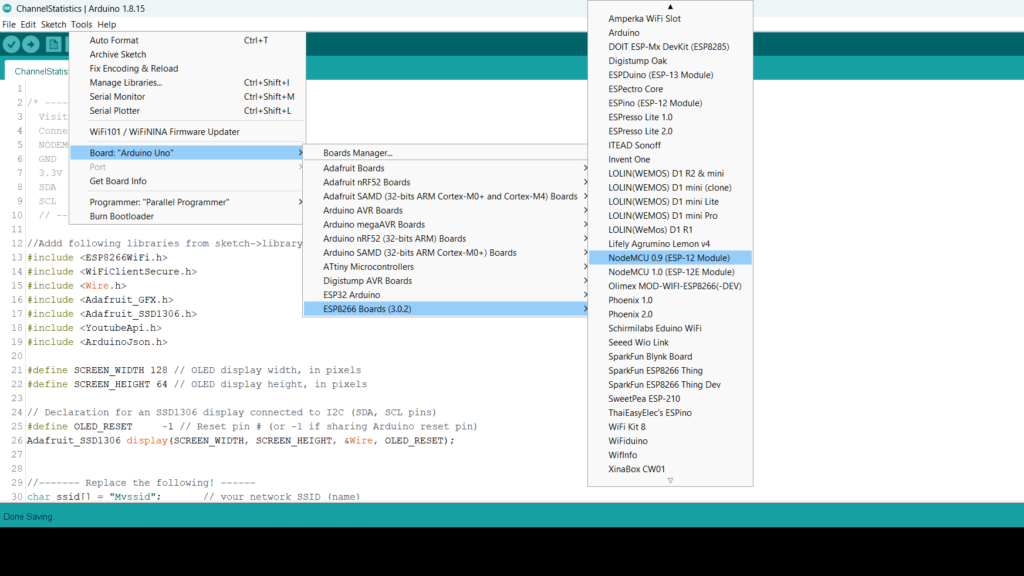
- Now select the correct Board(Go to: Boards > ESP8266 Boards > Select NodeMCU 1.0) and Port, then upload the code.
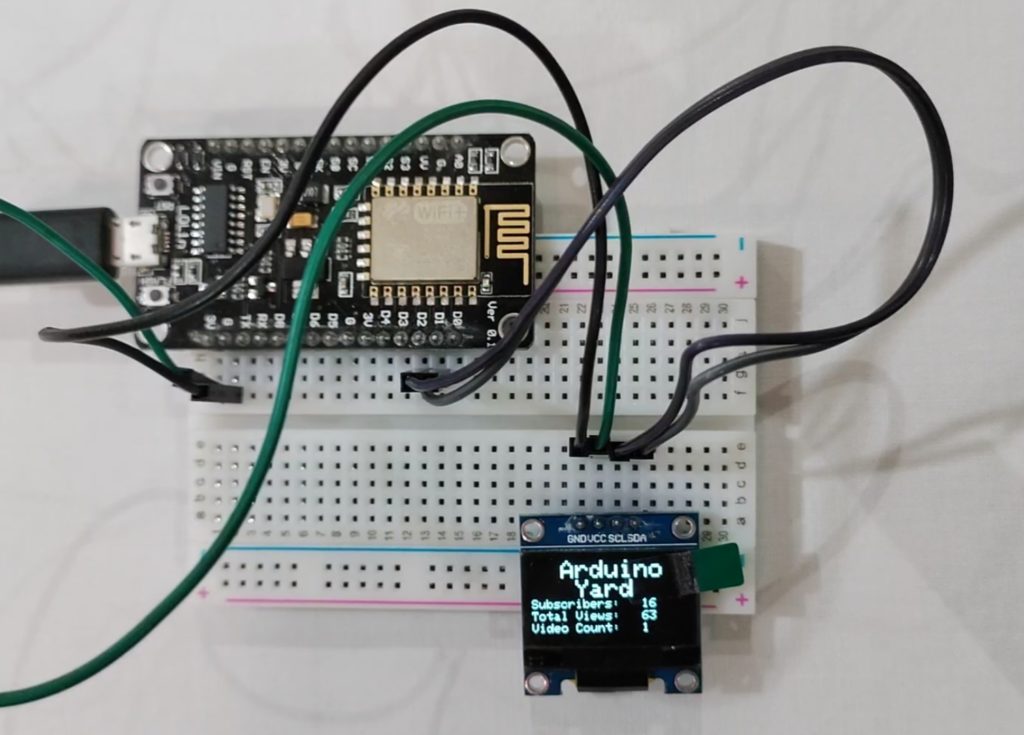
Final Results
After uploading the code you should be able to see your channels live statistics on the OLED. These statistics will be updated every 5 seconds.
Additional Resources
Additional boards manager URLs (for ESP8266 boards): https://arduino.esp8266.com/stable/package_esp8266com_index.json
Detailed YouTube video
You may also like:
DIY HOME SECURITY: ARDUINO INTRUDER ALARM SYSTEM WITH ESP32 & BLYNK CLOUD INTEGRATION