While building a small home automation setup recently, I needed accurate temperature and humidity readings. The basic DHT11 wasn’t cutting it, so I switched to the DHT22 with ESP32, and the results were far more reliable. The DHT22 offers better accuracy, a wider sensing range, and more consistent output, which makes it a great choice for smart home projects, greenhouse monitoring, or environmental logging.
In this guide, we’ll walk you through the full process of using the DHT22 sensor with an ESP32 board. From wiring and library setup to writing and uploading the code, we’ll cover everything step by step. Whether you’re building a weather station or just want to track indoor conditions, this tutorial has you covered.
What is the DHT22 Sensor?
The DHT22, also known as the AM2302, is a popular digital sensor used for measuring both temperature and relative humidity. It’s the upgraded version of the DHT11 sensor and is known for its higher accuracy, wider measurement range, and greater reliability.
Internally, the DHT22 uses a capacitive humidity sensor and a thermistor to measure the surrounding air, and it outputs a calibrated digital signal via a single data pin. This makes it perfect for interfacing with microcontrollers like ESP32 and Arduino and that’s why DHT22 is a go-to choice for many electronics projects that require environmental sensing.
The sensor is compact, energy-efficient, and very easy to use in ESP32-based IoT projects. Its improved performance compared to the DHT11 makes DHT22 an excellent solution for projects that require more precise and stable environmental data — like indoor climate control systems, smart greenhouses, or long-term data logging applications.
DHT11 vs. DHT22: Key Differences
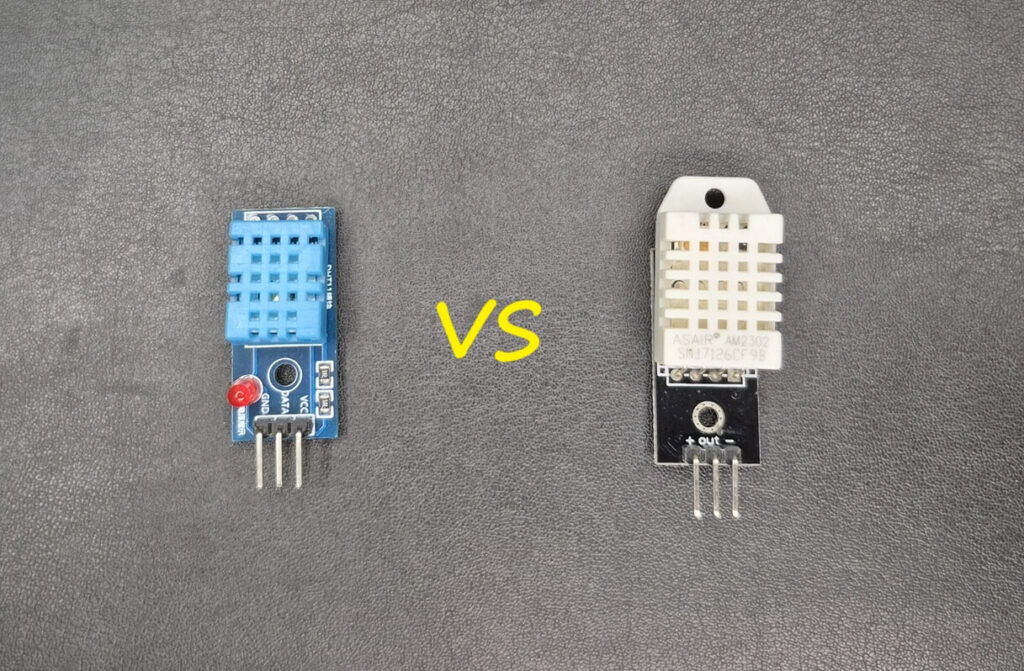
Here’s how DHT11 compares with DHT22:
| Feature | DHT11 | DHT22 |
|---|---|---|
| Temperature Range | 0-50 °C | -40 to 80 °C |
| Temperature Accuracy | ±2 °C | ±0.5 °C |
| Humidity Range | 20-90% RH | 0-100% RH |
| Humidity Accuracy | ±5% RH | ±2-5% RH |
| Sampling Rate | 1 Hz (1 second) | 0.5 Hz (2 seconds) |
| Cost | Cheaper | Slightly more expensive |
If you want better precision and a wider operating range, DHT22 with ESP32 is the preferred choice over DHT11.
Required Components
To build this, you’ll need the following components:
- ESP32 Development Board
- DHT22 Sensor Module
- Breadboard and Jumper Wires
- (Optional) 10kΩ Pull-up Resistor
DHT22 Pinout
DHT22 sensors usually have 3 or 4 pins depending on the module:
| Pin | Description |
|---|---|
| VCC | Power supply (3.3V–5V) |
| GND | Ground |
| DATA | Digital output signal |
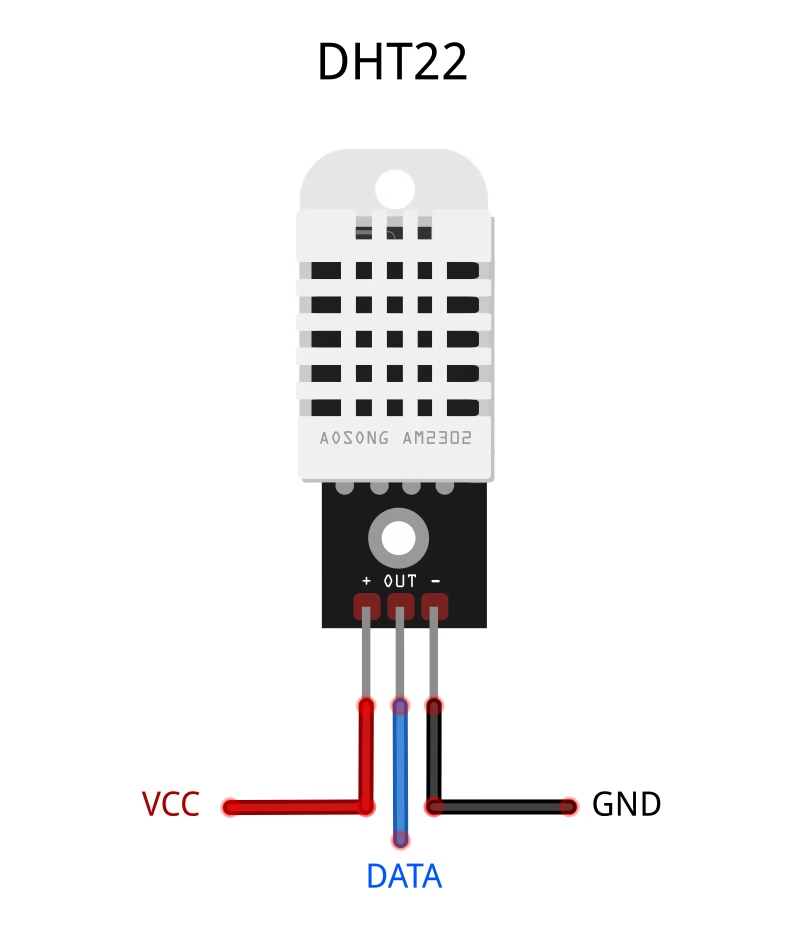
When using DHT22 sensor with ESP32, the DATA pin can be connected to any digital pin. In this example, we’ll use GPIO 4.
Circuit Diagram: DHT22 with ESP32
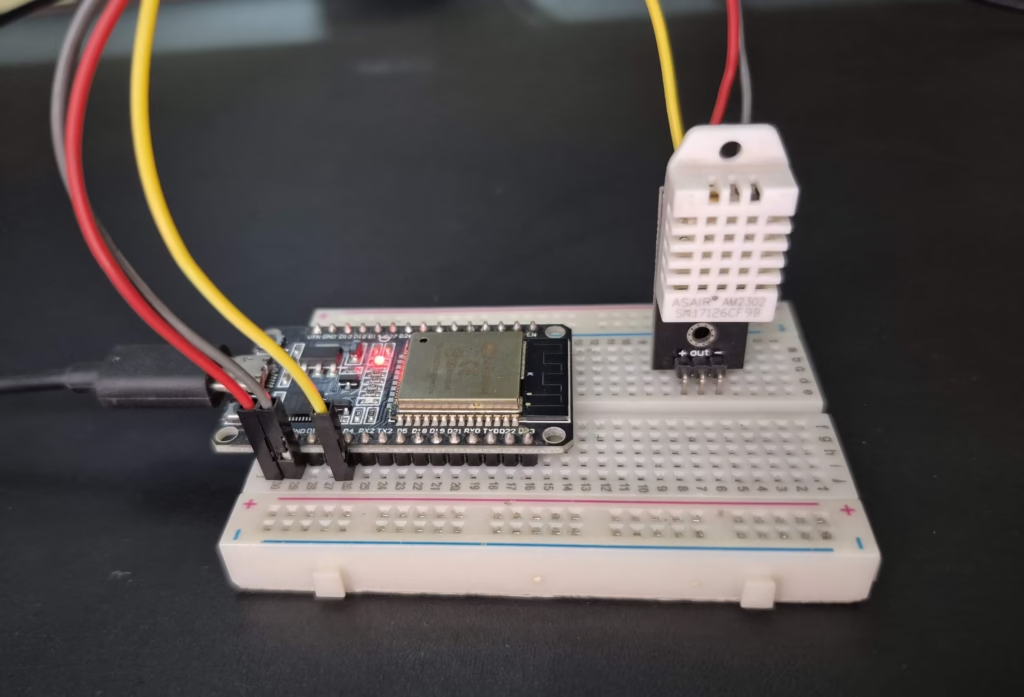
Here’s how to connect the DHT22 sensor to ESP32:
| DHT22 Pin | ESP32 Pin |
|---|---|
| VCC | 3.3V |
| GND | GND |
| DATA | GPIO 4 |
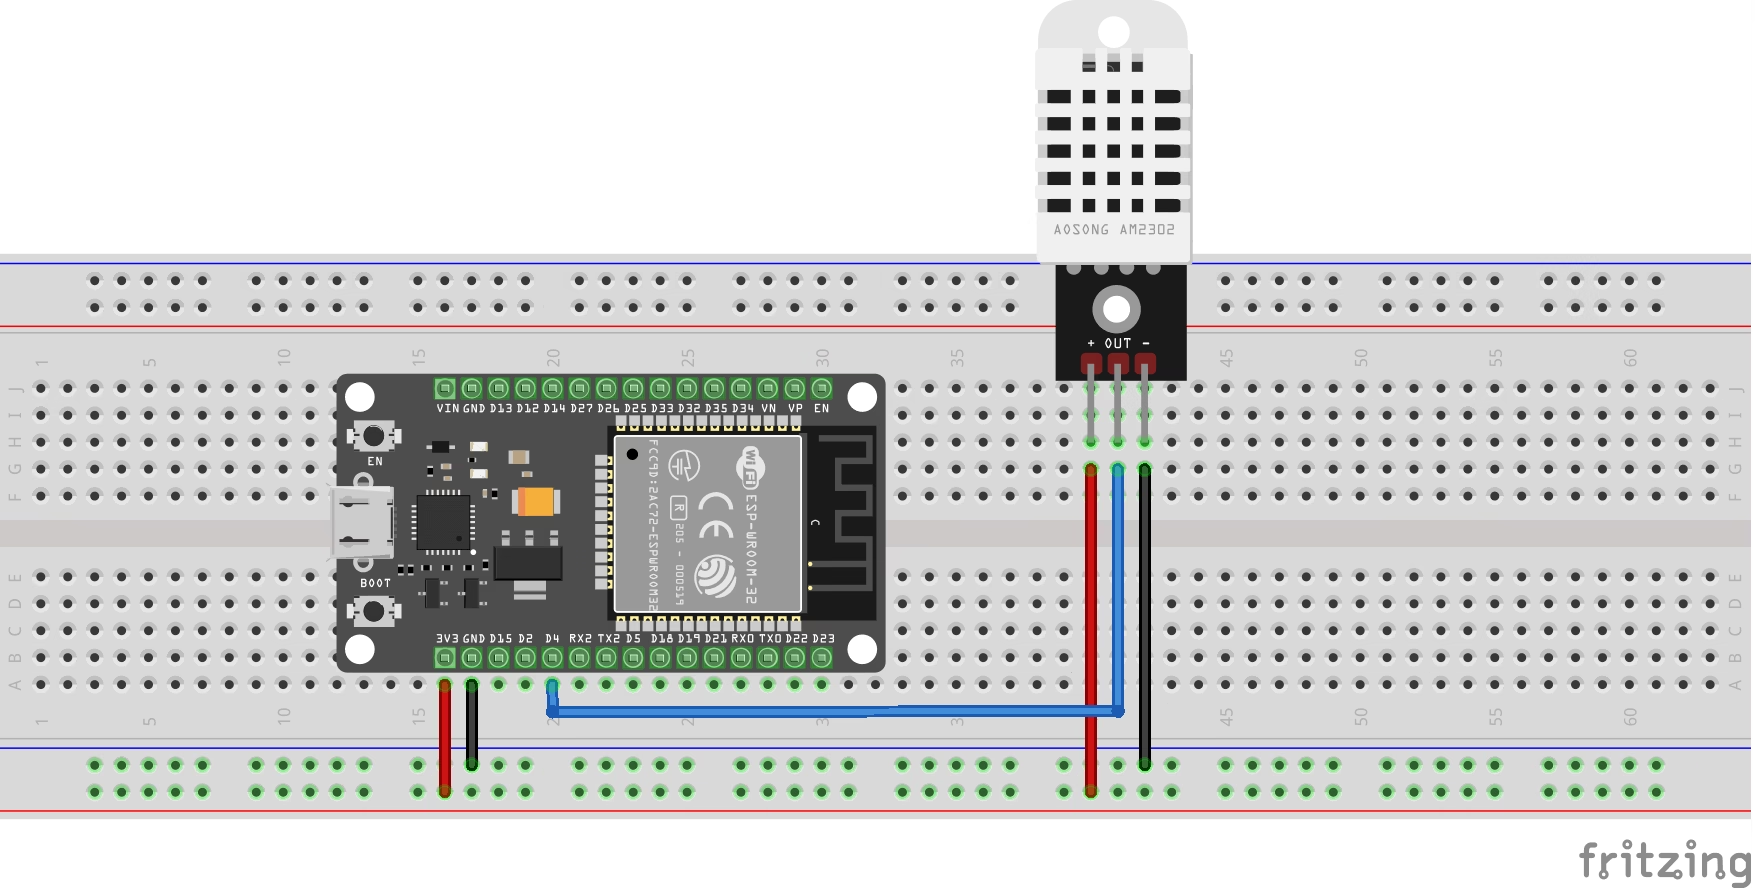
📝 Note: A 10kΩ pull-up resistor between VCC and DATA is recommended for more stable readings.
📌 See ESP32 Pinout Reference:
If you’re unsure about the ESP32 pin numbers, check out our full ESP32 Pinout Guide for clarity.
Installing the DHT Library
Before using the DHT22 sensor, you need to install the DHT library in the Arduino IDE:
- Open the Arduino IDE and go to Sketch > Include Library > Manage Libraries…
- In the Library Manager, search for DHT Sensor Library by Adafruit.
- Click Install and wait for the installation to complete.
For more details or manual installation, you can visit the Adafruit DHT Sensor Library GitHub repository.
ESP32 Code for DHT22
Here’s a complete code example to read temperature and humidity using DHT22 with ESP32.
// Reading DHT22 with ESP32 by ArduinoYard
#include "DHT.h"

#define DHTPIN 4      // GPIO 4 connected to DHT22 DATA pin
#define DHTTYPE DHT22  // Define sensor type

DHT dht(DHTPIN, DHTTYPE);

void setup() {
  Serial.begin(9600);
  dht.begin();
  Serial.println("Reading from DHT22 sensor...");
}

void loop() {
  float temperature = dht.readTemperature(); // Celsius
  float humidity = dht.readHumidity();       // Percent

  if (isnan(temperature) || isnan(humidity)) {
    Serial.println("Failed to read from DHT22 sensor!");
    return;
  }

  Serial.print("Temperature: ");
  Serial.print(temperature);
  Serial.println(" °C");

  Serial.print("Humidity: ");
  Serial.print(humidity);
  Serial.println(" %");

  delay(2000); // 2-second delay to match sampling rate
}
Code Breakdown
- Pin Definition: We use GPIO 4 for the DHT22 data line.
- Sensor Initialization:
dht.begin()starts communication with the sensor. - Reading Values:
readTemperature()andreadHumidity()fetch the data. - Validation:
isnan()checks if readings are valid before printing.
This code gives real-time environmental data using DHT22 with ESP32.
Output Example
Hardware:
Serial Monitor:
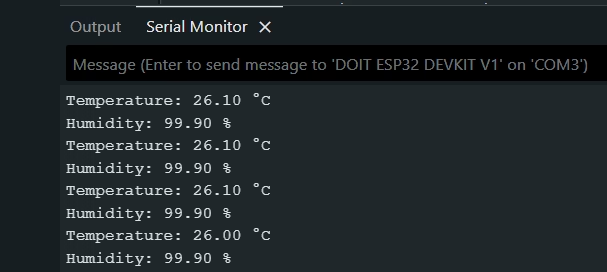
The values are updated every 2 seconds, which matches the sampling rate of the DHT22.
Troubleshooting DHT22 with ESP32
Problem: Serial Monitor says “Failed to read from DHT22 sensor!”
✅ Check connections and power supply
✅ Ensure you’ve selected DHT22, not DHT11 in the code
✅ Add 10kΩ pull-up resistor between VCC and DATA
Problem: Random or unstable values
✅ Use short jumper wires
✅ Try powering from 3.3V instead of 5V
✅ Ensure no moisture is affecting the sensor
Applications of DHT22 with ESP32
📦 Storage Monitoring – Maintain proper climate in storerooms
🌡️ Weather Stations – Log real-time weather data
🏠 Smart Home Projects – Control appliances based on climate
🌿 Greenhouse Automation – Monitor and adjust humidity
📊 IoT Dashboards – Send sensor data to online dashboards
Conclusion
Pairing the DHT22 sensor with an ESP32 board is a simple and cost-effective way to bring reliable temperature and humidity monitoring into your projects. Thanks to its higher accuracy and wider range compared to the DHT11, it’s well-suited for everything from beginner experiments to more advanced IoT systems.
Once you’ve mastered the basics, try expanding your project by displaying the data on an OLED screen, uploading it to a cloud dashboard, or even triggering smart devices based on the readings. The possibilities are wide open.