
Introduction
Using the SSD1306 OLED Display with ESP32 is a popular choice for showing text, graphics, and sensor readings in projects. This guide will help you set up a 0.96 inch I2C OLED Display with ESP32, covering wiring, code examples, and tips to get your display working quickly. Whether you’re a beginner or working on an advanced project, this article will simplify using OLED displays in your circuits.
Read more about OLED displays here.
Components Required:
- ESP32 Development Board
- 0.96 inch OLED Display (I2C interface)
- Jumper Wires
- Breadboard (optional, for easier prototyping)
Wiring the OLED Display with ESP32
| OLED Display Pin | ESP32 Pin | Description |
|---|---|---|
| VCC | 3.3V | Provides power to the display |
| GND | GND | Common ground connection |
| SDA | GPIO 21 | I2C Data line |
| SCL | GPIO 22 | I2C Clock line |

🛈 Note: ESP32 uses GPIO 21 and 22 for I2C by default, but you can also use other pins with Wire.begin(SDA, SCL).
Installing the Required Libraries
Before using the OLED Display with ESP32, you need to install two essential libraries:
- Open Arduino IDE.
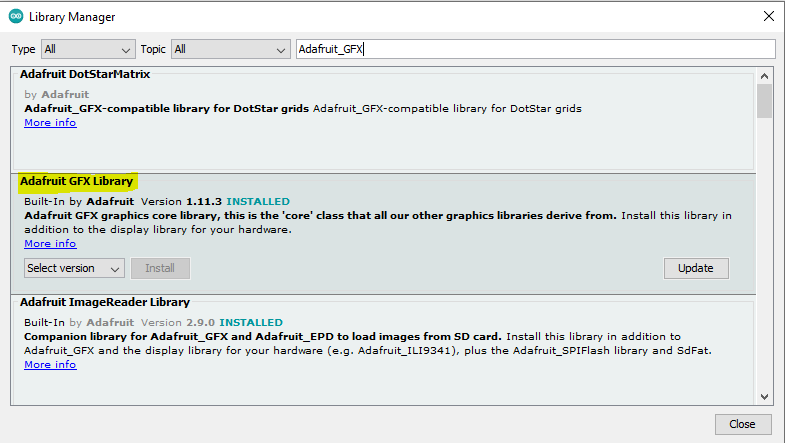
- Go to Sketch → Include Library → Manage Libraries.
- In the search bar, type Adafruit GFX. Click Install.
- Next, search for Adafruit SSD1306 and click Install.
Once both libraries are installed, you’re ready to start working with your OLED display.

Basic Code to Display Text
Here’s an example code to show “Hello, World!” on the OLED screen with ESP32:
// I2C OLED Display with ESP32 by ArduinoYard.com
#include <Wire.h>
#include <Adafruit_GFX.h>
#include <Adafruit_SSD1306.h>

#define SCREEN_WIDTH 128
#define SCREEN_HEIGHT 64
#define OLED_RESET -1

Adafruit_SSD1306 display(SCREEN_WIDTH, SCREEN_HEIGHT, &Wire, OLED_RESET);

void setup() {
  Wire.begin(21, 22);  // SDA, SCL (can be changed if using different pins)

  if (!display.begin(SSD1306_SWITCHCAPVCC, 0x3C)) {
    Serial.println(F("SSD1306 allocation failed"));
    for (;;);
  }

  display.display();
  delay(2000);
}

void loop() {
  display.clearDisplay();
  display.setTextColor(WHITE);
  display.setTextSize(2);
  display.setCursor(0, 10);
  display.println("Hello,");
  display.setCursor(0, 30);
  display.println("World!");
  display.display();
  delay(2000);
}
How It Works – Code Breakdown
Let’s walk through the code step-by-step to understand how it displays “Hello, World!” on the OLED Display:
1. Initialization: setup() function
This part is executed once when the ESP32 starts.
display.begin(SSD1306_SWITCHCAPVCC, 0x3C);
display.display();
delay(2000);- display.begin() – Initializes the OLED display.
- SSD1306_SWITCHCAPVCC specifies that the display is powered by a 3.3V supply generated internally.
- 0x3C is the I2C address of the OLED display (common for most 0.96” OLEDs).
- display.display() – Refreshes the display to show any content (even if empty) after initialization.
- delay(2000) – Pauses the program for 2000 milliseconds (2 seconds), allowing the initial screen to stay visible before the loop starts.
2. Displaying Text: loop() function
This part runs repeatedly after setup().
display.clearDisplay();- Clears the display buffer (removes any previous content).
display.setTextColor(WHITE);- Sets the text color to white. Since most OLED displays are monochrome (black and white),
WHITEis the color used to show text or graphics.
display.setTextSize(2);- Sets the text size.
- Size
1is the smallest (default),2is larger, and so on. - Each increase in size multiplies the text by that factor.
- Size
display.setCursor(0, 10);- Positions the cursor at coordinates
(0, 10)on the display.(x, y)refers to pixels, with(0, 0)being the top-left corner.- Here, text will start 10 pixels down from the top.
display.println("Hello,");- Prints the text “Hello,” on the display at the current cursor position.
- Moves the cursor to the next line automatically after printing (similar to
Serial.println()).
display.setCursor(0, 30);
display.println("World!");- Moves the cursor to
(0, 30), then prints “World!” on the display.
display.display();- Pushes the content from the display buffer to the screen.
- Nothing appears on the OLED until you call
display.display().
- Nothing appears on the OLED until you call
delay(2000);- Pauses the display for 2 seconds, keeping the text visible.
Summary of Key Functions:
| Function | Purpose |
|---|---|
display.begin() | Initializes the OLED display. |
display.display() | Updates the screen with what’s in the buffer. |
display.clearDisplay() | Clears the display buffer. |
display.setTextColor() | Sets the text color (WHITE or BLACK). |
display.setTextSize() | Sets the text size (1, 2, 3…). |
display.setCursor() | Sets the cursor position for text. |
display.println() | Prints text and moves to a new line. |
This is the basic structure for displaying text on an OLED Display with ESP32.
Demonstration

You can play around and test this setup on Wokwi Simulation.
Troubleshooting OLED Display Address Issues
Some OLEDs may use a different I2C address. Here’s how to check:
Common I2C Addresses:
- SSD1306:
0x3C(most common) - SH1106:
0x3D(some displays)
Use an I2C Scanner Sketch
#include <Wire.h>

void setup() {
  Wire.begin(21, 22); // Adjust if using different pins
  Serial.begin(115200);
  while (!Serial);
  Serial.println("\nI2C Scanner");
}

void loop() {
  byte error, address;
  int nDevices = 0;

  Serial.println("Scanning...");

  for (address = 1; address < 127; address++) {
    Wire.beginTransmission(address);
    error = Wire.endTransmission();

    if (error == 0) {
      Serial.print("I2C device found at address 0x");
      if (address < 16) Serial.print("0");
      Serial.println(address, HEX);
      nDevices++;
    } else if (error == 4) {
      Serial.print("Unknown error at address 0x");
      if (address < 16) Serial.print("0");
      Serial.println(address, HEX);
    }
  }

  if (nDevices == 0)
    Serial.println("No I2C devices found\n");
  else
    Serial.println("Done\n");

  delay(5000);
}
What to Do Next:
- Open Serial Monitor (set baud rate to 115200).
- Note the detected address (e.g.,
0x3C). - Update your code:
display.begin(SSD1306_SWITCHCAPVCC, 0x3C); // Replace 0x3C if neededConclusion
OLED displays are a versatile and powerful tool for displaying information in your ESP32 projects. By following this beginner’s guide, you should be able to connect an OLED display to an ESP32 and display text or graphics on it using a library like Adafruit SSD1306.
With some creativity and experimentation, you can use OLED displays to create unique and innovative projects like:
YOUTUBE CHANNEL STATISTICS DISPLAY WITH NODEMCU(ESP8266) AND I2C OLED DISPLAY
Thank you!