If you’re beginning your journey in PHP and MySQL web development, learning how to install XAMPP server on Windows is a crucial first step. XAMPP is a free and open-source package that bundles Apache, MySQL, PHP, and phpMyAdmin, making it one of the easiest ways to create a local development environment.
In this guide, we’ll walk through how to install XAMPP server on Windows step-by-step.
What is XAMPP
XAMPP stands for:
- X – Cross-platform
- A – Apache (Web server)
- M – MySQL (Database)
- P – PHP (Scripting Language)
- P – Perl (Optional scripting)
When you install XAMPP server on Windows, you essentially turn your PC into a local server to test web applications before deploying them online.
System Requirements
Before you install XAMPP server on Windows, make sure your computer meets the following requirements:
- Windows 7 or later
- At least 1GB RAM
- Around 1GB of free disk space
Step 1: Download XAMPP
To install XAMPP server on Windows, first download the installer:
- Go to the official Apache Friends website:
https://www.apachefriends.org - Click the Windows download button to get the latest version of XAMPP.

Step 2: Run the Installer
- Locate the downloaded file and double-click it.
- Grant necessary permissions if prompted.
- Click “OK” if you see a warning about User Account Control.
This launches the setup wizard to help you install XAMPP server on Windows.
Step 3: Choose Components
The installer will ask you to choose which components to install. For most users, the default selection is perfect. Make sure Apache, MySQL, PHP, and phpMyAdmin are checked.
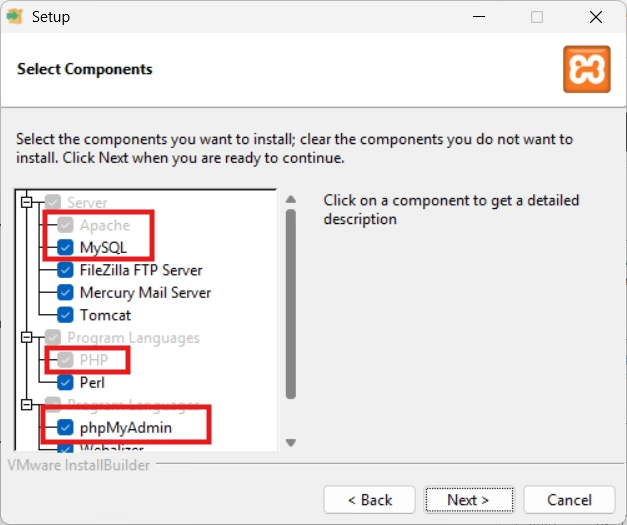
Click Next to continue the process to install XAMPP server on Windows.
Step 4: Select Installation Folder
You will be asked to choose a folder where XAMPP will be installed. It is best to useC:\xampp
to avoid permission issues.
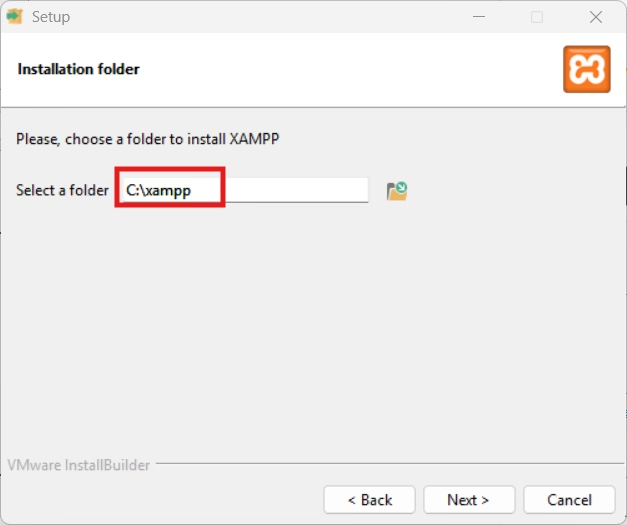
After selecting the folder, click Next to move forward with the installation.
Step 5: Language and Optional Features
Select your preferred language. You may see a screen related to Bitnami modules for CMS platforms like WordPress—feel free to skip it.
Click Next, then click Install to begin.
Step 6: Complete Installation
Wait for the installer to finish. Once complete, click Finish to open the XAMPP Control Panel. At this point, you have successfully begun to install XAMPP server on Windows.
Step 7: Start Apache and MySQL
In the XAMPP Control Panel:
- Click Start next to Apache.
- Click Start next to MySQL.
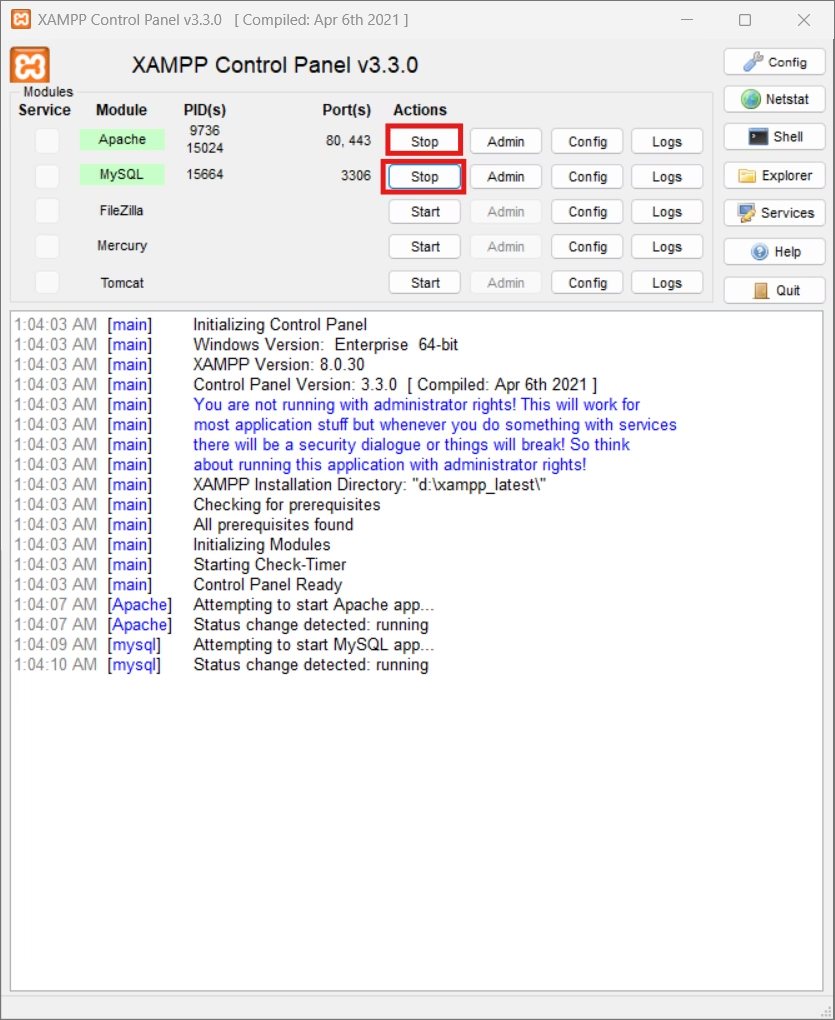
If both modules turn green and show “Running,” your setup is complete.
This confirms you were able to install XAMPP server on Windows successfully.
Bonus: Test Your Server
To make sure everything is working after you install XAMPP server on Windows, open your browser and go to:
http://localhostYou should see the XAMPP welcome page.

To test PHP functionality:
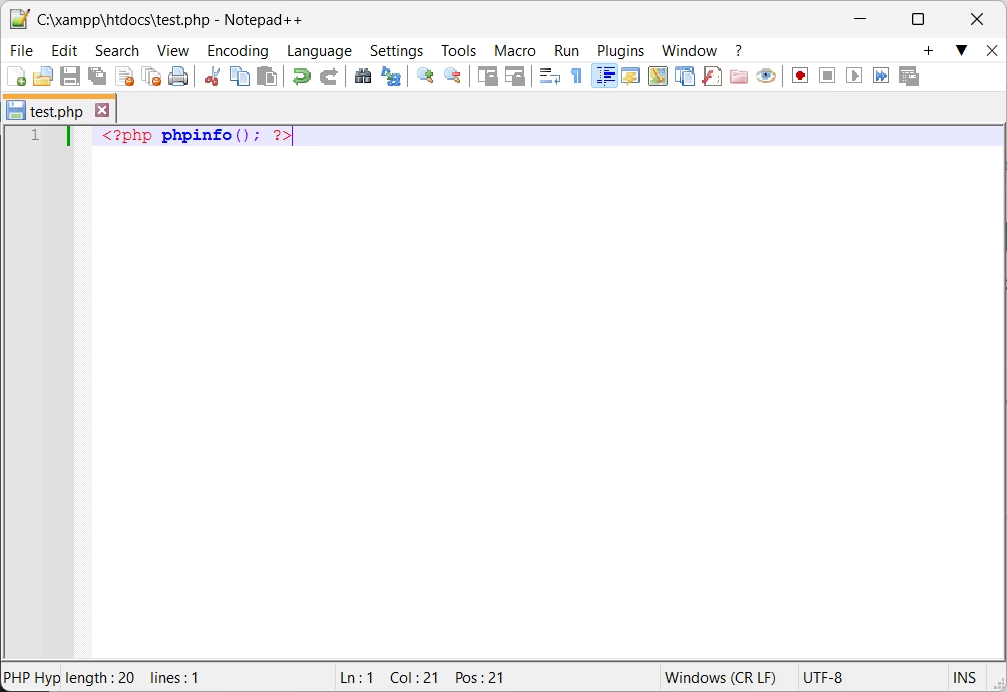
- Create a file called
test.phpinside theC:\xampp\htdocsfolder.
- Add the following code:
<?php phpinfo(); ?>
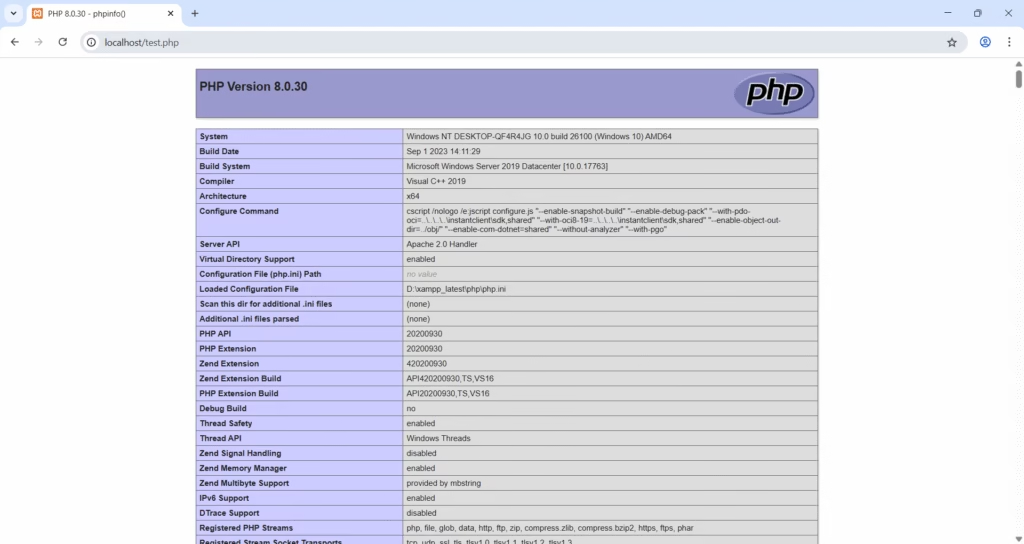
- Visit
http://localhost/test.phpin your browser.
If the PHP info page appears, everything is working fine.
Troubleshooting Tips
If Apache does not start, check for port conflicts (commonly with Skype or IIS). You may need to change Apache’s port in the config file.
If MySQL fails to run, make sure another service is not using port 3306. Running XAMPP as an Administrator may also help.
These are common issues people face when they install XAMPP server on Windows, but they are easy to fix.
Conclusion
Learning how to install XAMPP server on Windows is essential for any aspiring web developer working with PHP and MySQL. It provides a stable and local testing environment that mirrors a real server. Once you install XAMPP server on Windows, you can build and test your projects before putting them online.
If you have questions or run into any issues while trying to install XAMPP server on Windows, feel free to drop them in the comments. I’m here to help.
In case you want to get started with the local MQTT Broker. you can visit:
Getting Started With MQTT: How To Install Mosquitto MQTT Broker On Windows – ArduinoYard