In this guide, we will explore how to interface a Servo Motor with Arduino, understand its working, write code to control it, and troubleshoot common issues. Servo motors are one of the most common types of motors used in Arduino projects due to their precise angular control and ease of use.
What is a Servo Motor?
A servo motor is a type of motor designed to rotate within a specific range, usually from 0° to 180°. Unlike regular DC motors, servo motors do not spin continuously — instead, they move to a specific angle based on the signal they receive.
Key Features of Servo Motors:
- Rotational range: Typically 0° to 180°
- Precise position control
- Three wires: Power (VCC), Ground (GND), and Signal (PWM control)

How Servo Motors Work with Arduino
Servo motors receive PWM signals (Pulse Width Modulation) from the Arduino. The width of the pulse determines the angle of the servo shaft.
- 0° = Minimum pulse width (usually around 1ms)
- 90° = Medium pulse width (usually 1.5ms)
- 180° = Maximum pulse width (usually around 2ms)
Arduino’s Servo library makes this process super simple by abstracting PWM generation.
Components Required
- Arduino UNO
- SG90 Servo Motor (or any compatible servo)
- Jumper Wires
- External Power Supply (optional for larger servos)
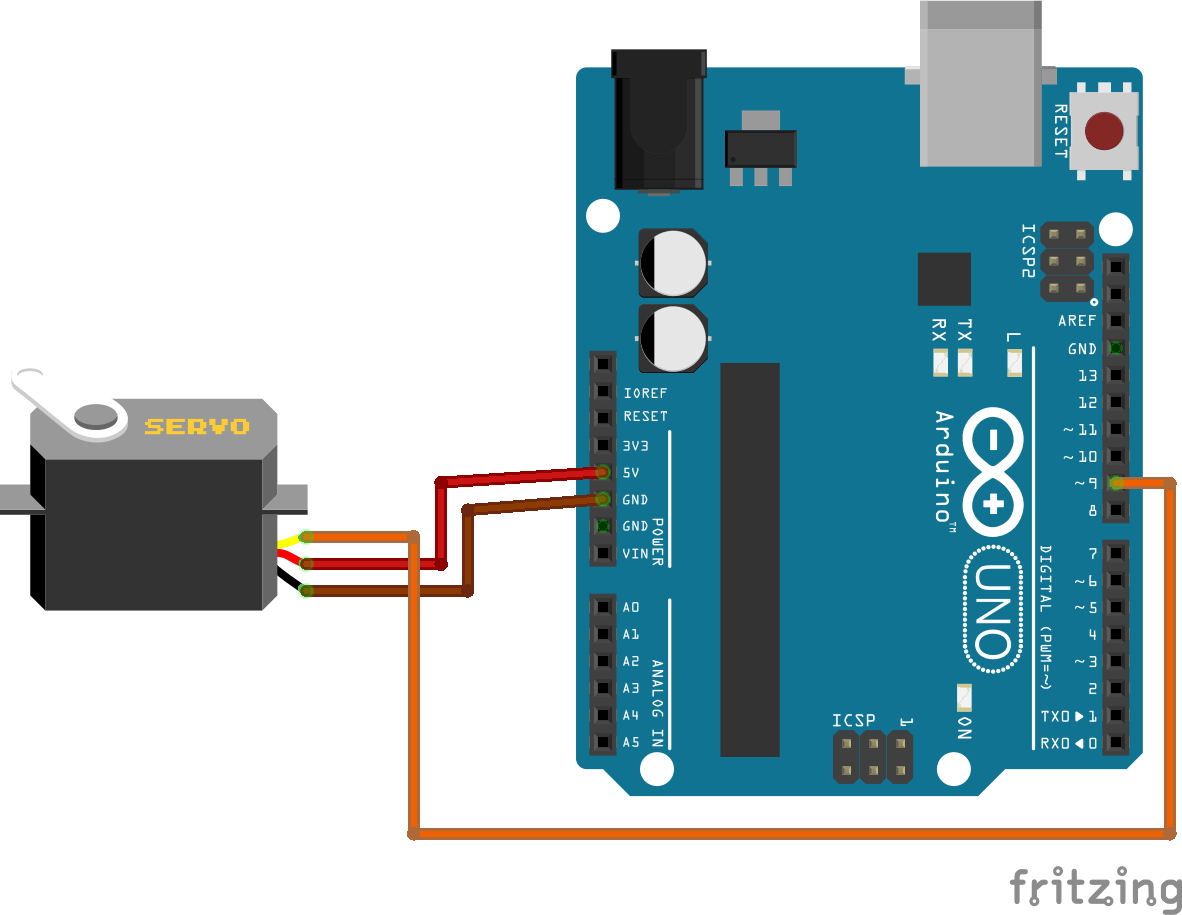
Connecting Servo Motor with Arduino
Wiring Table:
| Servo Wire | Connect To |
|---|---|
| Brown (GND) | Arduino GND |
| Red (VCC) | Arduino 5V |
| Orange (Signal) | Any PWM Pin (e.g., Pin 9) |
Example Code: Controlling Servo Motor with Arduino
Basic Sweep Example
This example rotates the servo from 0° to 180° and back continuously.
#include <Servo.h>

// Create servo object
Servo myServo;

void setup() {
  myServo.attach(9);  // Signal pin connected to D9
}

void loop() {
  for (int angle = 0; angle <= 180; angle++) {
    myServo.write(angle);
    delay(15);  // Small delay for smooth movement
  }

  for (int angle = 180; angle >= 0; angle--) {
    myServo.write(angle);
    delay(15);
  }
}
Code Explanation
Servo myServo;creates a servo object.myServo.attach(9);links the servo to pin 9.myServo.write(angle);moves the servo to the desired angle.
Demonstration
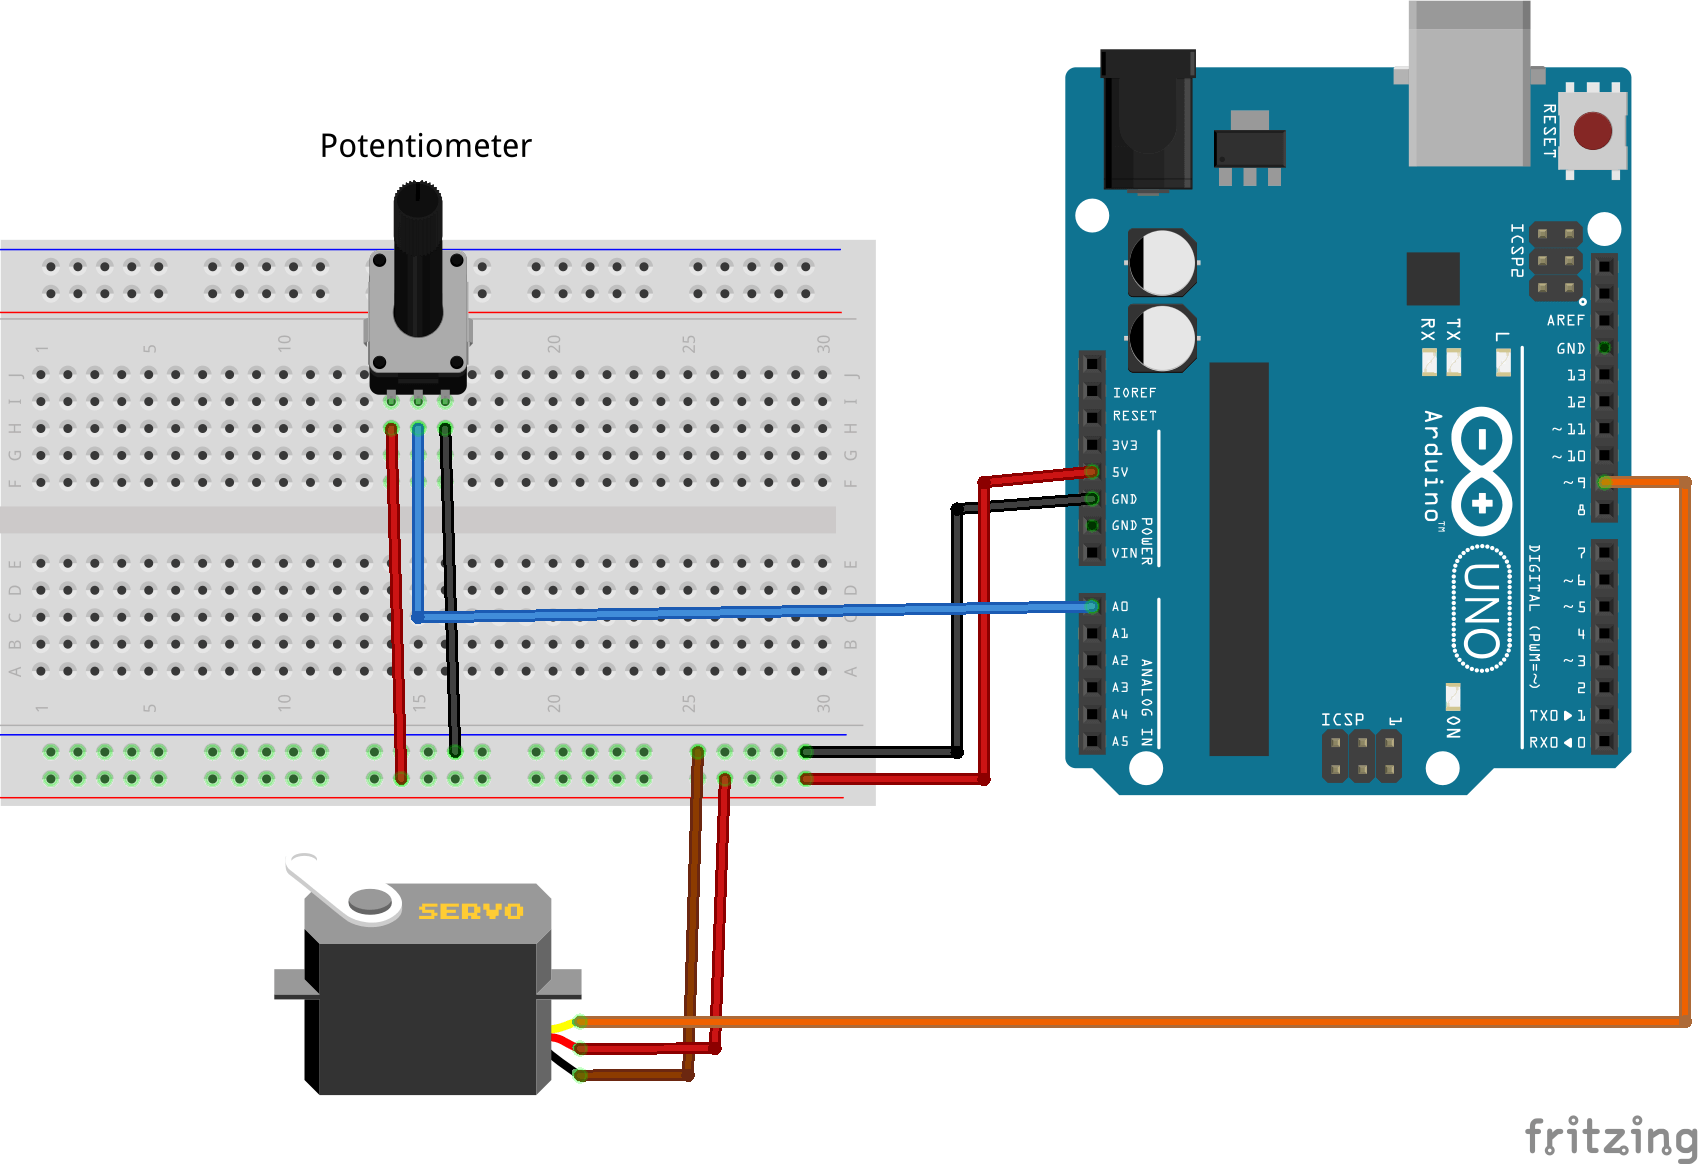
Practical Project: Control Servo with Potentiometer
In this project, you can control the servo angle manually using a potentiometer — great for robotics arms, camera gimbals, etc.
Wiring
| Component | Arduino Pin |
|---|---|
| Servo Signal | D9 |
| Potentiometer VCC | 5V |
| Potentiometer GND | GND |
| Potentiometer Signal | A0 |
Code
#include <Servo.h>

Servo myServo;
int potPin = A0; // Potentiometer connected to A0

void setup() {
  myServo.attach(9);
}

void loop() {
  int potValue = analogRead(potPin);       // Read potentiometer
  int angle = map(potValue, 0, 1023, 0, 180);  // Map to 0-180°
  myServo.write(angle);                     // Move servo
  delay(10);                                // Short delay for stability
}
Demonstration
Common Issues and Fixes
| Problem | Cause | Solution |
|---|---|---|
| Servo jittering | Weak power supply | Use external power source |
| Servo not moving | Wrong wiring or pin | Double-check connections |
| Servo moves erratically | Noise on signal pin | Use shorter wires, twist signal + GND together |
Power Considerations
Small servos like SG90 can run directly from Arduino’s 5V pin, but larger servos need a dedicated external power source (e.g., 6V battery pack).
⚠️ Warning! Never power large servos directly from the Arduino — they will cause voltage drops and unstable behavior.
Applications of Servo Motors
- Robotic arms
- RC planes and cars
- Camera gimbals
- Automated door locks
- Animatronics
Conclusion
Working with a Servo Motor with Arduino is one of the most beginner-friendly motor control projects. With just three wires and a few lines of code, you can precisely control angles and build amazing projects — from robotic arms to motion-triggered devices.
Start small, try the basic sweep code, and then gradually move to projects like potentiometer control, gesture control, or even Bluetooth remote control using HC-05.
Useful Resources
Internal Links
- L298N Motor Driver with Arduino – Learn how to control DC motors.
- Arduino MP3 Player with Voice Control using HC-05 and DFPlayer Mini – Combine audio playback with control features using Bluetooth.