
Introduction
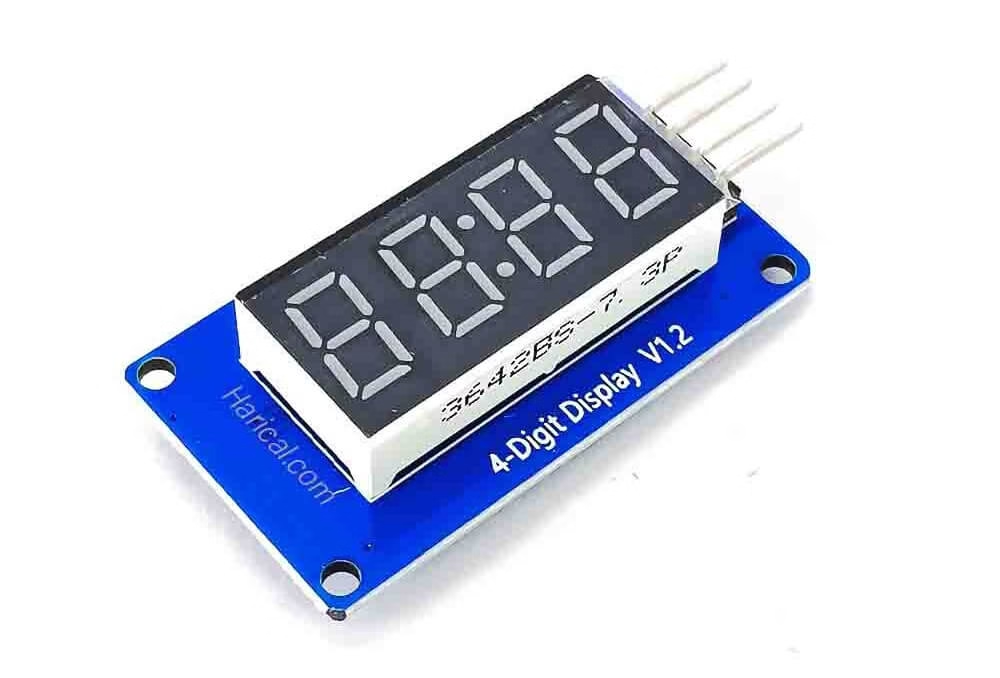
The TM1637 Display with Arduino is a popular 4-digit 7-segment display module used in various electronics projects, including timers, clocks, and sensor-based systems. It provides an easy way to display numerical values while using only two data pins, making it efficient and beginner-friendly.
What is the TM1637 Display?
The TM1637 is a 4-digit 7-segment display module with an integrated driver IC that simplifies communication with microcontrollers like Arduino. Unlike traditional 7-segment displays that require multiple I/O pins, the TM1637 uses a two-wire communication interface, similar to I2C, reducing wiring complexity.
Key Features of TM1637:
- 4-digit 7-segment LED display
- Two-wire interface (CLK & DIO) for easy communication
- Adjustable brightness levels
- Low power consumption
- Compatible with Arduino, ESP32, Raspberry Pi
- Ideal for timers, clocks, counters, and sensor displays
Components Required
To work with the TM1637 module, you will need the following components:
- Arduino board (Uno, Mega, or compatible board)
- TM1637 4-digit display module
- Jumper wires
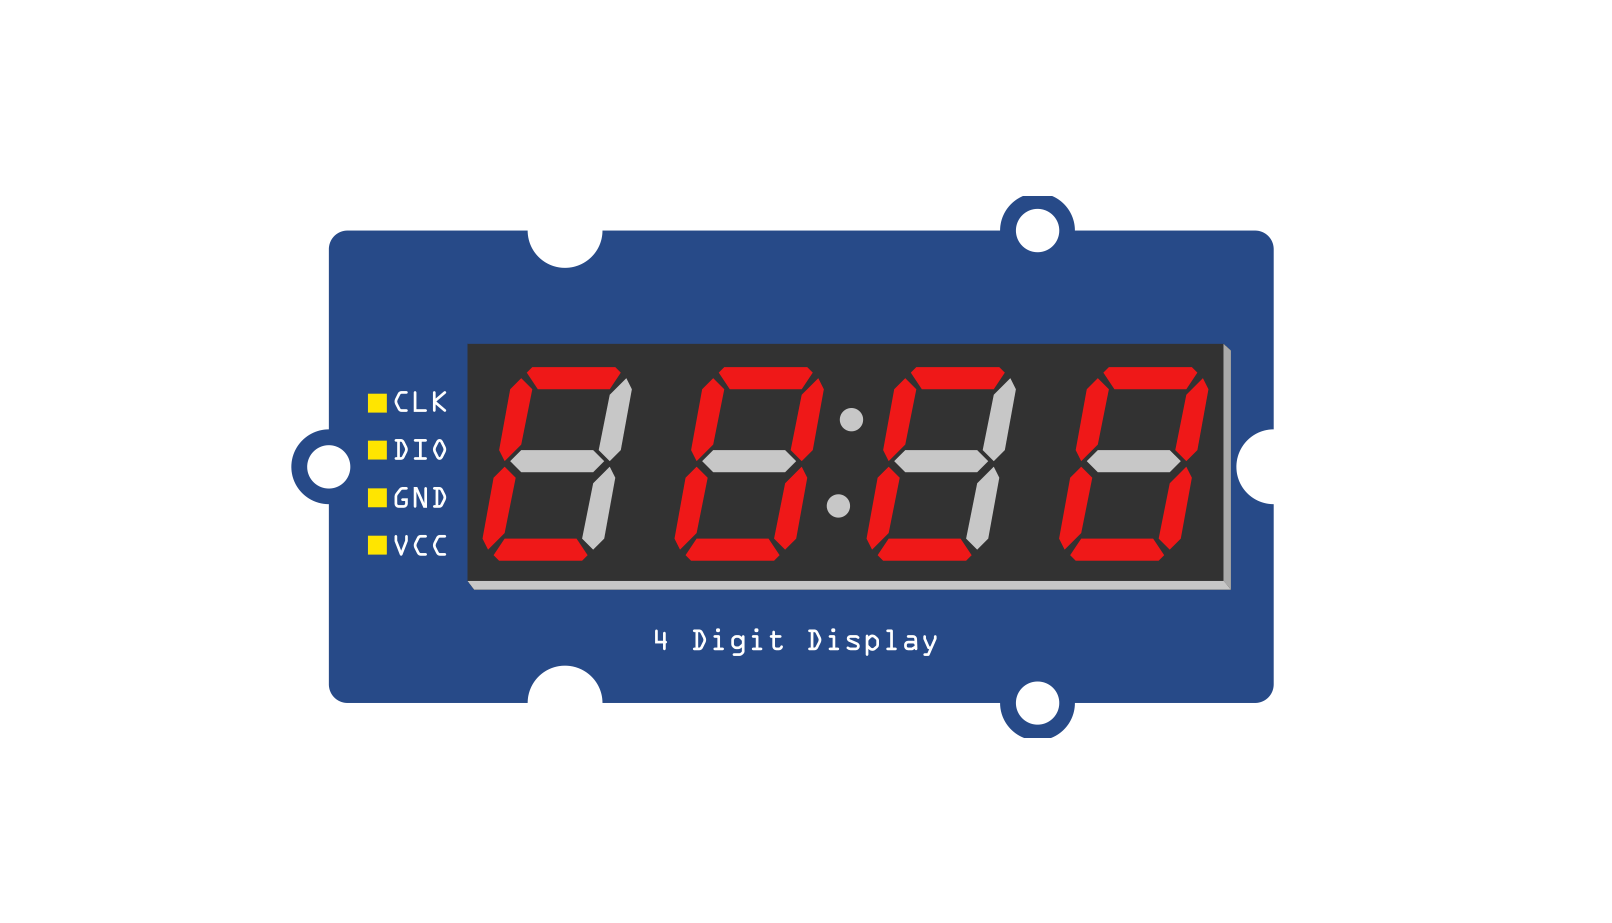
TM1637 Display Pinout
The TM1637 module has 4 pins, labeled as follows:
| Pin | Label | Function |
|---|---|---|
| 1 | VCC | Connects to 5V power |
| 2 | GND | Ground connection |
| 3 | CLK | Clock signal (DIO) |
| 4 | DIO | Data input/output |
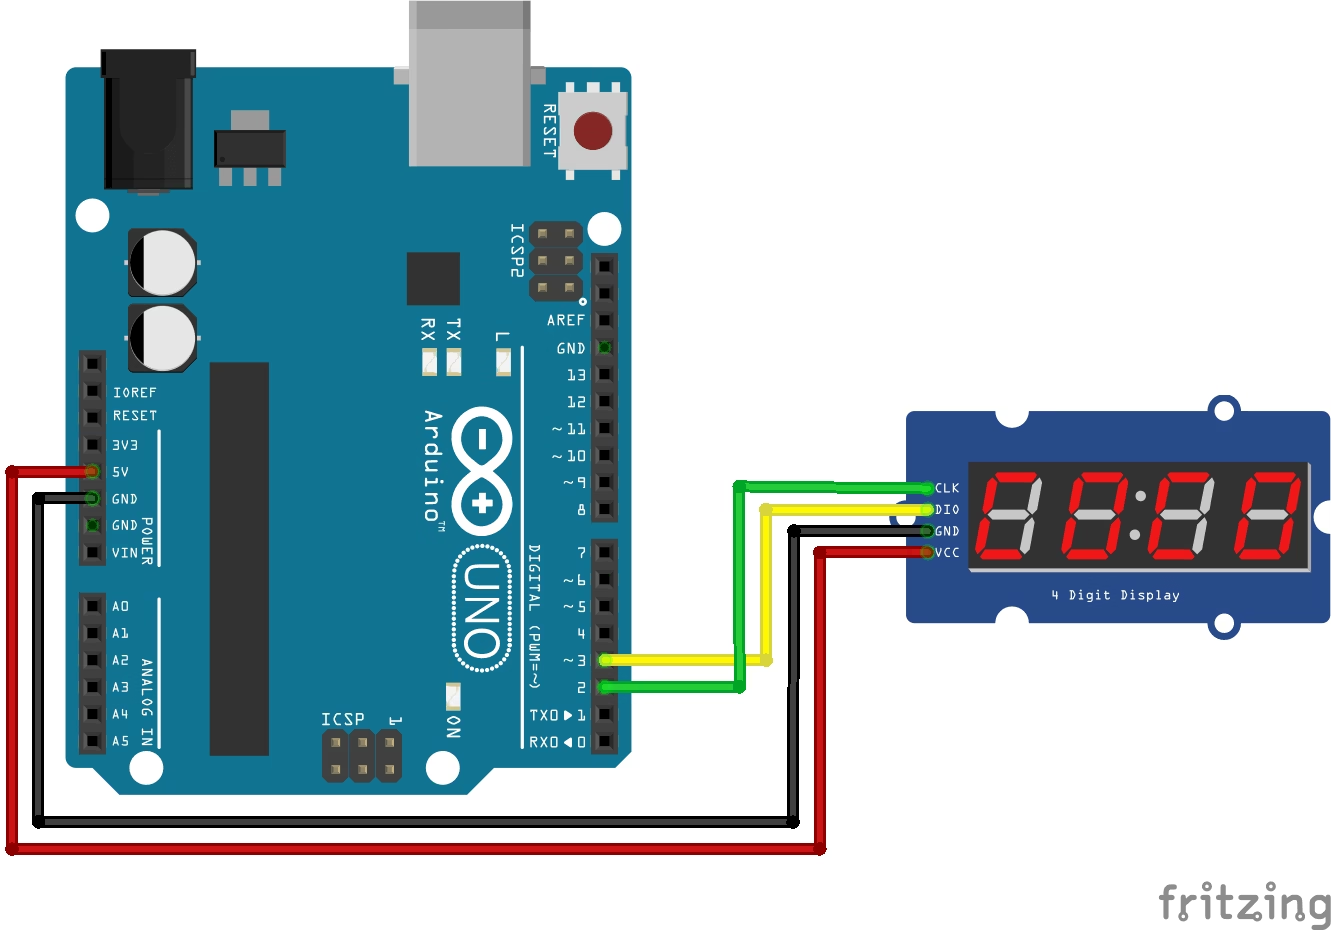
Connecting TM1637 Display with Arduino
Use the following wiring to connect the display to the Arduino:
| TM1637 Pin | Arduino Pin |
|---|---|
| VCC | 5V |
| GND | GND |
| CLK | D3 |
| DIO | D2 |
Installing the TM1637 Library
To make coding easier, install the TM1637Display library:
- Open Arduino IDE
- Navigate to Sketch > Include Library > Manage Libraries
- Search for TM1637
- Click Install on the library shown below
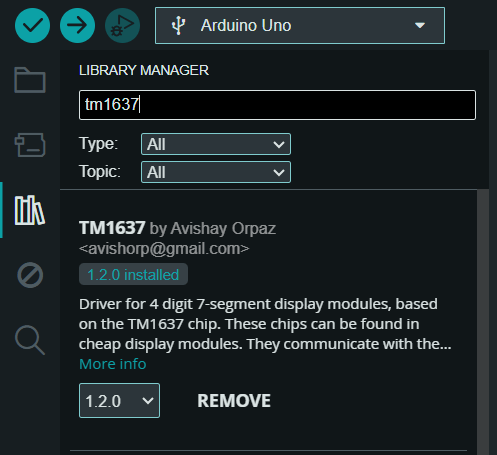
You can also download the Library zip file from GitHub.
Basic Arduino Code
Below is a complete example that demonstrates various features of the TM1637 Display with Arduino. This code covers displaying numbers, hexadecimal values, brightness control, and special characters.
// TM1637 Display with Arduino - Full Test
#include <TM1637Display.h>

// Define TM1637 module connection pins (Digital Pins)
#define CLK 2  // Clock Pin
#define DIO 3  // Data Pin

// Delay time between different test cases
#define TEST_DELAY 2000

// Custom segment encoding for displaying "DONE"
const uint8_t SEG_DONE[] = {
  SEG_B | SEG_C | SEG_D | SEG_E | SEG_G,           // d
  SEG_A | SEG_B | SEG_C | SEG_D | SEG_E | SEG_F,   // O
  SEG_C | SEG_E | SEG_G,                           // n
  SEG_A | SEG_D | SEG_E | SEG_F | SEG_G            // E
};

// Create display object
TM1637Display display(CLK, DIO);

void setup() {
  // Set brightness level (0x0F = max brightness)
  display.setBrightness(0x0F);
}

void loop() {
  int k;
  uint8_t data[] = { 0xff, 0xff, 0xff, 0xff }; // All segments ON
  uint8_t blank[] = { 0x00, 0x00, 0x00, 0x00 }; // All segments OFF

  // 1. Display all segments ON
  display.setSegments(data);
  delay(TEST_DELAY);

  // 2. Display numbers 0123
  data[0] = display.encodeDigit(0);
  data[1] = display.encodeDigit(1);
  data[2] = display.encodeDigit(2);
  data[3] = display.encodeDigit(3);
  display.setSegments(data);
  delay(TEST_DELAY);

  // 3. Display partial digits
  display.clear();
  display.setSegments(data + 2, 2, 2); // Display "23__"
  delay(TEST_DELAY);

  display.clear();
  display.setSegments(data + 2, 2, 1); // Display "_23_"
  delay(TEST_DELAY);

  display.clear();
  display.setSegments(data + 1, 3, 1); // Display "_123"
  delay(TEST_DELAY);

  // 4. Show numbers with and without leading zeros
  display.showNumberDec(0, false);  // Expect: ___0
  delay(TEST_DELAY);
  display.showNumberDec(0, true);   // Expect: 0000
  delay(TEST_DELAY);
  display.showNumberDec(301, false); // Expect: _301
  delay(TEST_DELAY);
  display.showNumberDec(301, true);  // Expect: 0301
  delay(TEST_DELAY);

  // 5. Display negative numbers
  display.showNumberDec(-1, false);  // Expect: __-1
  delay(TEST_DELAY);
  display.showNumberDec(-12);        // Expect: _-12
  delay(TEST_DELAY);
  display.showNumberDec(-999);       // Expect: -999
  delay(TEST_DELAY);

  // 6. Show hexadecimal numbers
  display.showNumberHexEx(0xf1af);        // Expect: f1Af
  delay(TEST_DELAY);
  display.showNumberHexEx(0x2c);          // Expect: __2C
  delay(TEST_DELAY);
  display.showNumberHexEx(0xd1, 0, true); // Expect: 00d1
  delay(TEST_DELAY);

  // 7. Display all possible dot positions
  for (k = 0; k <= 4; k++) {
    display.showNumberDecEx(0, (0x80 >> k), true);
    delay(TEST_DELAY);
  }

  // 8. Brightness test (gradual increase)
  for (k = 0; k < 4; k++) {
    data[k] = 0xff; // All segments ON
  }
  for (k = 0; k < 7; k++) {
    display.setBrightness(k);
    display.setSegments(data);
    delay(TEST_DELAY);
  }

  // 9. On/Off Test
  for (k = 0; k < 4; k++) {
    display.setBrightness(7, false);  // Turn off
    display.setSegments(data);
    delay(TEST_DELAY);
    display.setBrightness(7, true);   // Turn on
    display.setSegments(data);
    delay(TEST_DELAY);
  }

  // 10. Display "DONE"
  display.setSegments(SEG_DONE);

  // Halt execution
  while (1);
}
Code Explanation:
This Arduino program demonstrates how to use the TM1637 4-digit 7-segment display efficiently. Here’s what each part of the code does:
- Initialize TM1637 Display:
- The
TM1637Displaylibrary is included. - The Clock (CLK) and Data (DIO) pins are defined.
- A
displayobject is created.
- The
- Set Brightness:
display.setBrightness(0x0F);sets the brightness level (range 0-7).
- Displaying Numbers & Characters:
display.showNumberDec(301, true);displays the number with leading zeros (e.g.,0301).display.showNumberDec(-12);displays negative numbers correctly.display.showNumberHexEx(0xf1af);demonstrates hexadecimal numbers.
- Segment Control:
display.setSegments(data);allows full control of the 7-segment LEDs.display.setSegments(SEG_DONE);displays the word “DONE”.
- Brightness and Dot Testing:
display.setBrightness(k);gradually increases brightness.- A loop runs through all dot positions to test them.
- On/Off Testing:
display.setBrightness(7, false);turns off the display.display.setBrightness(7, true);turns it back on.
- Looping & Stopping Execution:
- After all tests, the program displays “DONE” and halts execution.
Demo:
Simple Countdown Timer
A simple countdown from 30 seconds to 0.
// TM1637 Display with Arduino - Countdown Timer
#include <TM1637Display.h>

#define CLK 2
#define DIO 3

TM1637Display display(CLK, DIO);

void setup() {
  display.setBrightness(7);
}

void loop() {
  for (int i = 30; i >= 0; i--) {
    display.showNumberDec(i, true);  // Display with leading zero (e.g., 09)
    delay(1000);
  }

  display.clear();
  delay(2000);
}
Here is the link to Wokwi simulation for this project: Simple Countdown Timer TM1637
Advanced Applications
Beyond basic number displays, the TM1637 Display with Arduino can be used in:
- Real-time clocks (with DS3231 module)
- Temperature displays (with DHT11/DHT22 sensors)
- Game score counters
- Stopwatches & countdown timers
Check out our guide on using DS3231 with Arduino.
Conclusion
In this detailed guide, we covered how to use the TM1637 Display with Arduino, including wiring, basic number display, custom characters, and countdown timers. You can further extend this project by integrating it with sensors, real-time clocks, or advanced user interfaces.
Explore more Arduino Display Tutorials here: