
This is a modern and recommended way to implement ESP32 Firebase integration without needing external servers. Logging data from a microcontroller to the cloud is a foundational task in many IoT applications. In this tutorial, you will learn how to send a counter integer value from an ESP32 development board to the Firebase Realtime Database.
Unlike sensor-based logging, this example will simply increment a number every few seconds and store it in your Firebase database. This approach is excellent for learning how to connect your ESP32 to Firebase before adding sensors.
Prerequisites
To follow this tutorial, you need:
- An ESP32 board
- Arduino IDE (version 1.8.19 or newer)
- ESP32 Boards manager. Click here if you haven’t installed yet.
- A Firebase project with Realtime Database enabled
- A Wi-Fi connection
- Firebase_ESP_Client library installed in Arduino IDE
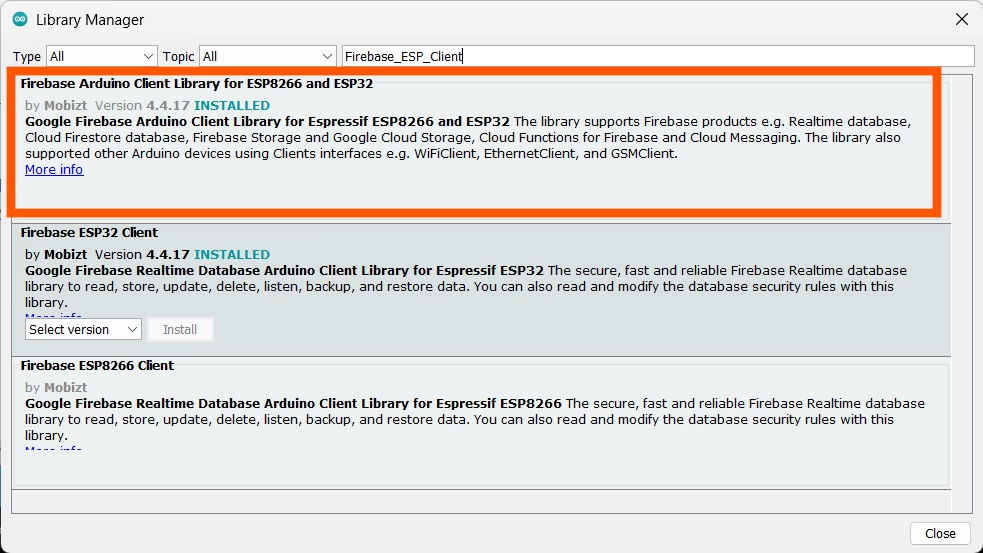
Install Firebase ESP Client Library
- Open Arduino IDE
- Go to Sketch > Include Library > Manage Libraries
- Search for
Firebase ESP Client - Install the library by Mobizt named Firebase_ESP_Client
This library provides full support for ESP32 Firebase operations, including authentication, secure HTTPS requests, and real-time database communication.
Create Firebase Realtime Database
- Open the Firebase Console
- Click “Add Project” and follow the steps to create a project
- Go to Build > Realtime Database
- Click “Create Database”
- Choose your location and start in test mode
This will give you a working Realtime Database that accepts write requests without restrictions.
Get Firebase Credentials
To use the ESP32 Firebase connection method shown in this guide, you need two things:
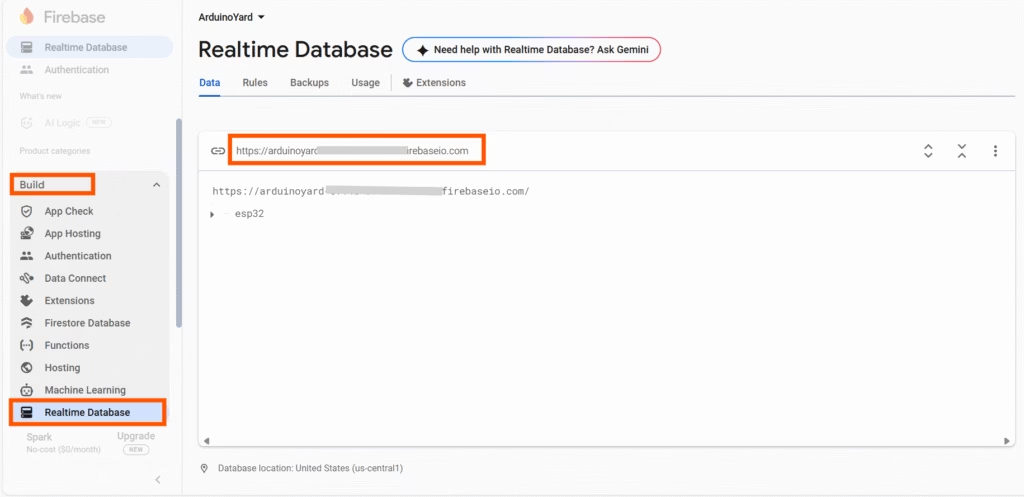
1. Database URL
- Found at the top of your Realtime Database dashboard
- Format:
your-project-id.firebaseio.com
2. Database Secret
- Go to Project Settings > Service Accounts > Database Secrets
- Click “Show” and copy the secret key
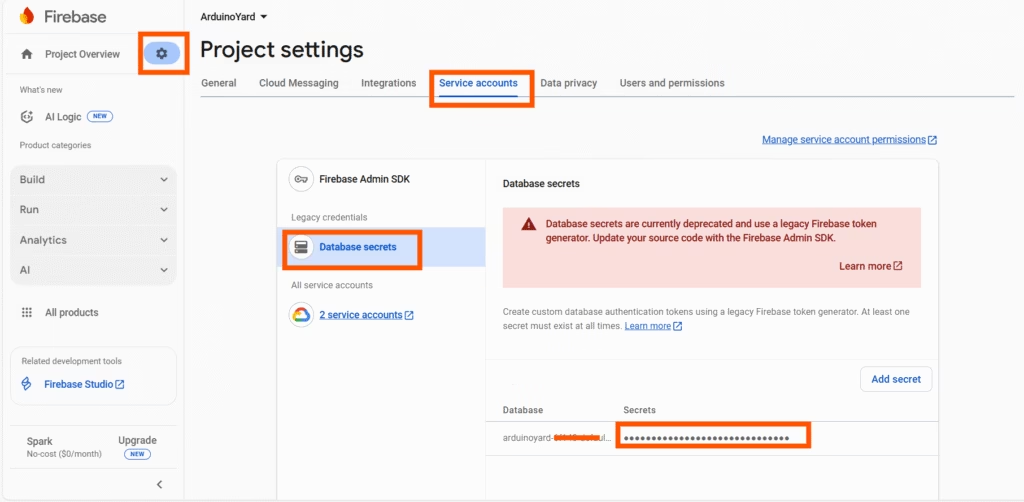
This secret allows the ESP32 to connect using the legacy authentication method.
Arduino Code to Send Counter to Firebase
Below is the complete code to send a simple counter value to Firebase every 5 seconds. It uses the modern initialization method with FirebaseConfig and FirebaseAuth structures.
ESP32 Firebase Logging Code
//ESP32 Firebase
#include <WiFi.h>
#include <Firebase_ESP_Client.h>
#include <addons/RTDBHelper.h>

// Wi-Fi credentials
#define WIFI_SSID "YOUR_WIFI_SSID"
#define WIFI_PASSWORD "YOUR_WIFI_PASSWORD"

// Firebase credentials
#define DATABASE_URL "your-project-id.firebaseio.com"
#define DATABASE_SECRET "your_firebase_database_secret"

// Firebase objects
FirebaseData fbdo;
FirebaseAuth auth;
FirebaseConfig config;

unsigned long dataMillis = 0;
int count = 0;

void setup() {
  Serial.begin(115200);

  WiFi.begin(WIFI_SSID, WIFI_PASSWORD);
  Serial.print("Connecting to Wi-Fi");
  while (WiFi.status() != WL_CONNECTED) {
    Serial.print(".");
    delay(300);
  }

  Serial.println();
  Serial.print("Connected with IP: ");
  Serial.println(WiFi.localIP());

  Serial.printf("Firebase Client v%s\n\n", FIREBASE_CLIENT_VERSION);

  config.database_url = DATABASE_URL;
  config.signer.tokens.legacy_token = DATABASE_SECRET;

  Firebase.reconnectNetwork(true);
  fbdo.setBSSLBufferSize(4096, 1024);
  Firebase.begin(&config, &auth);
}

void loop() {
  if (millis() - dataMillis > 5000) {
    dataMillis = millis();
    bool result = Firebase.RTDB.setInt(&fbdo, "/esp32/counter", count++);
    Serial.printf("Uploading count: %s\n", result ? "ok" : fbdo.errorReason().c_str());
  }
}
This code initializes the ESP32 Firebase connection and uploads the counter value under the /esp32/counter path.
Monitor the Data in Firebase Console
After uploading the code and powering up your ESP32, go to your Firebase Realtime Database panel.
Firebase real-time Database:
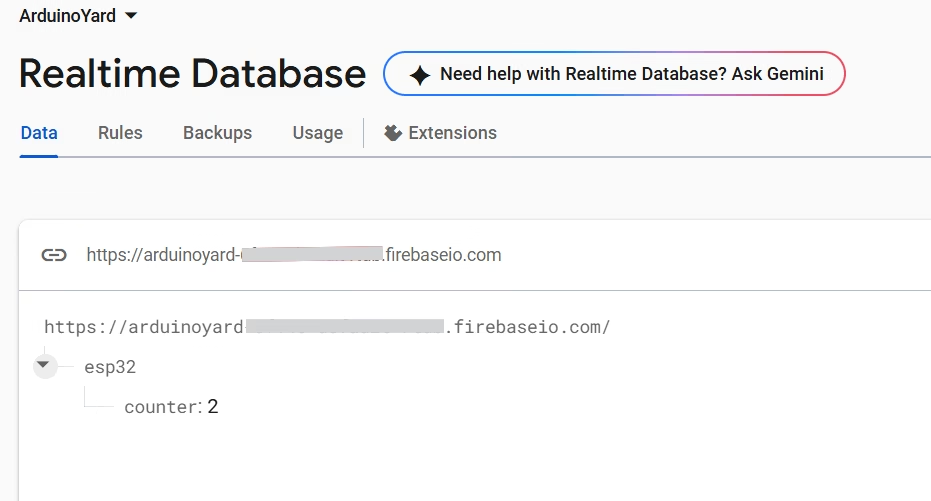
The value will update every 5 seconds as the ESP32 writes to Firebase.
Serial Monitor:
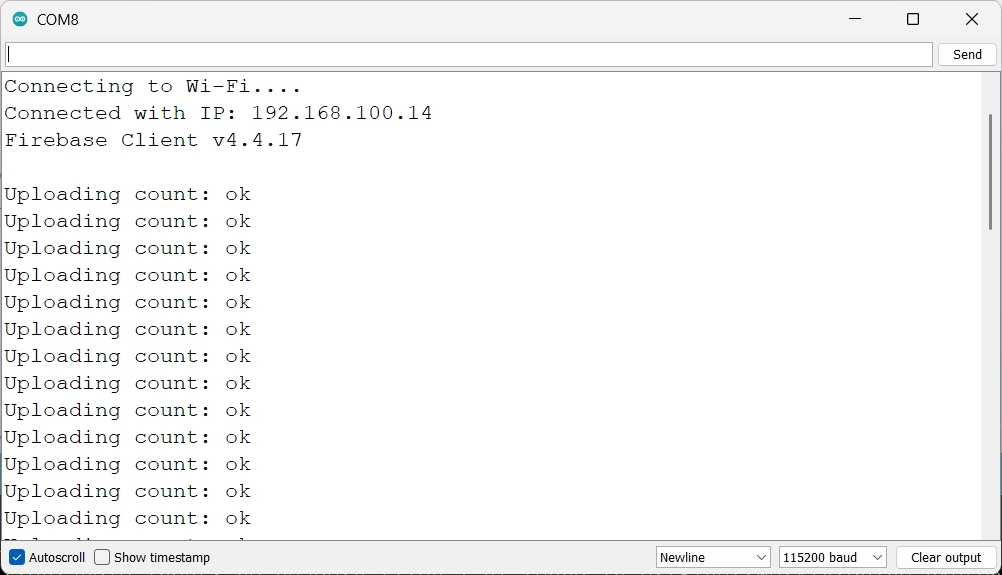
Optional:
Realtime Database Rules
For development purposes, you may want to keep the database open. Navigate to Realtime Database > Rules and use the following settings:
{
  "rules": {
    ".read": true,
    ".write": true
  }
}Make sure to restrict access before deploying the project publicly. The ESP32 Firebase setup used here uses a database secret, so securing it is very important.
Mini Task: Extend with a Sensor
Now that your ESP32 Firebase connection is working, try this simple task:
Task:
Replace the counter with a real sensor value — for example, a DHT11 or DHT22 temperature and humidity sensor.
Steps:
- Connect the DHT sensor to your ESP32
- Use the
DHTlibrary to read temperature or humidity - Replace
count++in the loop with the sensor value - Log the temperature under the path
/esp32/temperaturein Firebase
From this guide, you can get connection details and code of DHT11 and ESP32:
Display ESP32 Readings On A Local Webpage Via XAMPP: A Simple Guide – ArduinoYard
This exercise will give you hands-on experience integrating sensors with Firebase and will prepare you for more advanced IoT projects.
Summary
In this guide, you learned how to connect an ESP32 to Firebase using the modern Firebase_ESP_Client library and log a counter value in real-time. This method provides a clean, secure, and scalable foundation for more advanced applications like sensor monitoring, user actions, or remote logging.
By understanding the ESP32 Firebase connection process and testing it with a counter, you now have the skills to integrate any data source into your Firebase project.
You can expand on this example by:
- Logging temperature or humidity data
- Creating a timestamped event log
- Triggering cloud-based actions or notifications
The combination of ESP32 and Firebase makes real-time IoT data storage easy and efficient.
SEE HOW TO GET STARTED WITH THE FIREBASE:
Getting Started With Firebase: A Basic Guide – ArduinoYard
Firebase To ESP32: Read Realtime Data From Firebase Realtime Database – ArduinoYard
SEE HOW TO INSTALL ESP32/ESP8266 BOARDS IN ARDUINO IDE:
How To Install ESP32 And ESP8266 Boards In Arduino IDE (Step-by-Step Guide) – ArduinoYard