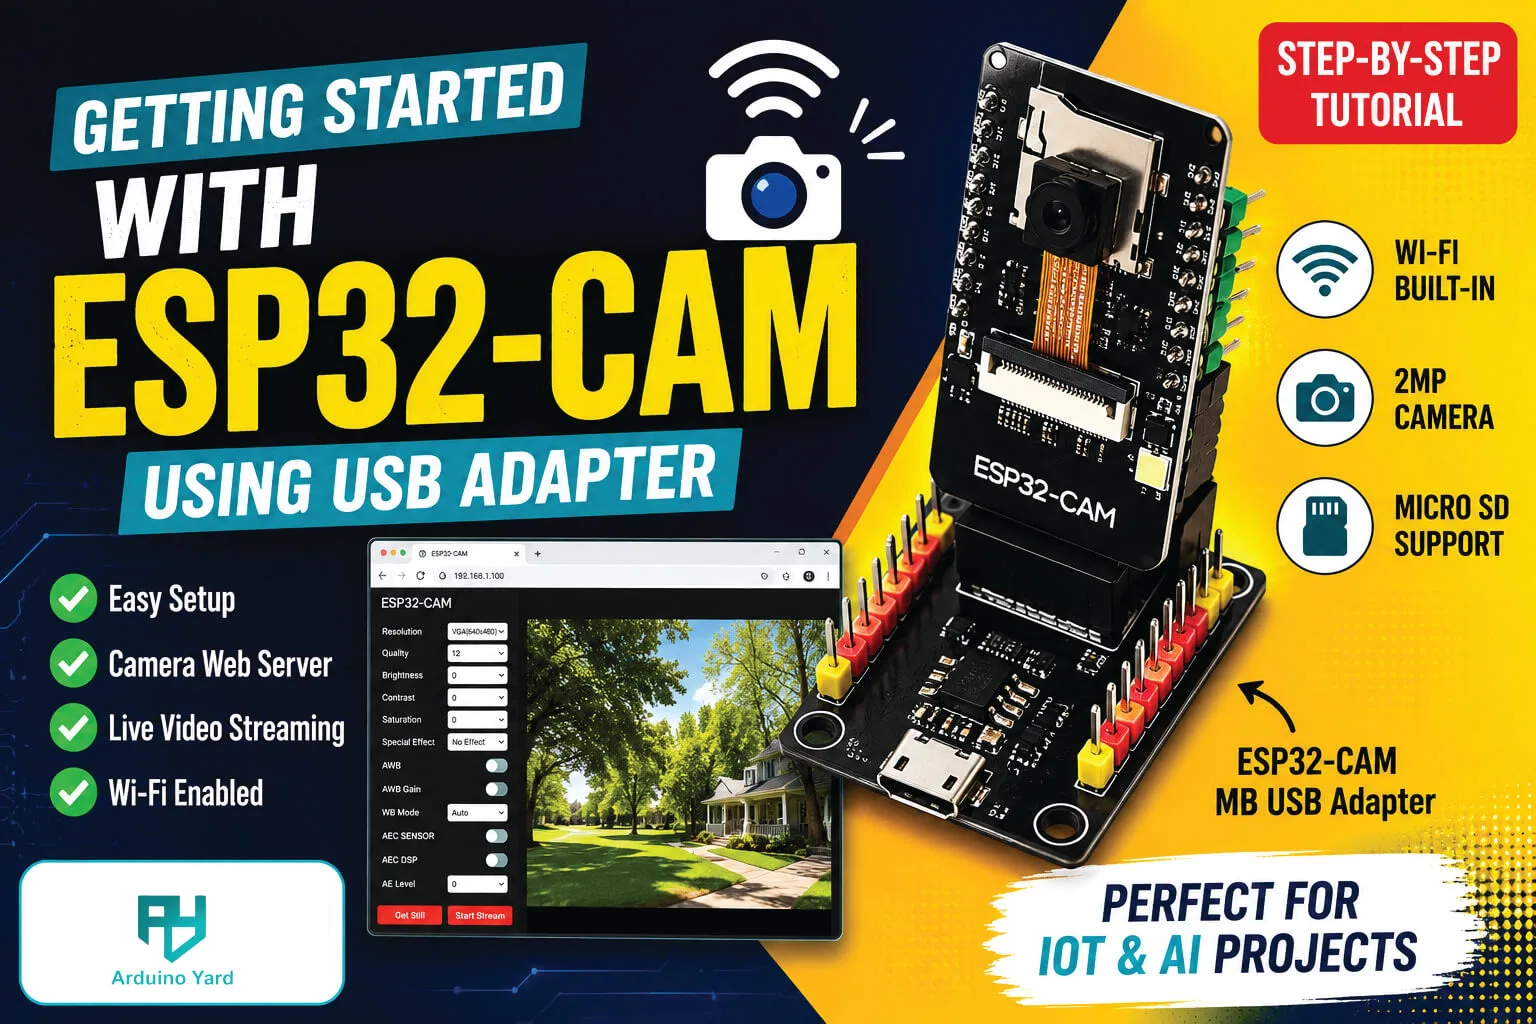
If you are looking to explore embedded vision and IoT projects, getting started with ESP32-CAM is one of the best decisions you can make. This compact and affordable module combines a powerful microcontroller with a camera. Getting Started with ESP32-CAM Using the ESP32-CAM-MB USB Adapter
If you have recently purchased an ESP32-CAM along with the ESP32-CAM-MB USB adapter, you are already using one of the easiest setups for programming and testing this powerful camera module. Unlike the standalone ESP32-CAM, the USB adapter eliminates the need for an external FTDI programmer, making the setup much simpler for beginners.
In this guide, you’ll learn everything you need for getting started with ESP32-CAM, including installing the Arduino IDE, configuring the board, uploading your first program, and viewing the live camera stream.
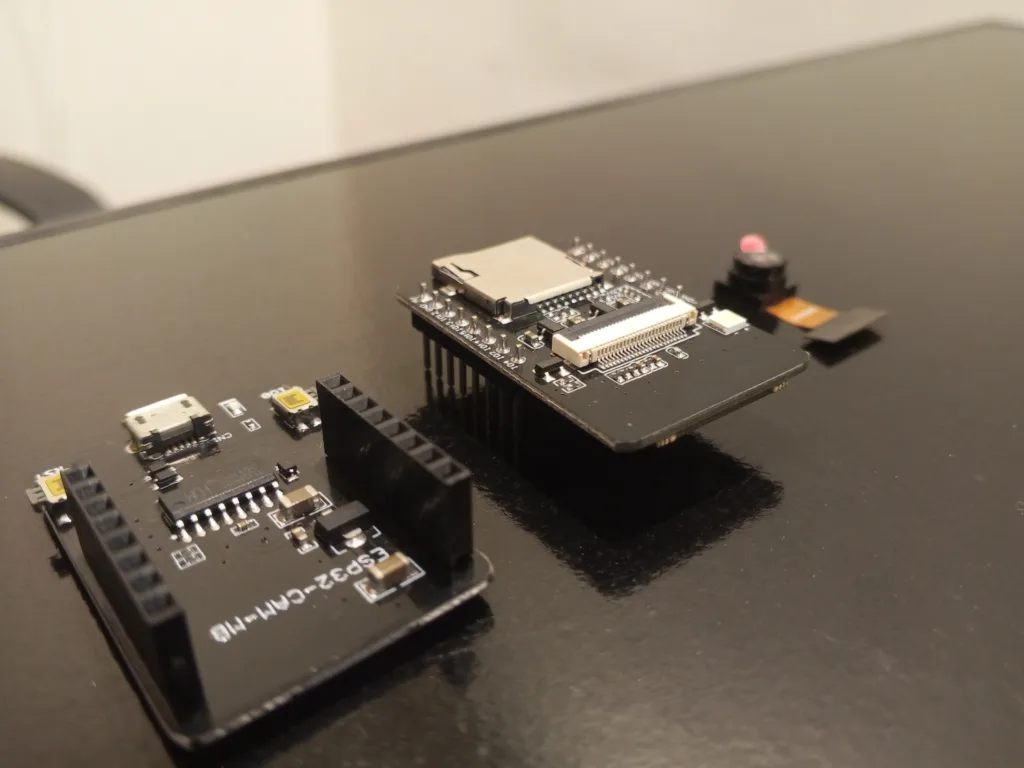
If you don’t have your board yet, it’s worth comparing your options first. Our guide to the best ESP32 camera boards for beginners breaks down which modules are worth buying and what to look for before you order one.
What is the ESP32-CAM?
The ESP32-CAM is a compact development board based on the ESP32 SoC and features the OV2640 2MP camera module. It combines Wi-Fi, Bluetooth, and image processing capabilities into a low-cost board, making it suitable for security cameras, smart doorbells, QR code scanners, object detection, and many other IoT applications.
When paired with the ESP32-CAM-MB USB adapter, programming becomes as simple as plugging the board into your computer using a Micro-USB cable.
Features of ESP32-CAM
Some of the main features include:
- Dual-core ESP32 processor running up to 240 MHz
- OV2640 2MP camera module
- Built-in Wi-Fi (802.11 b/g/n)
- Bluetooth Classic and BLE
- MicroSD card slot
- Deep Sleep support for battery-powered projects
- Multiple GPIO pins for sensors and peripherals
These features make the ESP32-CAM one of the most popular camera development boards available today.
Components Required
For this tutorial, you will need:
- ESP32-CAM development board
- ESP32-CAM-MB USB adapter
- Micro-USB cable
- Windows, Linux, or macOS computer
- Arduino IDE
- Wi-Fi network
Since the USB adapter already includes a USB-to-Serial converter and automatic reset circuitry, no FTDI programmer or jumper wires are required.
Installing Arduino IDE
If you haven’t already installed Arduino IDE, download the latest version from the official Arduino website.
After installation:
- Open Arduino IDE.
- Go to File → Preferences.
- In Additional Boards Manager URLs, add:
https://raw.githubusercontent.com/espressif/arduino-esp32/gh-pages/package_esp32_index.json<br>- Click OK.
- Open Tools → Board → Boards Manager.
- Search for ESP32.
- Install the latest ESP32 board package from Espressif Systems.
Or visit: How To Install ESP32 And ESP8266 Boards In Arduino IDE (Step-by-Step Guide) – ArduinoYard
Once installed, restart the Arduino IDE.
Installing the ESP32-CAM on the USB Adapter
Insert the ESP32-CAM carefully into the ESP32-CAM-MB adapter.
Make sure:
- The camera faces away from the USB connector.
- The pins are fully inserted.
- The board sits evenly on the adapter.
Now connect the adapter to your computer using a Micro-USB cable.
Windows should automatically detect a new COM port. If it doesn’t, install the appropriate USB driver for the CH340 or CP2102 chip used on your adapter.
Configuring Arduino IDE
Before uploading any sketch, configure these settings:
Board: AI Thinker ESP32-CAM
Upload Speed: 115200
Flash Frequency: 40 MHz
Partition Scheme: Huge APP
Port: Select the COM port assigned to your ESP32-CAM.
These settings work reliably for most ESP32-CAM projects.
Complete ESP32-CAM Web Server Code
/*
  Getting Started with ESP32-CAM
  Website: ArduinoYard.com
*/

#include <WiFi.h>
#include "esp_camera.h"
#include "esp_http_server.h"

// =====================================================
// WIFI SETTINGS
// =====================================================
const char* ssid = "YOUR_WIFI_NAME";
const char* password = "YOUR_WIFI_PASSWORD";

// =====================================================
// AI THINKER ESP32-CAM PIN DEFINITIONS
// =====================================================
#define PWDN_GPIO_NUM     32
#define RESET_GPIO_NUM    -1
#define XCLK_GPIO_NUM      0
#define SIOD_GPIO_NUM     26
#define SIOC_GPIO_NUM     27

#define Y9_GPIO_NUM       35
#define Y8_GPIO_NUM       34
#define Y7_GPIO_NUM       39
#define Y6_GPIO_NUM       36
#define Y5_GPIO_NUM       21
#define Y4_GPIO_NUM       19
#define Y3_GPIO_NUM       18
#define Y2_GPIO_NUM        5

#define VSYNC_GPIO_NUM    25
#define HREF_GPIO_NUM     23
#define PCLK_GPIO_NUM     22

// Built-in white flash LED on many AI Thinker boards
#define FLASH_LED_PIN      4

// =====================================================
// WEB PAGE
// =====================================================
static const char INDEX_HTML[] PROGMEM = R"rawliteral(
<!DOCTYPE html>
<html>
<head>
  <meta charset="UTF-8">
  <meta name="viewport"
        content="width=device-width, initial-scale=1.0">

  <title>ESP32-CAM Web Server</title>

  <style>
    body {
      margin: 0;
      padding: 20px;
      background: #111827;
      color: white;
      font-family: Arial, Helvetica, sans-serif;
      text-align: center;
    }

    h1 {
      margin-bottom: 5px;
    }

    p {
      color: #d1d5db;
    }

    .container {
      max-width: 900px;
      margin: auto;
    }

    .camera-box {
      margin-top: 20px;
      padding: 12px;
      background: #1f2937;
      border-radius: 12px;
    }

    img {
      width: 100%;
      max-width: 800px;
      height: auto;
      border-radius: 8px;
      background: black;
    }

    .button-row {
      margin-top: 20px;
    }

    button,
    a.button {
      display: inline-block;
      margin: 6px;
      padding: 12px 20px;
      border: none;
      border-radius: 7px;
      background: #0ea5e9;
      color: white;
      font-size: 16px;
      text-decoration: none;
      cursor: pointer;
    }

    button:hover,
    a.button:hover {
      background: #0284c7;
    }

    .stop {
      background: #ef4444;
    }

    .stop:hover {
      background: #dc2626;
    }
  </style>
</head>

<body>
  <div class="container">
    <h1>ESP32-CAM Web Server</h1>
    <p>ArduinoYard.com</p>

    <div class="camera-box">
      <img id="cameraStream" alt="ESP32-CAM live video stream">
    </div>

    <div class="button-row">
      <button onclick="startStream()">Start Stream</button>

      <button class="stop" onclick="stopStream()">
        Stop Stream
      </button>

      <a class="button" href="/capture" target="_blank">
        Capture Photo
      </a>
    </div>
  </div>

  <script>
    function startStream() {
      document.getElementById("cameraStream").src =
        "/stream?t=" + new Date().getTime();
    }

    function stopStream() {
      document.getElementById("cameraStream").src = "";
    }

    window.onload = startStream;
  </script>
</body>
</html>
)rawliteral";

// =====================================================
// HTTP SERVER HANDLES
// =====================================================
httpd_handle_t cameraHttpServer = NULL;
httpd_handle_t streamHttpServer = NULL;

// MJPEG stream boundary
#define PART_BOUNDARY "123456789000000000000987654321"

static const char* STREAM_CONTENT_TYPE =
    "multipart/x-mixed-replace;boundary=" PART_BOUNDARY;

static const char* STREAM_BOUNDARY =
    "\r\n--" PART_BOUNDARY "\r\n";

static const char* STREAM_PART =
    "Content-Type: image/jpeg\r\n"
    "Content-Length: %u\r\n\r\n";

// =====================================================
// MAIN WEB PAGE HANDLER
// =====================================================
static esp_err_t indexHandler(httpd_req_t* request)
{
  httpd_resp_set_type(request, "text/html");

  return httpd_resp_send(
    request,
    INDEX_HTML,
    HTTPD_RESP_USE_STRLEN
  );
}

// =====================================================
// SINGLE PHOTO CAPTURE HANDLER
// =====================================================
static esp_err_t captureHandler(httpd_req_t* request)
{
  camera_fb_t* frameBuffer = esp_camera_fb_get();

  if (frameBuffer == NULL)
  {
    Serial.println("Camera capture failed");

    httpd_resp_send_500(request);

    return ESP_FAIL;
  }

  httpd_resp_set_type(request, "image/jpeg");

  httpd_resp_set_hdr(
    request,
    "Content-Disposition",
    "inline; filename=esp32-cam.jpg"
  );

  httpd_resp_set_hdr(
    request,
    "Access-Control-Allow-Origin",
    "*"
  );

  esp_err_t result = httpd_resp_send(
    request,
    reinterpret_cast<const char*>(frameBuffer->buf),
    frameBuffer->len
  );

  esp_camera_fb_return(frameBuffer);

  return result;
}

// =====================================================
// LIVE VIDEO STREAM HANDLER
// =====================================================
static esp_err_t streamHandler(httpd_req_t* request)
{
  esp_err_t result =
      httpd_resp_set_type(request, STREAM_CONTENT_TYPE);

  if (result != ESP_OK)
  {
    return result;
  }

  httpd_resp_set_hdr(
    request,
    "Access-Control-Allow-Origin",
    "*"
  );

  camera_fb_t* frameBuffer = NULL;

  uint8_t* jpegBuffer = NULL;
  size_t jpegLength = 0;

  char headerBuffer[128];

  while (true)
  {
    frameBuffer = esp_camera_fb_get();

    if (frameBuffer == NULL)
    {
      Serial.println("Camera frame capture failed");
      result = ESP_FAIL;
    }
    else
    {
      // The camera is normally configured to output JPEG.
      if (frameBuffer->format == PIXFORMAT_JPEG)
      {
        jpegBuffer = frameBuffer->buf;
        jpegLength = frameBuffer->len;
      }
      else
      {
        bool converted = frame2jpg(
          frameBuffer,
          80,
          &jpegBuffer,
          &jpegLength
        );

        if (!converted)
        {
          Serial.println("JPEG conversion failed");

          esp_camera_fb_return(frameBuffer);
          frameBuffer = NULL;

          result = ESP_FAIL;
        }
      }
    }

    if (result == ESP_OK)
    {
      result = httpd_resp_send_chunk(
        request,
        STREAM_BOUNDARY,
        strlen(STREAM_BOUNDARY)
      );
    }

    if (result == ESP_OK)
    {
      int headerLength = snprintf(
        headerBuffer,
        sizeof(headerBuffer),
        STREAM_PART,
        static_cast<unsigned int>(jpegLength)
      );

      result = httpd_resp_send_chunk(
        request,
        headerBuffer,
        headerLength
      );
    }

    if (result == ESP_OK)
    {
      result = httpd_resp_send_chunk(
        request,
        reinterpret_cast<const char*>(jpegBuffer),
        jpegLength
      );
    }

    // Free converted JPEG data only when it did not come
    // directly from the camera frame buffer.
    if (frameBuffer != NULL &&
        frameBuffer->format != PIXFORMAT_JPEG &&
        jpegBuffer != NULL)
    {
      free(jpegBuffer);
      jpegBuffer = NULL;
    }

    if (frameBuffer != NULL)
    {
      esp_camera_fb_return(frameBuffer);
      frameBuffer = NULL;
    }

    if (result != ESP_OK)
    {
      break;
    }
  }

  return result;
}

// =====================================================
// START CAMERA WEB SERVERS
// =====================================================
void startCameraServer()
{
  // Main webpage and capture server
  httpd_config_t cameraConfig = HTTPD_DEFAULT_CONFIG();

  cameraConfig.server_port = 80;
  cameraConfig.ctrl_port = 32768;
  cameraConfig.max_uri_handlers = 8;

  httpd_uri_t indexUri = {
    .uri = "/",
    .method = HTTP_GET,
    .handler = indexHandler,
    .user_ctx = NULL
  };

  httpd_uri_t captureUri = {
    .uri = "/capture",
    .method = HTTP_GET,
    .handler = captureHandler,
    .user_ctx = NULL
  };

  if (httpd_start(
        &cameraHttpServer,
        &cameraConfig
      ) == ESP_OK)
  {
    httpd_register_uri_handler(
      cameraHttpServer,
      &indexUri
    );

    httpd_register_uri_handler(
      cameraHttpServer,
      &captureUri
    );
  }
  else
  {
    Serial.println("Failed to start web server");
  }

  // Video stream server uses a separate port
  httpd_config_t streamConfig = HTTPD_DEFAULT_CONFIG();

  streamConfig.server_port = 81;
  streamConfig.ctrl_port = 32769;
  streamConfig.max_uri_handlers = 4;

  httpd_uri_t streamUri = {
    .uri = "/stream",
    .method = HTTP_GET,
    .handler = streamHandler,
    .user_ctx = NULL
  };

  if (httpd_start(
        &streamHttpServer,
        &streamConfig
      ) == ESP_OK)
  {
    httpd_register_uri_handler(
      streamHttpServer,
      &streamUri
    );
  }
  else
  {
    Serial.println("Failed to start stream server");
  }
}

// =====================================================
// CAMERA INITIALIZATION
// =====================================================
bool initializeCamera()
{
  camera_config_t config;

  config.ledc_channel = LEDC_CHANNEL_0;
  config.ledc_timer = LEDC_TIMER_0;

  config.pin_d0 = Y2_GPIO_NUM;
  config.pin_d1 = Y3_GPIO_NUM;
  config.pin_d2 = Y4_GPIO_NUM;
  config.pin_d3 = Y5_GPIO_NUM;
  config.pin_d4 = Y6_GPIO_NUM;
  config.pin_d5 = Y7_GPIO_NUM;
  config.pin_d6 = Y8_GPIO_NUM;
  config.pin_d7 = Y9_GPIO_NUM;

  config.pin_xclk = XCLK_GPIO_NUM;
  config.pin_pclk = PCLK_GPIO_NUM;
  config.pin_vsync = VSYNC_GPIO_NUM;
  config.pin_href = HREF_GPIO_NUM;

  config.pin_sccb_sda = SIOD_GPIO_NUM;
  config.pin_sccb_scl = SIOC_GPIO_NUM;

  config.pin_pwdn = PWDN_GPIO_NUM;
  config.pin_reset = RESET_GPIO_NUM;

  config.xclk_freq_hz = 20000000;
  config.pixel_format = PIXFORMAT_JPEG;

  config.grab_mode = CAMERA_GRAB_LATEST;

  // Use larger buffers and resolution when PSRAM is available.
  if (psramFound())
  {
    Serial.println("PSRAM detected");

    config.frame_size = FRAMESIZE_VGA;
    config.jpeg_quality = 10;
    config.fb_count = 2;
    config.fb_location = CAMERA_FB_IN_PSRAM;
  }
  else
  {
    Serial.println("PSRAM not detected");

    config.frame_size = FRAMESIZE_QVGA;
    config.jpeg_quality = 12;
    config.fb_count = 1;
    config.fb_location = CAMERA_FB_IN_DRAM;
  }

  esp_err_t cameraError = esp_camera_init(&config);

  if (cameraError != ESP_OK)
  {
    Serial.printf(
      "Camera initialization failed. Error: 0x%x\n",
      cameraError
    );

    return false;
  }

  sensor_t* cameraSensor = esp_camera_sensor_get();

  if (cameraSensor != NULL)
  {
    // Start at VGA for a stable beginner setup.
    cameraSensor->set_framesize(
      cameraSensor,
      FRAMESIZE_VGA
    );

    cameraSensor->set_quality(
      cameraSensor,
      10
    );

    cameraSensor->set_brightness(
      cameraSensor,
      0
    );

    cameraSensor->set_contrast(
      cameraSensor,
      0
    );

    cameraSensor->set_saturation(
      cameraSensor,
      0
    );
  }

  return true;
}

// =====================================================
// WIFI CONNECTION
// =====================================================
bool connectToWiFi()
{
  WiFi.mode(WIFI_STA);

  WiFi.setSleep(false);

  WiFi.begin(ssid, password);

  Serial.print("Connecting to Wi-Fi");

  unsigned long connectionStart = millis();

  while (WiFi.status() != WL_CONNECTED)
  {
    delay(500);
    Serial.print(".");

    if (millis() - connectionStart > 30000)
    {
      Serial.println();
      Serial.println("Wi-Fi connection timed out");

      return false;
    }
  }

  Serial.println();
  Serial.println("Wi-Fi connected");

  Serial.print("IP address: ");
  Serial.println(WiFi.localIP());

  return true;
}

// =====================================================
// SETUP
// =====================================================
void setup()
{
  Serial.begin(115200);

  delay(1000);

  Serial.println();
  Serial.println("ESP32-CAM Web Server");
  Serial.println("ArduinoYard.com");

  pinMode(FLASH_LED_PIN, OUTPUT);
  digitalWrite(FLASH_LED_PIN, LOW);

  if (!initializeCamera())
  {
    Serial.println("Restarting ESP32-CAM in 5 seconds");

    delay(5000);
    ESP.restart();
  }

  if (!connectToWiFi())
  {
    Serial.println("Restarting ESP32-CAM in 5 seconds");

    delay(5000);
    ESP.restart();
  }

  startCameraServer();

  Serial.println();
  Serial.println("Camera web server started");

  Serial.print("Open this address: http://");
  Serial.println(WiFi.localIP());

  Serial.print("Direct stream URL: http://");
  Serial.print(WiFi.localIP());
  Serial.println(":81/stream");
}

// =====================================================
// LOOP
// =====================================================
void loop()
{
  delay(1000);
}
//Getting Started with ESP32-CAMArduino IDE settings
Select the following options before uploading:
| Setting | Selection |
|---|---|
| Board | AI Thinker ESP32-CAM |
| Upload Speed | 115200 |
| CPU Frequency | 240 MHz |
| Flash Frequency | 40 MHz |
| Flash Mode | QIO |
| Partition Scheme | Huge APP |
| Port | ESP32-CAM-MB COM port |
The official ESP32 Arduino package uses the esp_camera driver and Espressif’s lightweight HTTP server in its camera example.
How to upload using the ESP32-CAM-MB adapter
- Insert the ESP32-CAM into the MB adapter in the correct direction.
- Connect the adapter to your computer.
- Enter your Wi-Fi name and password in the sketch.
- Select AI Thinker ESP32-CAM.
- Select the correct COM port.
- Click Upload.
- When uploading finishes, press the RST button.
- Open Serial Monitor at 115200 baud.
- Copy the displayed IP address into your browser.
Your computer or phone must be connected to the same Wi-Fi network as the ESP32-CAM.
Expected Serial Monitor output
ESP32-CAM Web Server
ArduinoYard.com
PSRAM detected
Connecting to Wi-Fi....
Wi-Fi connected
IP address: 192.168.1.105

Camera web server started
Open this address: http://192.168.1.105
Direct stream URL: http://192.168.1.105:81/streamDemonstration
What Can You Build Next?
Once you’re comfortable with getting started with ESP32-CAM, you can build a wide variety of exciting projects, including:
- Wi-Fi security camera
- Smart doorbell
- Face recognition system
- Motion detection camera
- QR code scanner
- Time-lapse camera
- Wildlife monitoring system
- Home automation surveillance
- AI image processing projects
- Cloud-connected camera using Firebase or MQTT
The ESP32-CAM provides an excellent platform for learning embedded vision and IoT development.
Conclusion
The ESP32-CAM paired with the ESP32-CAM-MB USB adapter offers one of the simplest ways to begin working with wireless camera projects. The adapter removes much of the complexity associated with programming the standalone module, allowing beginners to focus on learning and building.
This tutorial covered hardware setup, Arduino IDE installation, board configuration, uploading the Camera Web Server example, troubleshooting common issues, and viewing the live stream. By following these steps, you have successfully completed getting started with ESP32-CAM and are ready to explore more advanced image processing and IoT applications.
Whether you’re building a smart surveillance system or experimenting with computer vision, the ESP32-CAM is an excellent platform that offers impressive capabilities at an affordable price.
Thank You!!!