Introduction
L293D Motor Driver with Arduino is widely used in electronics projects, from simple hobby robots to industrial automation. In this guide, we will learn how to control a DC motor using Arduino and the L293D motor driver. We will explore its working principle, pin configuration, and how to connect it with Arduino for precise motor control. By the end of this guide, you’ll be able to build your own motor control projects with ease.
We’ll cover two examples:
1️⃣ Basic ON/OFF and Direction Control
2️⃣ PWM Speed Control
Components Required
- Arduino Uno
- L293D Motor Driver IC
- DC Motor
- Power Supply (5V or 9V battery)
- Jumper Wires
- Breadboard
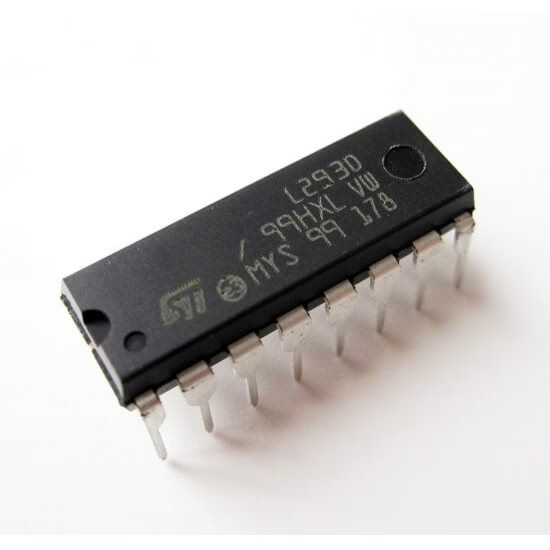
What is L293D Motor Driver?
The L293D is a dual H-Bridge motor driver IC that allows controlling two DC motors independently in both forward and reverse directions. It acts as an intermediary between a microcontroller (like Arduino) and the motors, providing the necessary current and voltage for motor operation.
With its built-in diodes for back EMF protection, it ensures safer motor operation and prevents damage to the control circuitry. The L293D can handle up to 600mA per channel and supports voltages up to 36V, making it suitable for small to medium-power DC motors.
Key Features:
- Controls two DC motors simultaneously (dual H-Bridge configuration)
- Operates on 5V logic (fully compatible with Arduino and other microcontrollers)
- Provides bidirectional control (Forward/Reverse rotation)
- Supports PWM for speed control (Precise motor speed adjustments)
- Handles motor voltages up to 36V (suitable for various DC motors)
- Built-in diodes for back EMF protection (prevents damage to the circuit)
- Compact DIP-16 package (easy to integrate into projects)
L293D vs. L298N: Which One to Use?
Both L293D and L298N are motor driver ICs used to control DC motor with Arduino, but they have some key differences:
| Feature | L293D | L298N |
|---|---|---|
| Voltage Range | 4.5V – 36V | 5V – 35V |
| Max Current (per channel) | 600mA | 2A |
| PWM Speed Control | Requires external PWM | Built-in PWM control |
| Efficiency | Lower (More heat dissipation) | Higher (Built-in heat sink) |
| Best For | Small motors, low-power applications | Higher power motors, better speed control |
📌 Note: If you’re using L298N, check our detailed L298N Motor Driver Guide for proper wiring and code.
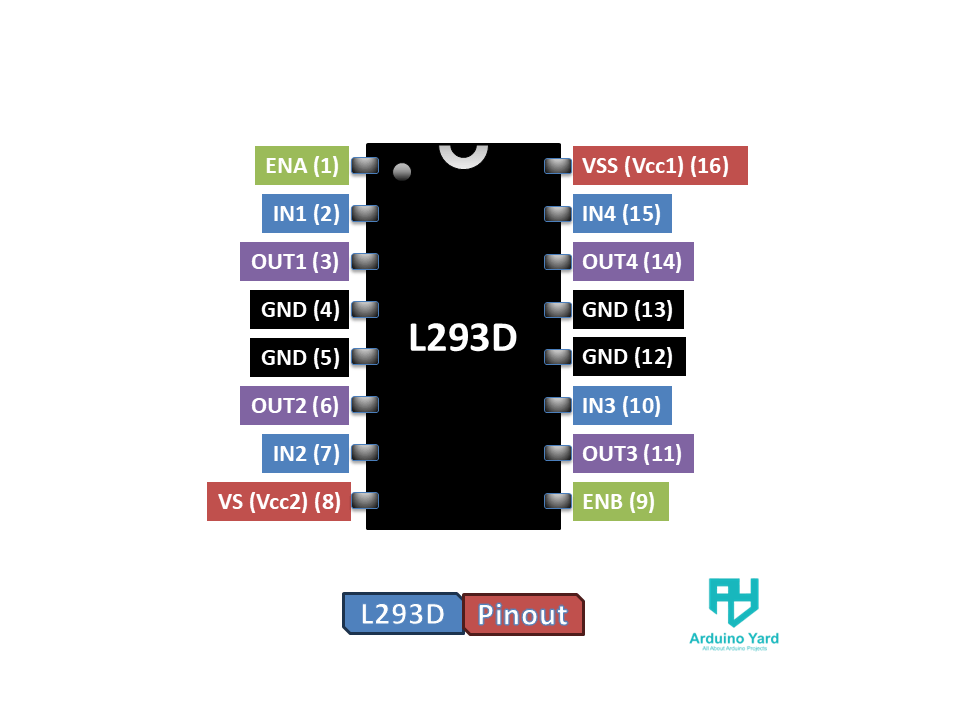
Understanding L293D Pinout
L293D has 16 pins, with two H-Bridge circuits to drive two motors. Below is a pin description table:
| Pin No. | Name | Description |
|---|---|---|
| 1 | Enable 1 | Enables Motor A (HIGH = ON, LOW = OFF) |
| 2 | Input 1 | Control pin for Motor A (connect to Arduino) |
| 3 | Output 1 | Connects to one terminal of Motor A |
| 4,5 | GND | Ground |
| 6 | Output 2 | Connects to other terminal of Motor A |
| 7 | Input 2 | Control pin for Motor A (connect to Arduino) |
| 8 | VCC2 | Motor Power Supply (5V-12V) |
| 9 | Enable 2 | Enables Motor B (if using two motors) |
| 10,11 | Input 3,4 | Control pins for Motor B |
| 12,13 | Output 3,4 | Connects to Motor B |
| 14 | Input 4 | Control pin for Motor B |
| 16 | VCC1 | Logic Power Supply (5V for L293D) |
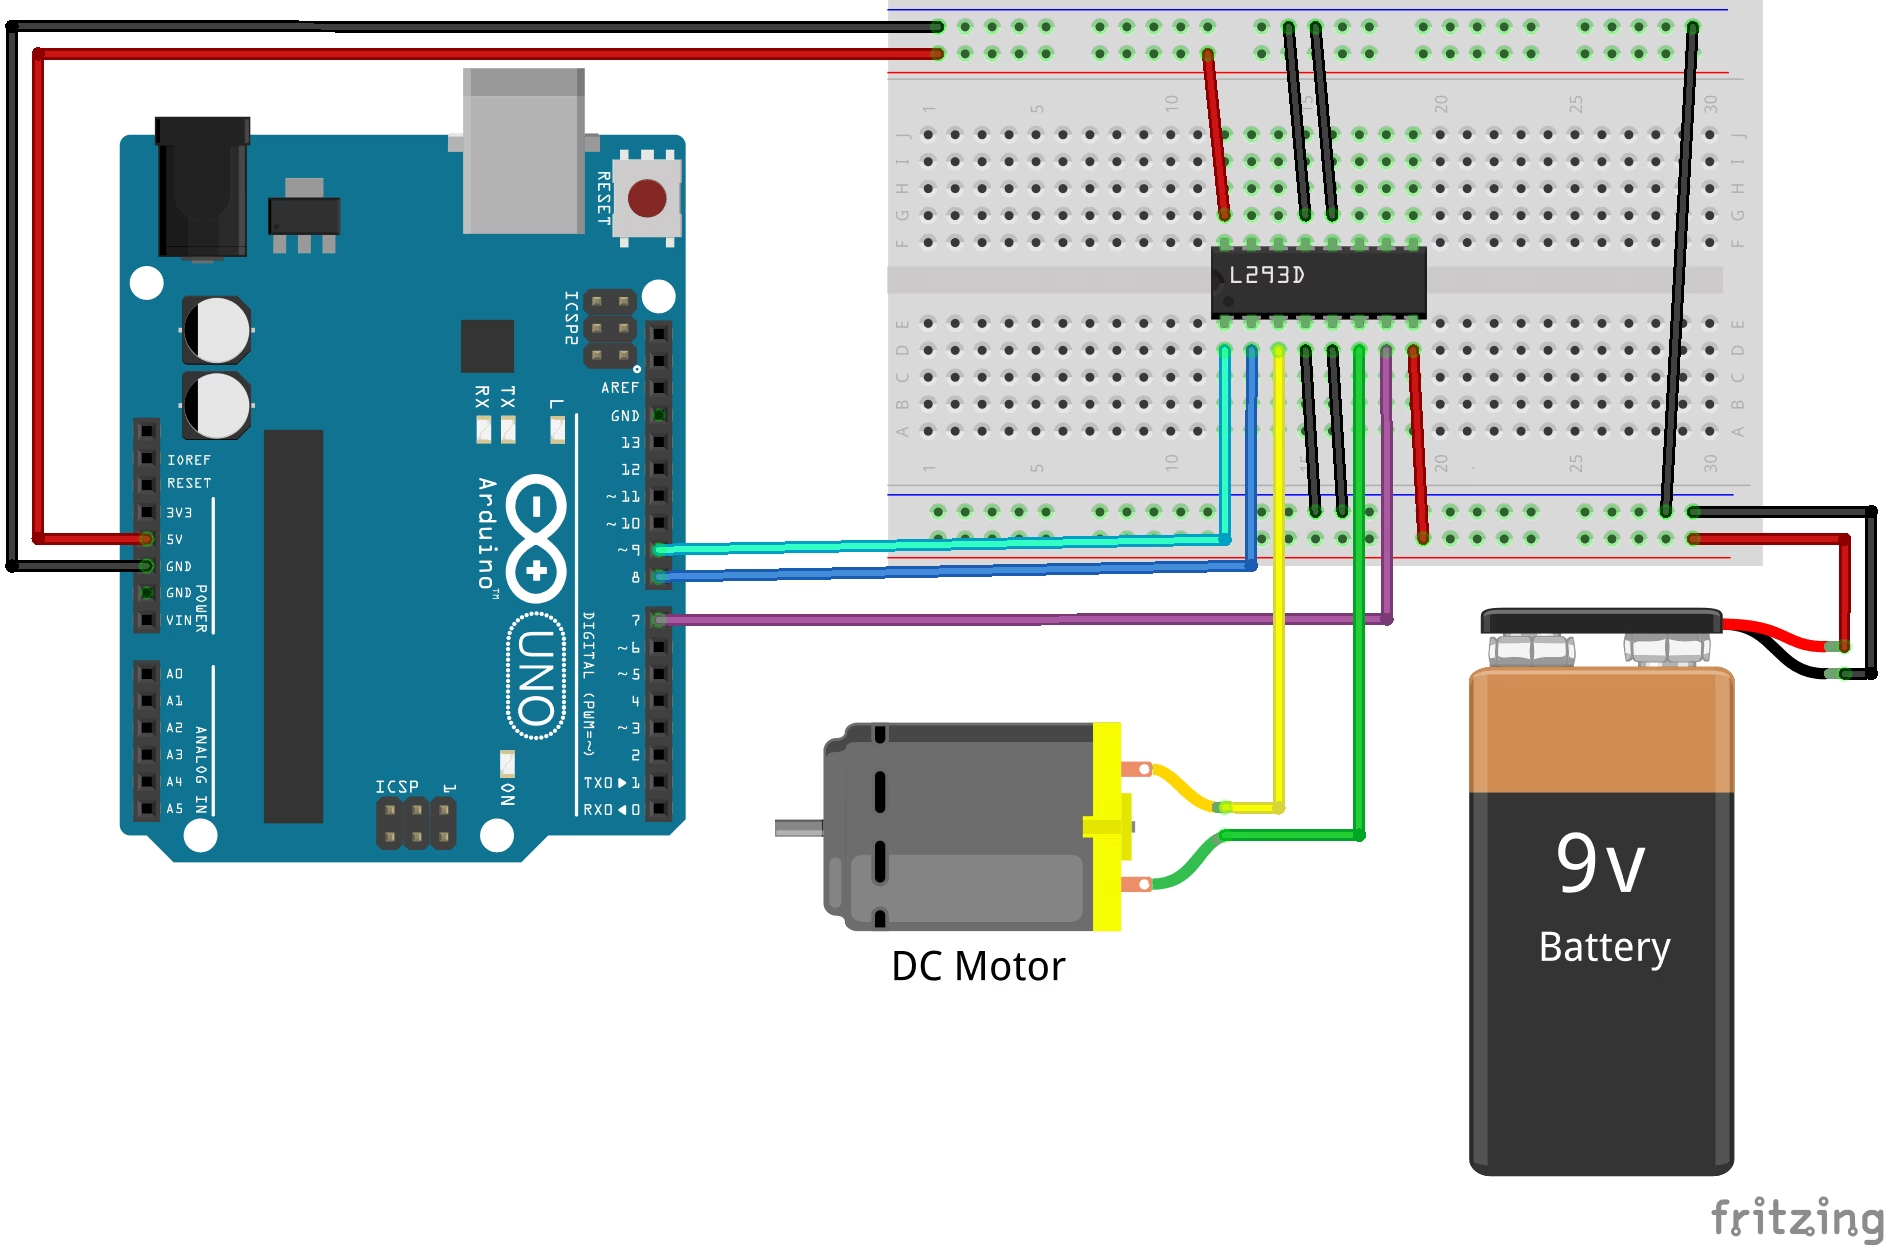
DC Motor with Arduino Wiring Diagram
For both examples, we will use one DC motor connected to the L293D motor driver, which will be controlled by Arduino. Below is the wiring table explaining the connections:
| L293D Pin | Connected To | Description |
|---|---|---|
| VS (Pin 8) | External Power (e.g., 9V Battery) | Powers the DC motor |
| VCC (Pin 16) | Arduino 5V | Provides logic power to L293D |
| GND (Pins 4, 5, 12, 13) | Arduino GND & Power Supply GND | Common ground |
| IN1 (Pin 2) | Arduino Pin 8 | Motor direction control |
| IN2 (Pin 7) | Arduino Pin 7 | Motor direction control |
| ENA (Pin 1) | Arduino Pin 9 | Enable pin (used for speed control) |
| OUT1 (Pin 3) | DC Motor Terminal 1 | Motor connection |
| OUT2 (Pin 6) | DC Motor Terminal 2 | Motor connection |
This setup allows the Arduino to control the motor’s speed and direction through the L293D driver.
Example 1: Basic Motor Control (ON/OFF & Direction)
This example demonstrates how to turn the motor ON/OFF and change its direction.
Code:
// L293D Motor Driver with Arduino – Control DC Motors - Basic
#define ENA 9  // Enable pin for motor speed control (not using PWM here)
#define IN1 8  // Motor direction control pin 1
#define IN2 7  // Motor direction control pin 2

void setup() {
    pinMode(ENA, OUTPUT); // Set ENA as output
    pinMode(IN1, OUTPUT); // Set IN1 as output
    pinMode(IN2, OUTPUT); // Set IN2 as output

    digitalWrite(ENA, HIGH); // Enable the motor (full speed)
}

void loop() {
    // Rotate motor in one direction
    digitalWrite(IN1, HIGH);
    digitalWrite(IN2, LOW);
    delay(2000); // Run for 2 seconds

    // Rotate motor in opposite direction
    digitalWrite(IN1, LOW);
    digitalWrite(IN2, HIGH);
    delay(2000); // Run for 2 seconds

    // Stop the motor
    digitalWrite(IN1, LOW);
    digitalWrite(IN2, LOW);
    delay(2000); // Wait for 2 seconds before repeating
}
Code Explanation:
The code controls a DC motor using the L293D motor driver with Arduino, allowing it to rotate forward, reverse, or stop based on the state of two input pins (IN1 and IN2).
- IN1 HIGH, IN2 LOW → Motor rotates forward
- The H-Bridge inside the L293D allows current to flow in one direction, making the motor spin forward.
- IN1 LOW, IN2 HIGH → Motor rotates in reverse
- The current flow is reversed, causing the motor to spin in the opposite direction.
- IN1 LOW, IN2 LOW → Motor stops
- Both inputs are LOW, meaning no voltage is applied to the motor, and it stops rotating.
Additionally, the ENA pin is always set to HIGH, which ensures that the motor stays enabled while the Arduino controls its direction.
Example 2: Speed Control using PWM
Here, we control the motor speed using PWM.
Code:
// L293D Motor Driver with Arduino – Control DC Motors - Speed Control
#define ENA 9  // Enable pin (PWM for speed control)
#define IN1 8  // Motor direction control pin 1
#define IN2 7  // Motor direction control pin 2

void setup() {
    pinMode(ENA, OUTPUT); // Set ENA as output (for speed control)
    pinMode(IN1, OUTPUT); // Set IN1 as output (direction control)
    pinMode(IN2, OUTPUT); // Set IN2 as output (direction control)
}

void loop() {
    // Rotate motor in one direction with increasing speed
    digitalWrite(IN1, HIGH);
    digitalWrite(IN2, LOW);
    for (int speed = 0; speed <= 255; speed += 50) { // Gradually increase speed
        analogWrite(ENA, speed); // Set motor speed
        delay(500); // Wait for smooth acceleration
    }
    delay(2000); // Keep running at full speed for 2 seconds

    // Rotate motor in the opposite direction with decreasing speed
    digitalWrite(IN1, LOW);
    digitalWrite(IN2, HIGH);
    for (int speed = 255; speed >= 0; speed -= 50) { // Gradually decrease speed
        analogWrite(ENA, speed); // Set motor speed
        delay(500); // Wait for smooth deceleration
    }
    delay(2000); // Pause before repeating the loop
}
Code Explanation:
This code demonstrates how to control the speed and direction of a DC motor using the L293D motor driver with Arduino. The motor speed is gradually adjusted using PWM (Pulse Width Modulation).
analogWrite(ENA, speed)controls the motor speed (0-255)- The
ENApin receives a PWM signal, where0means the motor is off, and255runs it at full speed.
- The
- Motor rotates forward with increasing speed:
IN1 = HIGH, IN2 = LOW→ Motor rotates forward.- A
forloop increases the speed in steps of 50 (speed = 0 → 50 → 100 → ... → 255), making the acceleration smooth.
- Motor rotates in reverse with decreasing speed:
IN1 = LOW, IN2 = HIGH→ Motor rotates in reverse.- Another
forloop gradually reduces speed (speed = 255 → 200 → 150 → ... → 0), ensuring smooth deceleration.
- Delays between actions:
- Allow the motor to complete each movement before changing direction.
➡️ Add Image: Screenshot of the Serial Monitor showing speed changes.
Conclusion
In this guide, we covered how to control a DC motor using the L293D Motor Driver with Arduino, including basic ON/OFF control and PWM-based speed control. You can further enhance this project by integrating a potentiometer for variable speed control or a joystick for directional movement.
Useful Resources
More Guides:
1️⃣ L298N Motor Driver with Arduino
2️⃣ Servo Motor with Arduino
Documentation:
1️⃣ Basics of PWM (Pulse Width Modulation)
2️⃣ L293D Datasheet (PDF)