Introduction
If you want an easy and reliable way to measure distances in your projects, the HC-SR04 with Arduino is a great place to start. This ultrasonic sensor is widely used in DIY electronics for tasks like obstacle detection, distance measurement, and even simple robotics. In this guide, we’ll walk you through how the sensor works, how to connect it to your Arduino, and how to run a simple test program to start collecting accurate distance readings. By the end, you’ll have a solid foundation for using the HC-SR04 in anything from basic experiments to fully automated systems.
What is the Ultrasonic Sensor HC-SR04?
The Ultrasonic Sensor HC-SR04 is a popular, low-cost, and easy-to-use sensor that measures the distance to objects using ultrasonic sound waves. It’s widely used in robotics, automation, and object detection systems.
The sensor works by sending out ultrasonic waves through a transmitter and measuring the time it takes for the echo to return to the receiver. The time taken is then converted into distance.
Key Specifications:
- Voltage: 5V
- Measuring Range: 2cm to 400cm
- Accuracy: ±3mm
- Operating Frequency: 40kHz
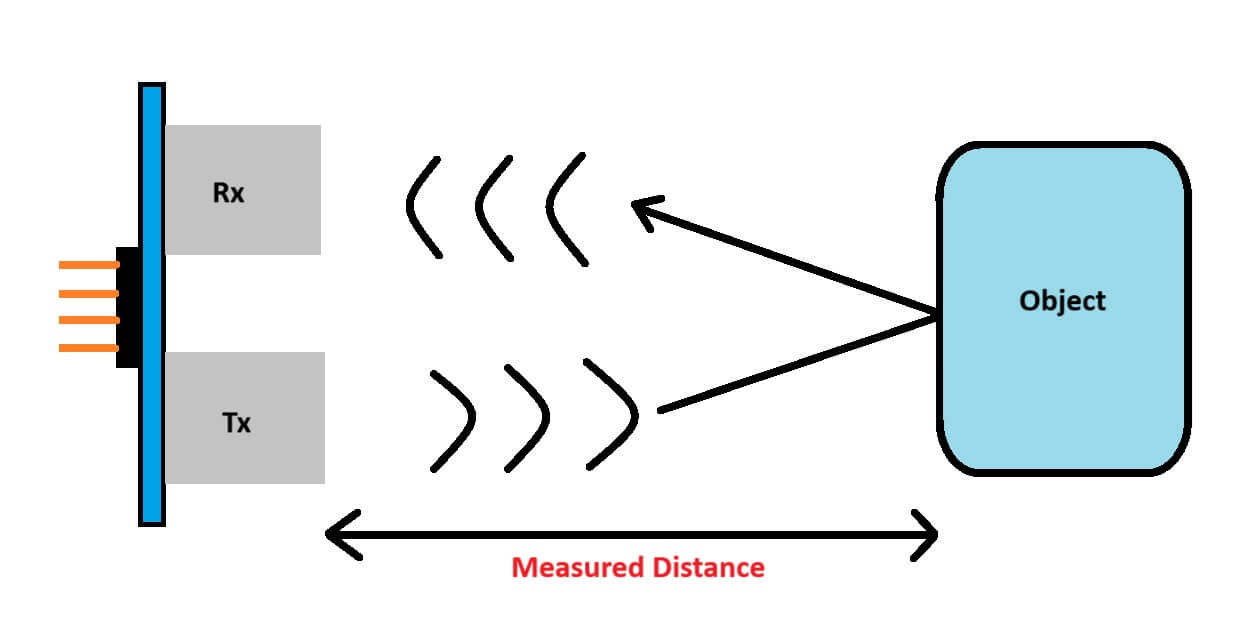
Working Principle of Ultrasonic Sensor HC-SR04
The HC-SR04 works by using ultrasonic sound waves, which are sound waves that humans cannot hear. Here’s how it works:
- Trigger Signal: The sensor’s trigger pin (TRIG) sends an ultrasonic sound wave.
- Echo Signal: The sound wave hits an object, reflects back, and the sensor’s echo pin (ECHO) detects the returning signal.
- Time Measurement: The time taken between sending and receiving the sound wave is measured.
- Distance Calculation: The sensor calculates the distance using the formula:

The division by 2 is because the sound wave travels to the object and back.
Read more about the working of Ultrasonic Sensors here.
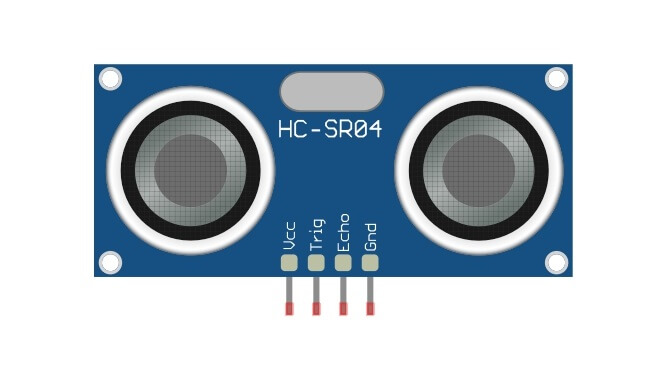
Ultrasonic Sensor HC-SR04 Pinout
The HC-SR04 sensor has four pins, each with a specific function:
| Pin | Function | Description |
|---|---|---|
| VCC | Power | Connect to 5V on Arduino |
| GND | Ground | Connect to Arduino GND |
| TRIG | Trigger | Sends the ultrasonic pulse |
| ECHO | Echo | Receives the reflected pulse |
Understanding the pinout is essential before connecting the sensor to the Arduino. Make sure to connect each pin to the correct Arduino pin to avoid inaccurate readings or damage to the sensor.
How to Use the HC-SR04 with Arduino
Components Required:
- 1x HC-SR04 Ultrasonic Sensor
- 1x Arduino Board (Uno, Mega, etc.)
- Jumper Wires
- Breadboard
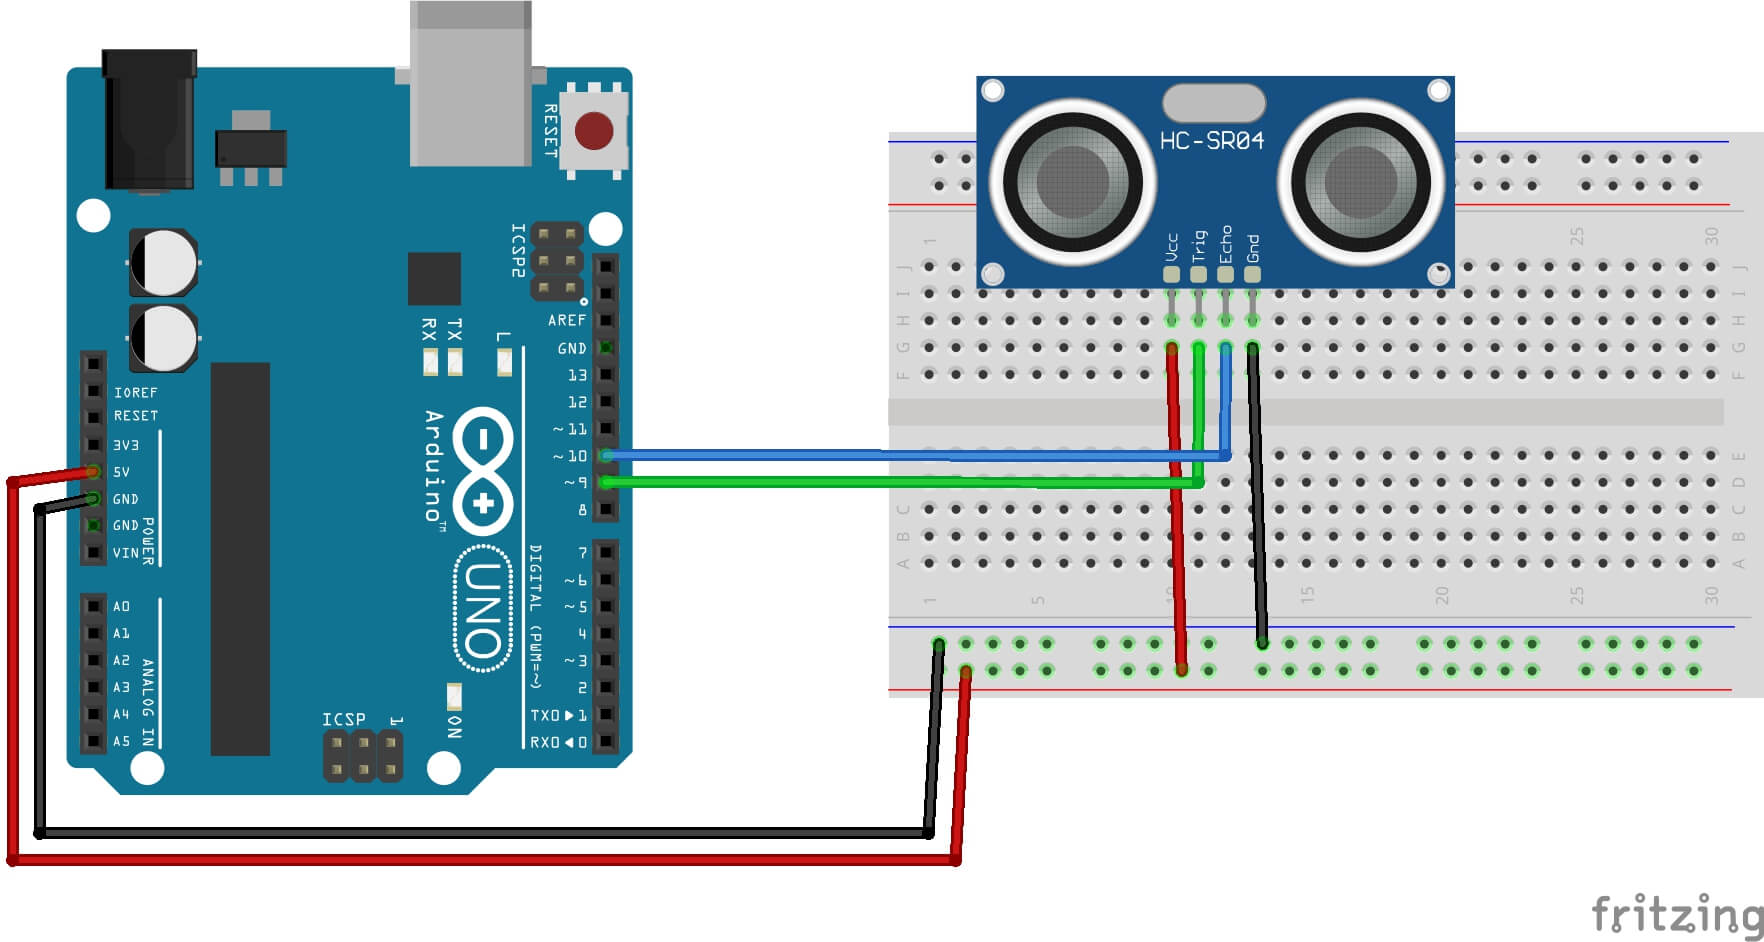
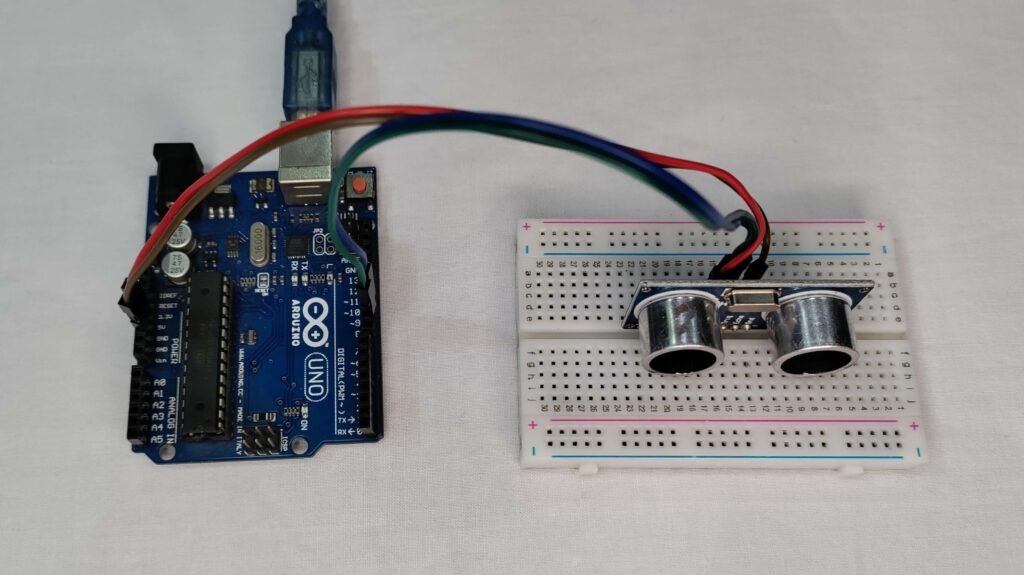
Step 1: Wiring the Ultrasonic Sensor HC-SR04 with Arduino
- Connect the VCC pin of the sensor to the 5V pin on the Arduino.
- Connect the GND pin to the ground (GND) pin on the Arduino.
- Connect the TRIG pin to digital pin 9 on the Arduino.
- Connect the ECHO pin to digital pin 10 on the Arduino.
Test Code for Ultrasonic Sensor HC-SR04 with Arduino
Here’s a simple test code to get started with the Ultrasonic Sensor HC-SR04. This code will print the distance measured by the sensor in the Serial Monitor of the Arduino IDE.
// Define pins
const int trigPin = 9;
const int echoPin = 10;

// Variables for time and distance
long duration;
int distance;

void setup() {
  // Initialize serial communication at 9600 baud rate
  Serial.begin(9600);

  // Set the trigPin as output and echoPin as input
  pinMode(trigPin, OUTPUT);
  pinMode(echoPin, INPUT);
}

void loop() {
  // Send a pulse to start the measurement
  digitalWrite(trigPin, LOW);
  delayMicroseconds(2);
  digitalWrite(trigPin, HIGH);
  delayMicroseconds(10);
  digitalWrite(trigPin, LOW);

  // Read the echoPin and calculate duration of pulse
  duration = pulseIn(echoPin, HIGH);

  // Calculate the distance
  distance = duration * 0.0343 / 2;

  // Print the distance in the serial monitor
  Serial.print("Distance: ");
  Serial.print(distance);
  Serial.println(" cm");

  delay(1000);  // Wait a second before the next measurement
}Step 2: Upload and Test
- Open the Arduino IDE.
- Copy and paste the code into the editor.
- Connect your Arduino to your computer using a USB cable.
- Select the correct board and COM port.
- Upload the code to your Arduino.
- Open the Serial Monitor (Ctrl + Shift + M) to view the measured distance.
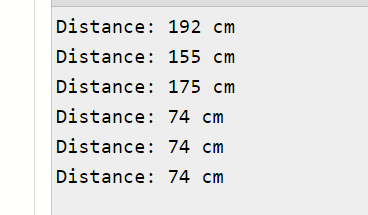
Example Readings:
Applications of Ultrasonic Sensor HC-SR04
The HC-SR04 Ultrasonic Sensor is widely used in:
- Obstacle Avoidance Systems: For robots to avoid objects.
- Distance Measurement: To measure distances in industrial or DIY projects.
- Water Level Detection: In water tanks to monitor levels.
- Security Systems: As part of motion or proximity detection systems.
Troubleshooting Tips
- Inaccurate Readings: If the sensor gives inaccurate distance readings, ensure the sensor is connected correctly and the wiring is solid.
- No Readings: If no readings appear in the Serial Monitor, recheck the connections and confirm that the correct COM port is selected in the Arduino IDE.
- Code Errors: Ensure the Arduino libraries are up to date, and verify that the code has no syntax errors.
Conclusion
Working with the HC-SR04 with Arduino is one of the simplest ways to bring accurate distance sensing into your projects. Thanks to its affordability, reliability, and ease of use, it’s a favorite for hobbyists, students, and makers building anything from obstacle-avoiding robots to automated measurement systems. With the wiring steps and example code covered in this guide, you now have everything you need to start experimenting and expanding your projects with ultrasonic sensing.
New to Arduino?
You will also like: 0.96 inch I2C OLED Display with Arduino